Tutorial
Click on thumbnailed images to enlarge
--Note--
I used GIMP 2.4 in this tutorial. Some of the effects may be located in different places on other versions of GIMP.
We'll be going from this: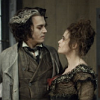
To this: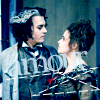
1. Start off by grabbing your [100x100] base. [You can use the image I've used for some practice] =]
Now that you have your base duplicate it. Set this layer to Screen with opacity 80% [you can play around with the opacity to suit you]
After that, flatten your image.
2. Go to Hue-Saturation
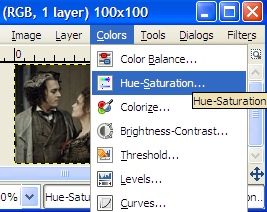
This window will pop up.
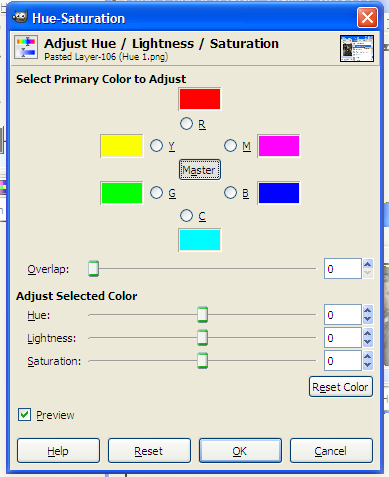
Set Saturation to 52
3. Go to Color Balance

This window will pop up.

Use these settings:
Midtones
cyan/red: -40
magenta/green: -30
yellow/blue: 10
Shadows
cyan/red: 9
magenta/green: -6
yellow/blue: -13
Highlights
cyan/red: 0
magenta/green: 10
yellow/blue: 16
4. Add a new layer and fill it with #B7E6FF, set layer to Burn, Opacity 100%
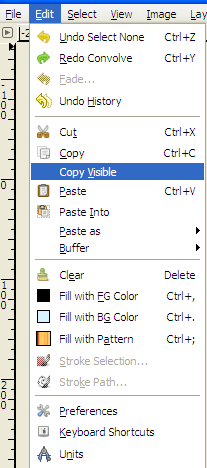
5. Go to Edit > Copy Visible
Paste it into a new layer.
Set it to Screen, Opacity 75%
6. Merge all layers.
7. Go to Colors > Brightness/Contrast, use following settings:
Brightness: -12
Contrast: 19
You can add some text and/or brushes if you'd like, if not then you're done. =]
If you have any questions please let me know.
I used GIMP 2.4 in this tutorial. Some of the effects may be located in different places on other versions of GIMP.
We'll be going from this:
To this:
1. Start off by grabbing your [100x100] base. [You can use the image I've used for some practice] =]
Now that you have your base duplicate it. Set this layer to Screen with opacity 80% [you can play around with the opacity to suit you]
After that, flatten your image.
2. Go to Hue-Saturation
This window will pop up.
Set Saturation to 52
3. Go to Color Balance
This window will pop up.
Use these settings:
Midtones
cyan/red: -40
magenta/green: -30
yellow/blue: 10
Shadows
cyan/red: 9
magenta/green: -6
yellow/blue: -13
Highlights
cyan/red: 0
magenta/green: 10
yellow/blue: 16
4. Add a new layer and fill it with #B7E6FF, set layer to Burn, Opacity 100%
5. Go to Edit > Copy Visible
Paste it into a new layer.
Set it to Screen, Opacity 75%
6. Merge all layers.
7. Go to Colors > Brightness/Contrast, use following settings:
Brightness: -12
Contrast: 19
You can add some text and/or brushes if you'd like, if not then you're done. =]
If you have any questions please let me know.
Tutorial Comments
Showing latest 9 of 9 comments

-.- damn old tuts as the images are removed
By harlemchick on Jun 16, 2011 12:44 pm

nevermind i got it.
By fahteema on Jul 31, 2008 3:36 am
um, could you make a screenshot of steps 4-5?
i got lost there.
By fahteema on Jul 31, 2008 3:18 am

Jup. :) It's a free download, too.
By blissfulxdarkness on Jul 19, 2008 3:13 am

so GIMP you can download right?
By Puccaz on Jul 15, 2008 4:39 pm
Could you make a tut about how to make an avatar?
By onefreak on Apr 15, 2008 6:02 pm
Oopsies. I missed a step >.< Sorry people. Forgot the Color Balance step, heh.
By blissfulxdarkness on Jan 23, 2008 1:43 am

I'm sorry, but what is:
Midtones
cyan/red: -40
magenta/green: -30
yellow/blue: 10
Shadows
cyan/red: 9
magenta/green: -6
yellow/blue: -13
Highlights
cyan/red: 0
magenta/green: 10
yellow/blue: 16?
o-o I get everything else. T-T
By beautifulreaction on Jan 23, 2008 1:06 am

damn gimp is so damn confusing sometimes. thanks for this tutorial
By heyo-captain-jack on Jan 19, 2008 4:26 am
Tutorial Details
| Author |
blissfulxdarkness
|
| Submitted on | Jan 14, 2008 |
| Page views | 9,551 |
| Favorites | 22 |
| Comments | 9 |
| Reviewer |
S-Majere
|
| Approved on | Jan 14, 2008 |