Tutorial
Click on thumbnailed images to enlarge
**NOTE**
I did this tutorial in Photoshop CS3 Extended which is why some of you may have problems. However, that doesn't mean this tutorial won't work in other versions of Photoshop. Just try it out.
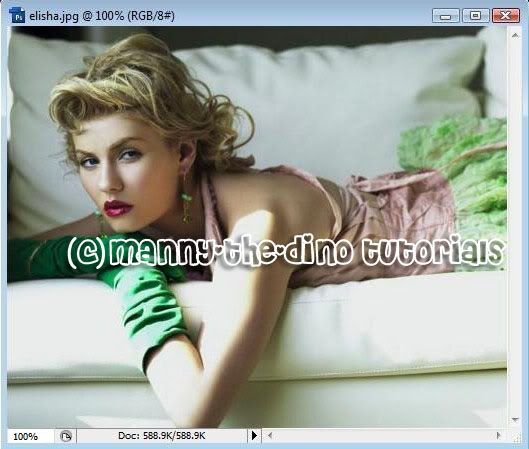
Feeling green? Well get your fix here. I will teach you how to get that green vintage effect. The cute Elisha Cuthbert will be my subject this time. Here's the before:

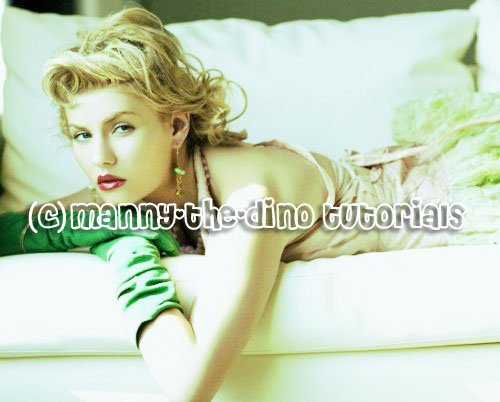
Here's the after:

Let's start!
001.Open your picture. I recommend using a picture where there's something green in it, so the effect will look better.
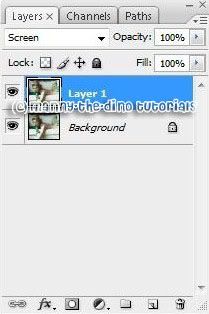
002.Do a ctrl+j & set the duplicate layer to Screen.
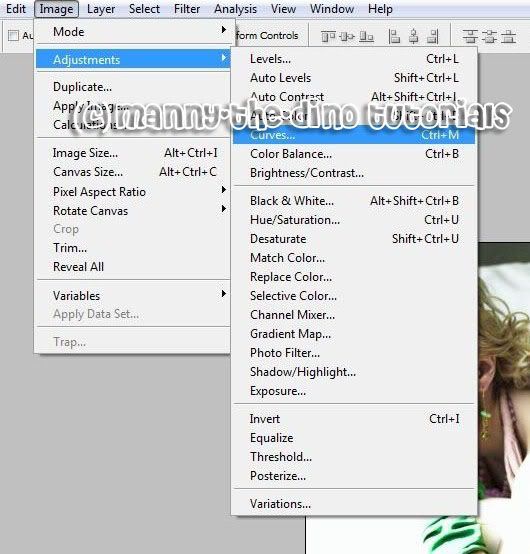
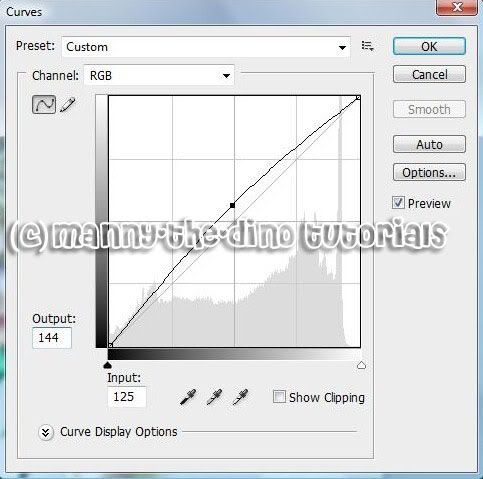
003.Now go Image>Adjustments>Curves.
004.Steps 4-7 we will just be entering numbers. So pay close attention to which category you are to enter the values for.
RGB:
Input: 125
Output: 144
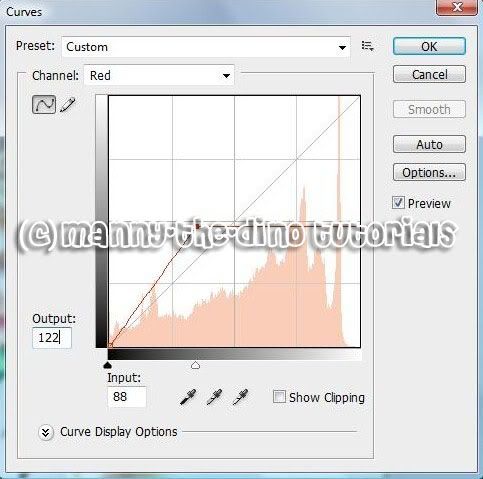
005.Enter these values:
Red:
Input: 88
Output: 122
006.Enter these values:
Green:
Input: 120
Output: 167

007.Enter these values:
Blue:
Input: 191
Output: 166

008.Now go Image>Adjustments>Color Balance.
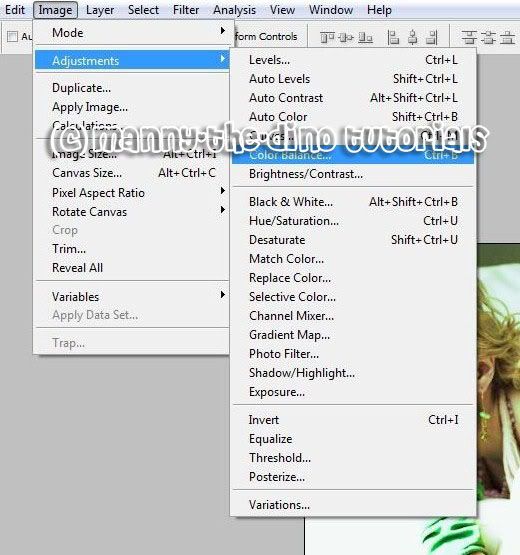
009.Once again, these last 3 steps we will just be entering numbers so pay attention to which area. But before you do that, make sure "Preserve Luminosity" is checked off.
Midtones:
-5/15/10
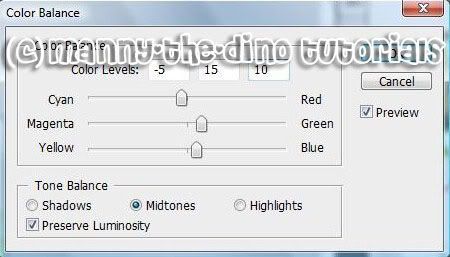
010.Enter these values:
Shadows:
-10/0/-5

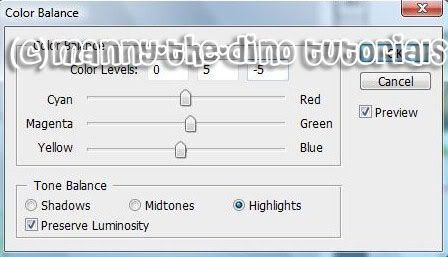
011.Enter these values:
Highlights:
0/5/-5
012.After you press enter, you're done! Your picture should resemble mine.
If you got lost or have any questions, comment the tutotial & I'll get back to you as soon as I can. :D
I did this tutorial in Photoshop CS3 Extended which is why some of you may have problems. However, that doesn't mean this tutorial won't work in other versions of Photoshop. Just try it out.
Feeling green? Well get your fix here. I will teach you how to get that green vintage effect. The cute Elisha Cuthbert will be my subject this time. Here's the before:
Here's the after:
Let's start!
001.Open your picture. I recommend using a picture where there's something green in it, so the effect will look better.
002.Do a ctrl+j & set the duplicate layer to Screen.
003.Now go Image>Adjustments>Curves.
004.Steps 4-7 we will just be entering numbers. So pay close attention to which category you are to enter the values for.
RGB:
Input: 125
Output: 144
005.Enter these values:
Red:
Input: 88
Output: 122
006.Enter these values:
Green:
Input: 120
Output: 167
007.Enter these values:
Blue:
Input: 191
Output: 166
008.Now go Image>Adjustments>Color Balance.
009.Once again, these last 3 steps we will just be entering numbers so pay attention to which area. But before you do that, make sure "Preserve Luminosity" is checked off.
Midtones:
-5/15/10
010.Enter these values:
Shadows:
-10/0/-5
011.Enter these values:
Highlights:
0/5/-5
012.After you press enter, you're done! Your picture should resemble mine.
If you got lost or have any questions, comment the tutotial & I'll get back to you as soon as I can. :D
Tutorial Comments
Showing latest 3 of 3 comments

im confused.
i cant click on Color Balance after i finish doing the curves.
By denan00b on Nov 22, 2008 10:42 pm

very nice. :]
By yannitotz on Jul 22, 2008 7:56 am

nice.
By turnupthevolume on Jan 27, 2008 10:34 pm
Tutorial Details
| Author |
manny-the-dino
|
| Submitted on | Jan 4, 2008 |
| Page views | 21,655 |
| Favorites | 108 |
| Comments | 3 |
| Reviewer |
IVIike
|
| Approved on | Jan 6, 2008 |