Tutorial
Click on thumbnailed images to enlarge
Lets start off with a simple, clear picture of the gorgeous Rachel Bilson.
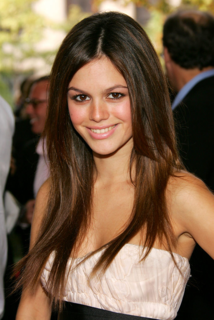
It's pretty dull, huh?
So the first step is to go to Image>Adjustments>Auto Levels. Woo! Brightened it up already!
So we're gonna repeat that step, but instead of going to Auto Levels, we will select Auto Contrast/Auto Color. It really depends on the picture your using. Auto Color
worked better for me.
Now! We go to Filter>Sharpen>Sharpen.
That makes the picture more crisp and clear. Be warned if your picture is already in terrible condition with dots and scratches all over it, its going to make it worse!
Then you must zoom in to 200%. That gives you a good, close look at the dottiness of the picture that you didn't really see before!
Get your blur tool, and use soft-rounded 12-20 pixel sized brush. Keep the opacity 100%.
Carefully apply it to every part of the skin, deflawing the picture's dull quality, bringing out the flawless beauty in Ms. Rachel Bilson. [Remember if its a small crevice you need to de-flaw, make your brush smaller to the size you think suits best.]
~~REMEMBER TO APPLY ONLY ON SKIN.~~
Alrighty, Now that we are done with that, we must make the picture less dull. So were gonna duplicate the layer [CTRL+J], and change the mode to soft light. Then we want the picture to have a dreamy sort of look. So we're gonna go to Filter>Blur>Gaussian Blur>Set it to 1.0-2.0
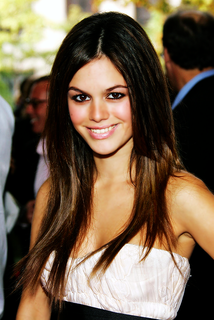
Do you like it? Was this useful? This was my result :P [P.S. I did a little bit more "jazzing up" to the picture :P]
It's pretty dull, huh?
So the first step is to go to Image>Adjustments>Auto Levels. Woo! Brightened it up already!
So we're gonna repeat that step, but instead of going to Auto Levels, we will select Auto Contrast/Auto Color. It really depends on the picture your using. Auto Color
worked better for me.
Now! We go to Filter>Sharpen>Sharpen.
That makes the picture more crisp and clear. Be warned if your picture is already in terrible condition with dots and scratches all over it, its going to make it worse!
Then you must zoom in to 200%. That gives you a good, close look at the dottiness of the picture that you didn't really see before!
Get your blur tool, and use soft-rounded 12-20 pixel sized brush. Keep the opacity 100%.
Carefully apply it to every part of the skin, deflawing the picture's dull quality, bringing out the flawless beauty in Ms. Rachel Bilson. [Remember if its a small crevice you need to de-flaw, make your brush smaller to the size you think suits best.]
~~REMEMBER TO APPLY ONLY ON SKIN.~~
Alrighty, Now that we are done with that, we must make the picture less dull. So were gonna duplicate the layer [CTRL+J], and change the mode to soft light. Then we want the picture to have a dreamy sort of look. So we're gonna go to Filter>Blur>Gaussian Blur>Set it to 1.0-2.0
Do you like it? Was this useful? This was my result :P [P.S. I did a little bit more "jazzing up" to the picture :P]
Tutorial Comments
Showing latest 3 of 3 comments

very easy, i usually set the background layer to Screen, then i put a 1.5 Guassian blur, & that makes the skin glow [:
By goth-nina on Oct 10, 2008 2:10 pm

Beautiful! ^^
By Nijnebeest on May 8, 2008 8:03 pm

Wow!
By x-cherries-x on Jan 6, 2008 1:02 pm
Tutorial Details
| Author |
iceangel94
|
| Submitted on | Jan 2, 2008 |
| Page views | 26,338 |
| Favorites | 124 |
| Comments | 3 |
| Reviewer |
S-Majere
|
| Approved on | Jan 3, 2008 |