Tutorial
Click on thumbnailed images to enlarge
Iconesque Colouring pt. 5
Note: I use Photoshop CS, but I'm almost sure that this is translateable into other programs
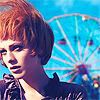
1. Grab your base, as usual.
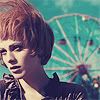
2. Duplicate your base, and set it to Screen @ 47% (weird number, I know. I just think it looks best at this opacity. Play around, of course. Depends on image.)
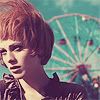
3. Create a new layer, fill it in with #FFE8C7 and set it to Multiply

4. Create another new layer, fill it in with #0C0034 and set it to Exclusion

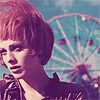
5. Create a new layer above those, fill it in with black ( #000000 ) and set it to Color @ 40%
6. Create a new layer, fill it in with #FF0000 and set it to Lighten @ 15%. Just want to add a little more red to the icon.
7. Now I want some purple, so, create a new layer, fill it in with #CC00FF and set it to Soft Light @ 28%
8. Take this light blob texture, which I made with a fairly large soft edged brush, and set it to Lighten.


9. Above all that, take this other light blob thing, also created by me, and set it to Lighten as well.

10. I took another brush from the same place ( [url=http://community.livejournal.com/iconistas/14867.html]here[/url] ) and stamped it off to the right, pretty much in the middle, and in white.

11. Now I added some text!
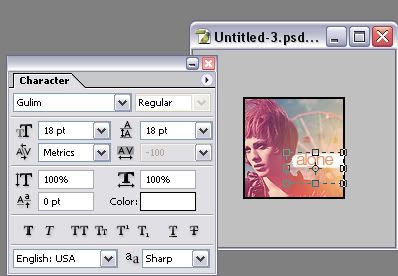

If you would like to download the font "Gulim" you can here: [url=http://classique.impersonal.tv/gulim.ttc]Gulim Font [/url]
12. Finally, add a 2px border, and,whadda know! We're done!
Note: I use Photoshop CS, but I'm almost sure that this is translateable into other programs
1. Grab your base, as usual.
2. Duplicate your base, and set it to Screen @ 47% (weird number, I know. I just think it looks best at this opacity. Play around, of course. Depends on image.)
3. Create a new layer, fill it in with #FFE8C7 and set it to Multiply
4. Create another new layer, fill it in with #0C0034 and set it to Exclusion
5. Create a new layer above those, fill it in with black ( #000000 ) and set it to Color @ 40%
6. Create a new layer, fill it in with #FF0000 and set it to Lighten @ 15%. Just want to add a little more red to the icon.
7. Now I want some purple, so, create a new layer, fill it in with #CC00FF and set it to Soft Light @ 28%
8. Take this light blob texture, which I made with a fairly large soft edged brush, and set it to Lighten.
9. Above all that, take this other light blob thing, also created by me, and set it to Lighten as well.
10. I took another brush from the same place ( [url=http://community.livejournal.com/iconistas/14867.html]here[/url] ) and stamped it off to the right, pretty much in the middle, and in white.
11. Now I added some text!
If you would like to download the font "Gulim" you can here: [url=http://classique.impersonal.tv/gulim.ttc]Gulim Font [/url]
12. Finally, add a 2px border, and,whadda know! We're done!
Tutorial Comments
Showing latest 10 of 16 comments

Copy/paste the picture of the blobs.
By technicolour on Nov 6, 2008 2:30 am

i cant get the blob :/
help please
By juliex3 on Nov 6, 2008 12:40 am

Lovely tutorial. (:
By addict on Oct 3, 2008 2:18 am

ahh
i love this tutorial
i use it lots
its so pretty
By younha486 on Jun 6, 2008 1:40 am

how do i get the blob?
By pnaigirl13 on Jun 4, 2008 2:04 am

freaking amazing!
my fave tut on the site!
thanks :)
By brunette925 on May 24, 2008 2:07 am

thankss so much, this helped a lot!
mine looked slightly different to yours, really dark, so i just messed with the opacitys a bit then it looked great! i then added a few touches like unsharp mask and adjusted the hue a little, and now my next icon will be a good one, thanks
By daniellebby on Apr 22, 2008 4:04 am

Never mind I got it.
Thank you! :DDD
By Hyennas333 on Nov 9, 2007 1:50 am
I couldn't get the glow part right...
Is there more explanatory way you could put it?
Do I need to duplicate a layer?
By Hyennas333 on Nov 9, 2007 1:47 am
very pretty x]
By XxDanceToThisBeatxX on Oct 10, 2007 10:15 am
Tutorial Details
| Author |
technicolour
|
| Submitted on | Aug 13, 2006 |
| Page views | 40,000 |
| Favorites | 172 |
| Comments | 16 |