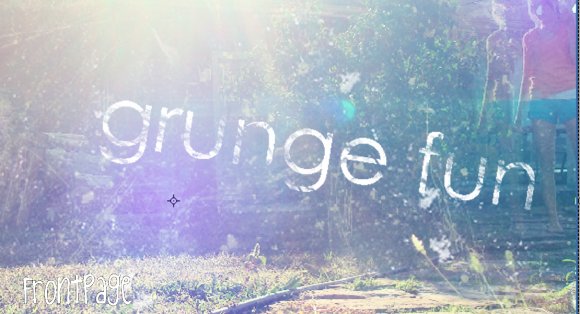
Tutorial
Click on thumbnailed images to enlarge
Now, I did all this on my own photo for my own reasons but hopefully it can spark inspiration or something! Enjoy.
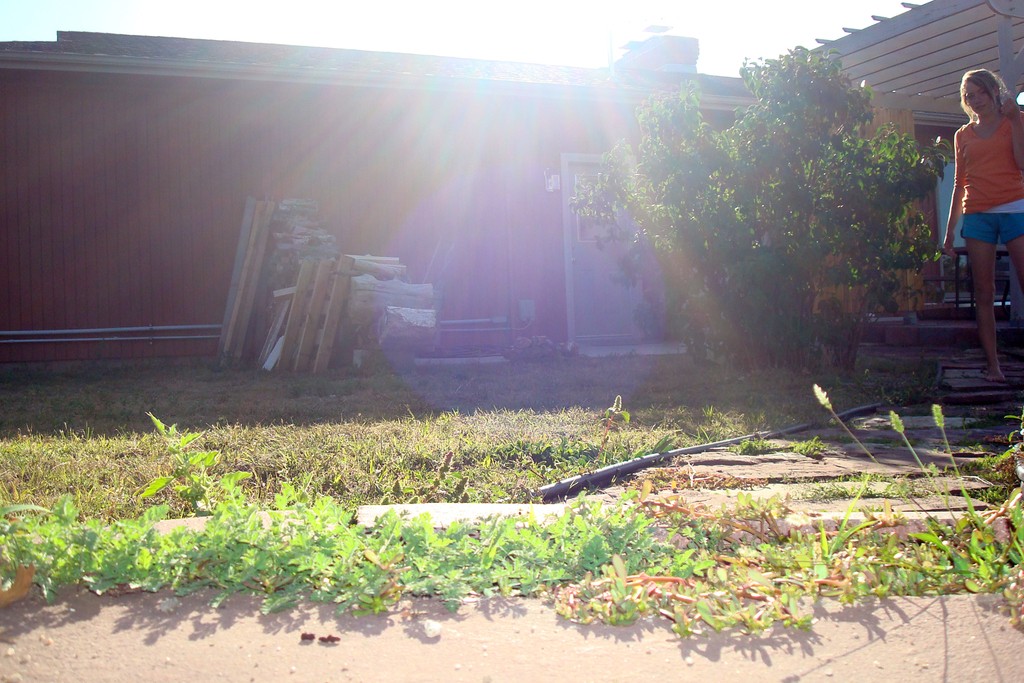
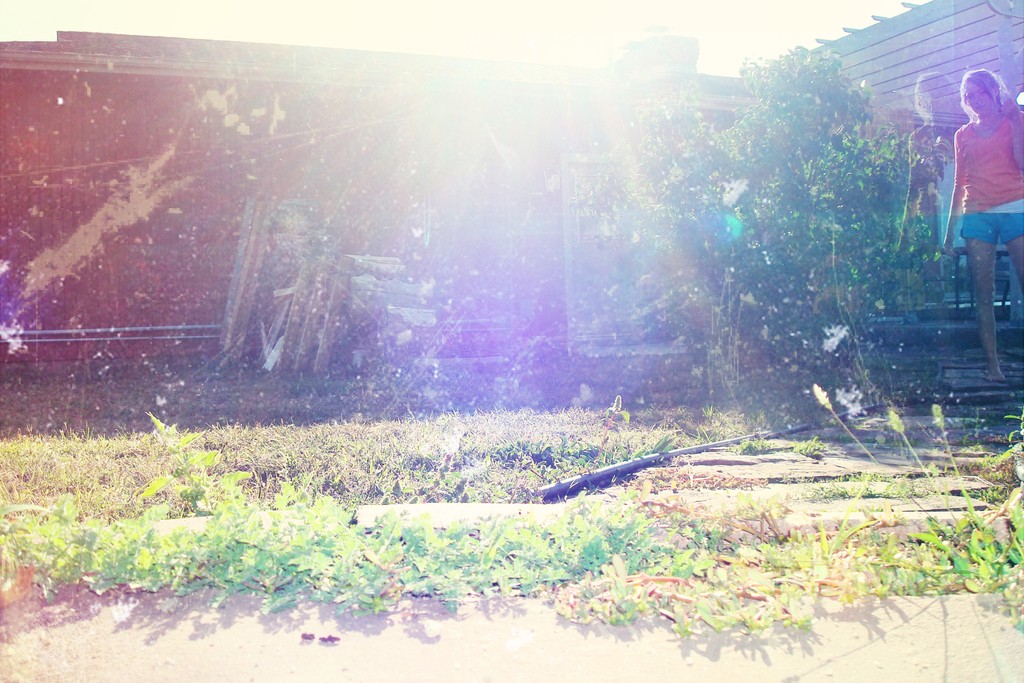
One. Open your picture. If you want to follow along exactly, I'm using this photo that I took in my backyard of myself. At first I didn't like this photo but after I started editing it, I fell in love. It's huge but here ya go:
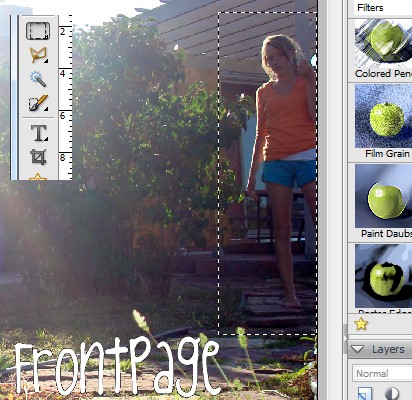
Two. Select the subject of you photo with the any selection tool. My subject is me and I'm using the rectangle selection tool.
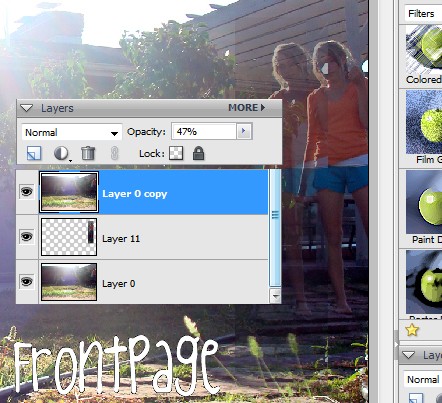
Three. Press Ctrl+J to duplicate the selected area onto a new layer. Press Ctrl+D to Deselect. Move it to the side of your original subject. Mine says "Layer 11" but yours definitly won't.

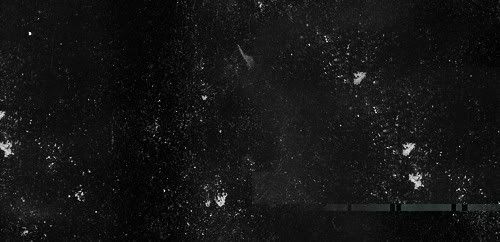
Four. Duplicate your base layer and drag above the selected subject layer. Change the opacity to 47%. If you want to clean up any edges that show, simply use an eraser.
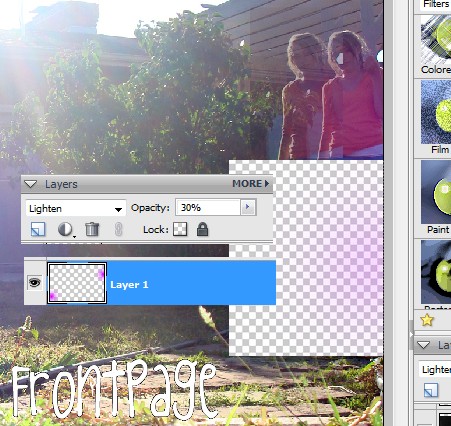
Five. Now some color orbs! Creat a new layer. Use de00ff and a circular brush. I put dots on my stomach and in the lower left hand corner. Now do Filter > Gaussian Blur until they are faint. I can't remember exactly what I used but make sure they're soft. Set this layer to Lighten at 30%
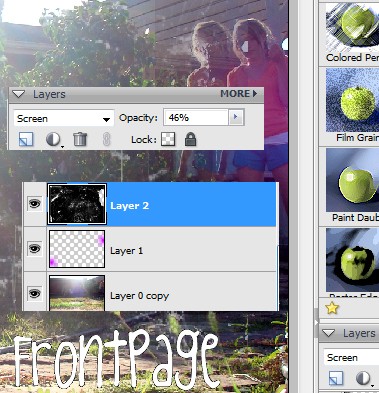
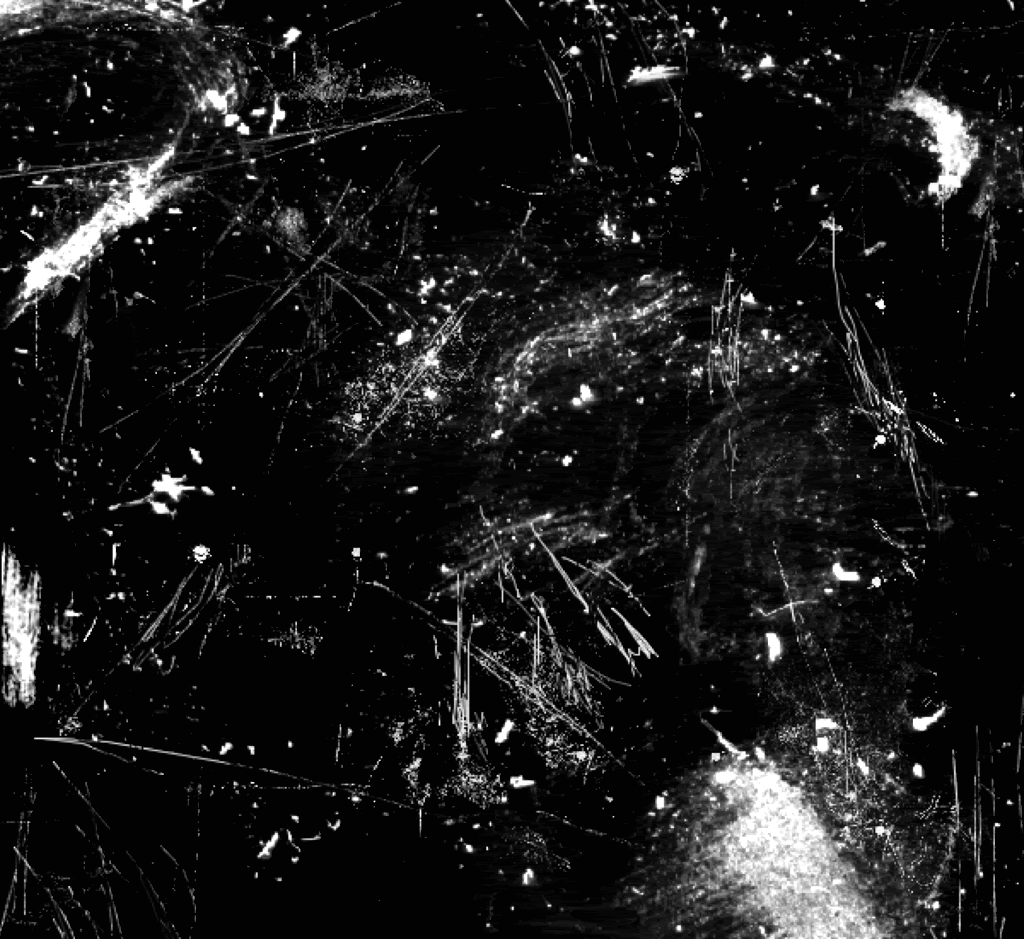
Six. Now find a grunge texture that fits your photo. Here's mine. I'm using the upper part. So just copy and paste onto a new layer. Settings: Screen 46%. Erase the area that covers your subject.
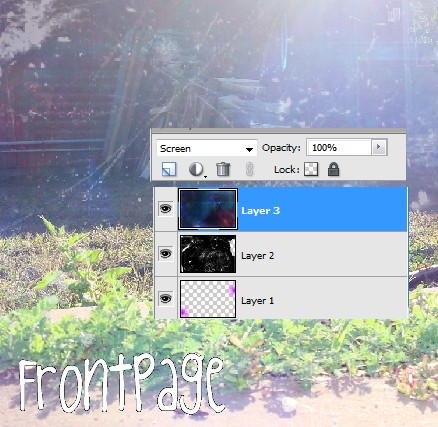
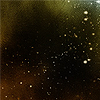
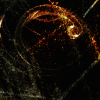
Seven. Find a color texture. This is my texture. Copy and paste to photo. Settings: Screen 100%.
Eight. Create a new fill layer. Fill with 0012ff. Set to Exclusion 24%.

Nine. I'm leaving you on your own for this part. What to do: fine some more smaller grunge textures and put them all over your photo. Make sure to erase the edges so the 'rectangle lines' don't show. Experiment by setting the seperate layers to Soft Light and Screen (all 100%). Also try some super small colored texturs for fun, on screen. Enjoy yourself. Some help? abcc
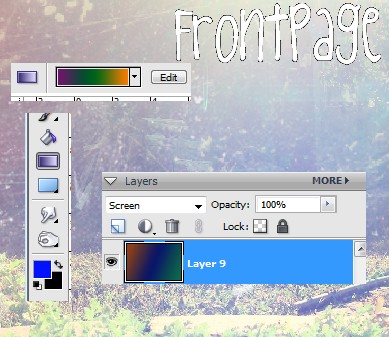
Ten. Add a gradient to your photo. Use whatever colors you want but keep them dark. Set this new layer to Screen 100%.
Eleven. Remeber step five? About the purple color orbs. Go do that again. Mine are placed (a) in the very center and (b) upper right corner. Settings are different. Lighten 73%.

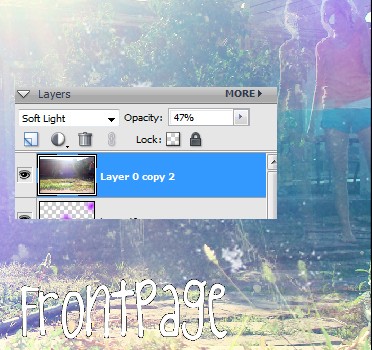
Twelve. Duplicate your base and drag to very top. Settings: Soft Light 47%.
Thirteen. Take a deep breath. Here comes the hard part. Now outloud say, "I'm done!" Haha.
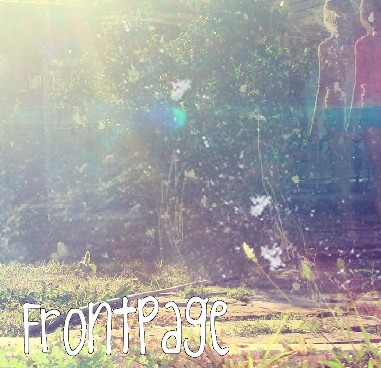
Results:
Let me know how yours turned out, okay? (:
Stealing is wrong!
One. Open your picture. If you want to follow along exactly, I'm using this photo that I took in my backyard of myself. At first I didn't like this photo but after I started editing it, I fell in love. It's huge but here ya go:
Two. Select the subject of you photo with the any selection tool. My subject is me and I'm using the rectangle selection tool.
Three. Press Ctrl+J to duplicate the selected area onto a new layer. Press Ctrl+D to Deselect. Move it to the side of your original subject. Mine says "Layer 11" but yours definitly won't.
Four. Duplicate your base layer and drag above the selected subject layer. Change the opacity to 47%. If you want to clean up any edges that show, simply use an eraser.
Five. Now some color orbs! Creat a new layer. Use de00ff and a circular brush. I put dots on my stomach and in the lower left hand corner. Now do Filter > Gaussian Blur until they are faint. I can't remember exactly what I used but make sure they're soft. Set this layer to Lighten at 30%
Six. Now find a grunge texture that fits your photo. Here's mine. I'm using the upper part. So just copy and paste onto a new layer. Settings: Screen 46%. Erase the area that covers your subject.
Seven. Find a color texture. This is my texture. Copy and paste to photo. Settings: Screen 100%.
Eight. Create a new fill layer. Fill with 0012ff. Set to Exclusion 24%.
Nine. I'm leaving you on your own for this part. What to do: fine some more smaller grunge textures and put them all over your photo. Make sure to erase the edges so the 'rectangle lines' don't show. Experiment by setting the seperate layers to Soft Light and Screen (all 100%). Also try some super small colored texturs for fun, on screen. Enjoy yourself. Some help? abcc
Ten. Add a gradient to your photo. Use whatever colors you want but keep them dark. Set this new layer to Screen 100%.
Eleven. Remeber step five? About the purple color orbs. Go do that again. Mine are placed (a) in the very center and (b) upper right corner. Settings are different. Lighten 73%.
Twelve. Duplicate your base and drag to very top. Settings: Soft Light 47%.
Thirteen. Take a deep breath. Here comes the hard part. Now outloud say, "I'm done!" Haha.
Results:
Let me know how yours turned out, okay? (:
Stealing is wrong!
Tutorial Comments
Showing latest 10 of 17 comments

I like it -- Funnn~
By MiissYER on Oct 24, 2010 7:40 pm

great job =)
By missrey on Mar 2, 2010 10:31 pm

nvm link wont work sorry. xD
By conflictingreflections on Dec 10, 2009 12:35 am
this tutorial is awsome! i love it. thank you very much it was a big help. xD heres the picture i made if you wanna see it. http://s682.photobucket.com/al bums/vv182/ginger0397/?action= view¤t=amoonlightwalk.jp g
By conflictingreflections on Dec 10, 2009 12:31 am

this is amazing thank you so much
By LoviiLetter on Aug 12, 2009 2:44 am

very cool :D
By KylieKARNIVORE on May 31, 2009 3:47 am

This is GORGEOUS
By --bonjour on Mar 5, 2009 11:31 pm

Thanks so much for this! Mine came out fantastic! :D
By dreaamer on Feb 8, 2009 12:42 am

awesome tutorial!! mine came out really good! thanks for submitting this. :D
By hikaribliss on Jan 22, 2009 11:51 pm

the colors are really bursting pretty!
By creole on Jan 2, 2009 11:34 pm
Tutorial Details
| Author |
digitalivory
|
| Submitted on | Dec 24, 2008 |
| Page views | 19,256 |
| Favorites | 154 |
| Comments | 17 |
| Reviewer |
Blaqheartedstar
|
| Approved on | Dec 26, 2008 |