
Tutorial
Click on thumbnailed images to enlarge
**NOTE**
I did this tutorial in Photoshop CS3 Extended which is why some of you may have problems. However, that doesn't mean this tutorial won't work in other versions of Photoshop. Just try it out.
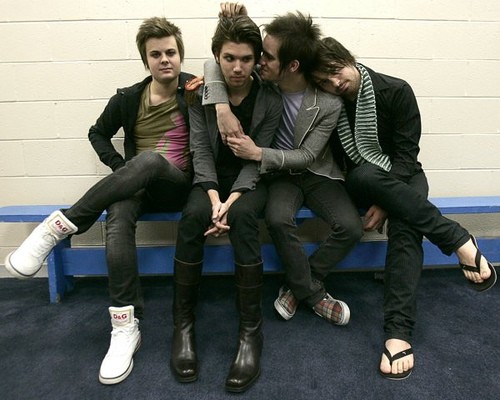
Looking for a cool new effect to apply to your pictures? Well I am introducing you to something called the "pop out" effect. For this tutorial I will be using Panic! At The Disco. Here's the before:
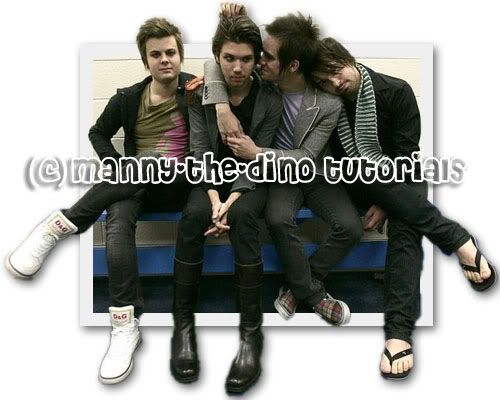
Here's the after:
Let's get started!
001.First, open up your picture.
002.Next, do a ctrl+j.
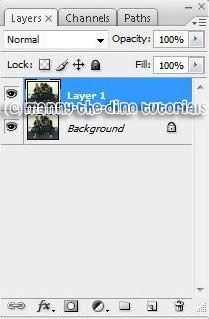
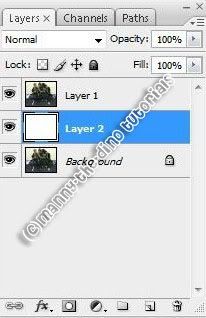
003.Hold down ctrl & make a new layer.

004.Make sure your fg & bg colors are at their default. Press "D" to do so. With "Layer 2" selected, do a ctrl+backspace to fill your layer with white.
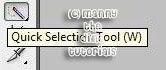
005.You can use any tool you're comfortable with such as the Pen Tool (P) or Lasso Tool (L). But I like to use the Quick Selection Tool (W).
006.Select the subject in your picture. Oh yeah & make sure you're on "Layer 1" when doing this.

007.Now do a ctrl+j.

008.Select your Rectangular Maruqee Tool (M).

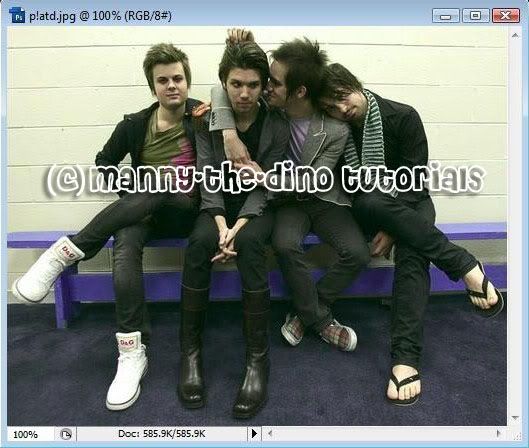
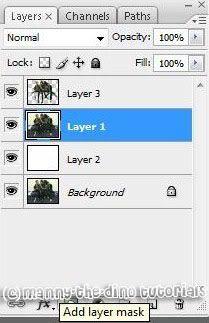
009.Select "Layer 1" & make a selection just around your subjects. Make sure that the parts you selected are sticking out. I probably don't make sense right now so look at my screenshot below.

010.Add a layer mask to "Layer 1".
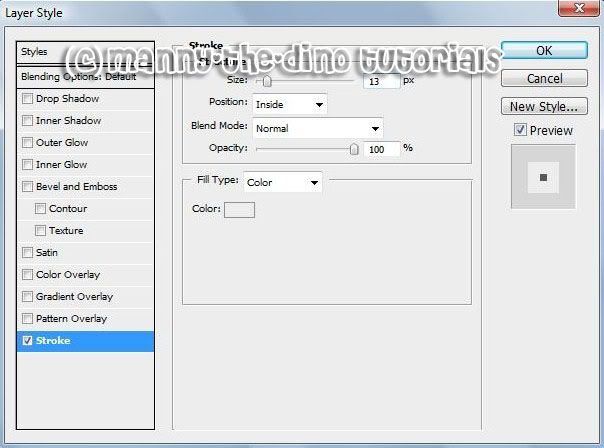
011.With "Layer 1" still selected, double click on it, go to the Stroke section & apply the following settings:
Size: 13px
Position: Inside
Color: #efefef
012.Now select both "Layer 1" & "Layer 3". You can do that by having one of the layers selected, then holding down shift & selecting the other layer.
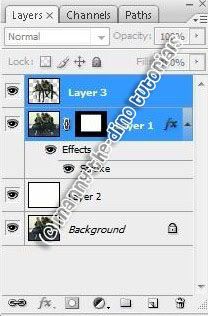
013.Merge them by doing a ctrl+e. I know that selecting two layers through using shift does not seem to work for most of you so you can do this; Have "Layer 3" selected. Right click & select "Merge Down". That should work.

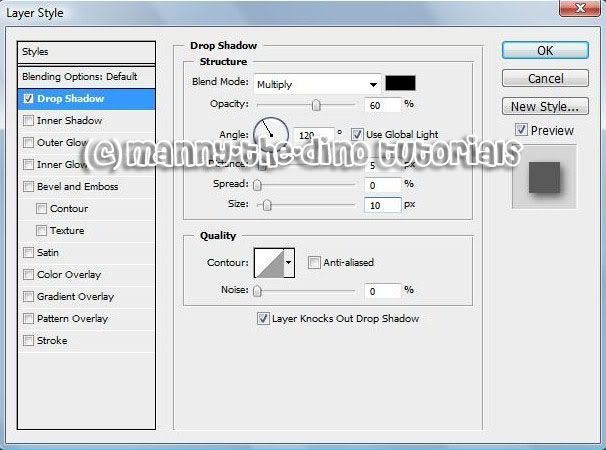
014.Double click on "Layer 3", go to the Drop Shadow section & apply the following settings:
Opacity: 60%
Angle: 120
Distance: 5px
Size: 10px
015.After pressing ok, you're done. Your outcome should look something like this:
If you got lost or have any questions, comment the tutotial & I'll get back to you as soon as I can. :D
I did this tutorial in Photoshop CS3 Extended which is why some of you may have problems. However, that doesn't mean this tutorial won't work in other versions of Photoshop. Just try it out.
Looking for a cool new effect to apply to your pictures? Well I am introducing you to something called the "pop out" effect. For this tutorial I will be using Panic! At The Disco. Here's the before:
Here's the after:
Let's get started!
001.First, open up your picture.
002.Next, do a ctrl+j.
003.Hold down ctrl & make a new layer.
004.Make sure your fg & bg colors are at their default. Press "D" to do so. With "Layer 2" selected, do a ctrl+backspace to fill your layer with white.
005.You can use any tool you're comfortable with such as the Pen Tool (P) or Lasso Tool (L). But I like to use the Quick Selection Tool (W).
006.Select the subject in your picture. Oh yeah & make sure you're on "Layer 1" when doing this.
007.Now do a ctrl+j.
008.Select your Rectangular Maruqee Tool (M).
009.Select "Layer 1" & make a selection just around your subjects. Make sure that the parts you selected are sticking out. I probably don't make sense right now so look at my screenshot below.
010.Add a layer mask to "Layer 1".
011.With "Layer 1" still selected, double click on it, go to the Stroke section & apply the following settings:
Size: 13px
Position: Inside
Color: #efefef
012.Now select both "Layer 1" & "Layer 3". You can do that by having one of the layers selected, then holding down shift & selecting the other layer.
013.Merge them by doing a ctrl+e. I know that selecting two layers through using shift does not seem to work for most of you so you can do this; Have "Layer 3" selected. Right click & select "Merge Down". That should work.
014.Double click on "Layer 3", go to the Drop Shadow section & apply the following settings:
Opacity: 60%
Angle: 120
Distance: 5px
Size: 10px
015.After pressing ok, you're done. Your outcome should look something like this:
If you got lost or have any questions, comment the tutotial & I'll get back to you as soon as I can. :D
Tutorial Comments
Showing latest 10 of 44 comments

very first tutorial of yours that ive followed that didnt work for me. im using photoshop 7.0
By angsetts on Apr 30, 2011 7:15 pm

this is so neat (:
awesome tutorial.
By Eww on Mar 11, 2009 10:43 pm

nice! 8)
By kattie805 on Feb 13, 2009 9:36 pm

wow, gorgeous effect =)
thanks
By emmasawr on Jan 19, 2009 6:01 pm
haha that's cool
By Janess on Dec 27, 2008 4:11 am
how do you do it on photofiltre?
By Emineminemily8 on Nov 23, 2008 10:44 pm

i used this on my picture it came out great
thnkz
By musicizlife18 on Oct 22, 2008 8:37 pm

i used this on a photo and it looked great! really good tut. thanks.
By notusing on Oct 1, 2008 7:36 am

damn. mad simple..mines came out great 8-D! thx!
By jayy-cass on Sep 30, 2008 9:41 pm

xdestinyleex- if you want to do it in Photofiltre, it has to be Photofiltre Studio, so you can have more than one layer.
By BrieDeleted on Sep 26, 2008 10:05 pm
Tutorial Details
| Author |
manny-the-dino
|
| Submitted on | Jan 3, 2008 |
| Page views | 50,992 |
| Favorites | 460 |
| Comments | 44 |
| Reviewer |
S-Majere
|
| Approved on | Jan 3, 2008 |