Tutorial
Click on thumbnailed images to enlarge
**NOTE**
I did this tutorial in Photoshop CS3 Extended which is why some of you may have problems. However, that doesn't mean this tutorial won't work in other versions of Photoshop. Just try it out.
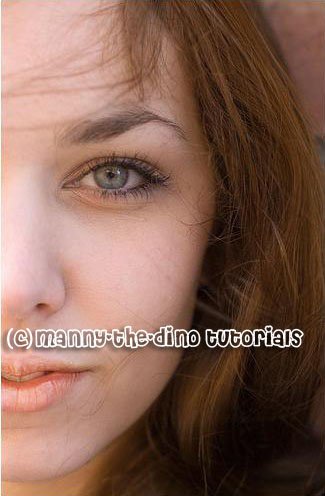
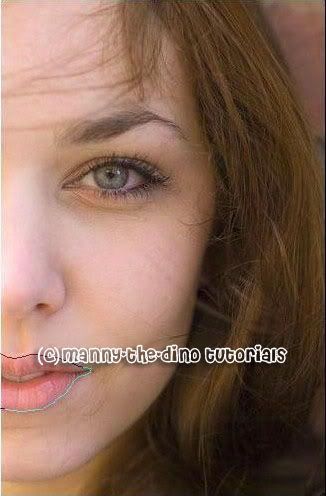
Want to add a little shine to your lips? (Sorry guys but this doesn't apply to you. Unless you want to "experiment".) Well you have yet once again clicked on the right tutorial. I will show you dolls how to apply lip gloss to your lucious lips. Here's the before:
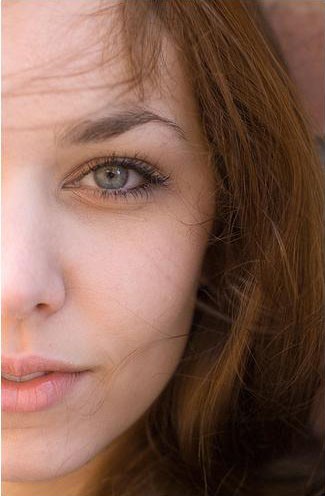
Here's the after:

To glossing!
001.C'mon, open your picture.
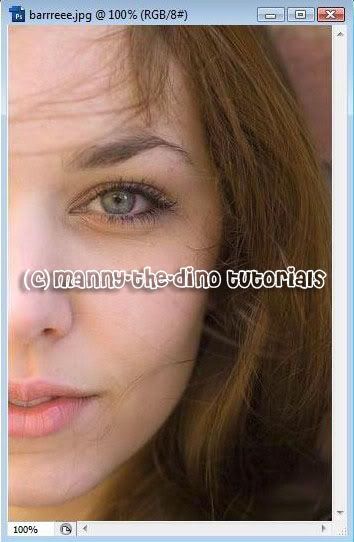
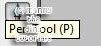
002.Select your Pen Tool (P).
003.Make sure your settings match mine.

004.Now trace around your lips.
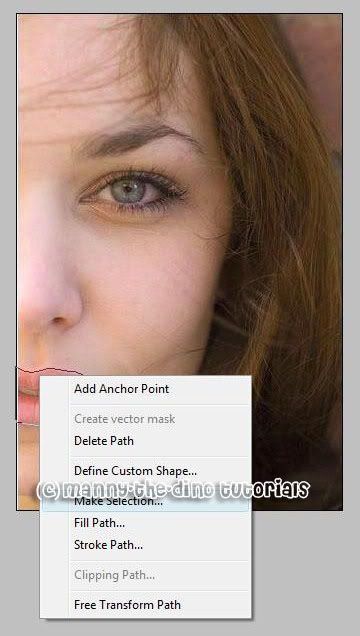
005.After that, right click on your selection & select "Make Work Path".
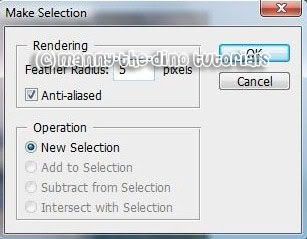
006.Enter 5 as your pixels.
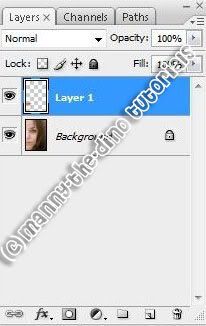
007.Now make a new layer.
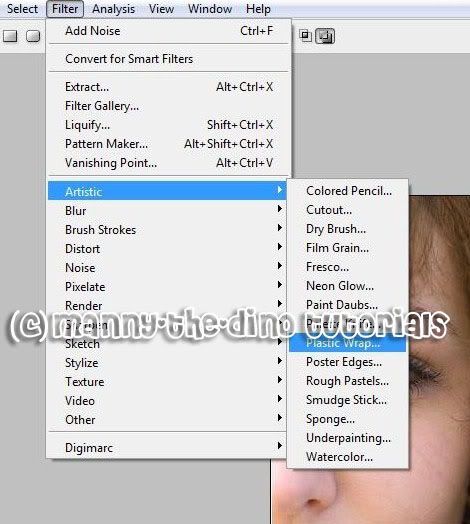
008.Go Filter>Artistic>Plastic Wrap.
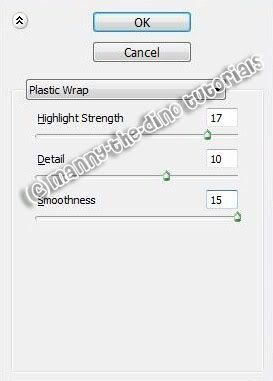
009.Apply the following settings:
Highlight Strength: 17
Detail: 10
Smoothness: 15
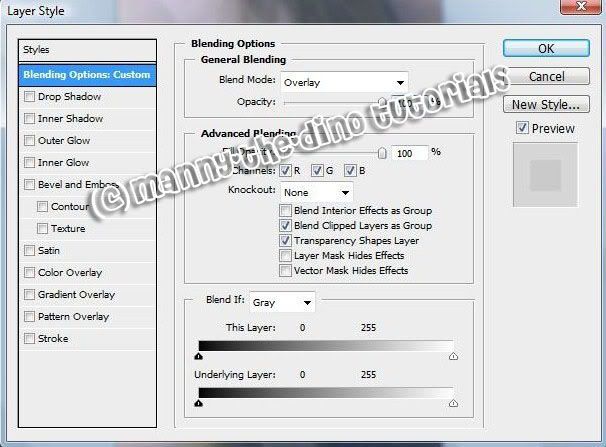
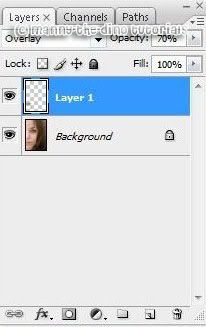
010.Now double click on your "Layer 1" & change it's blending mode to Overlay.
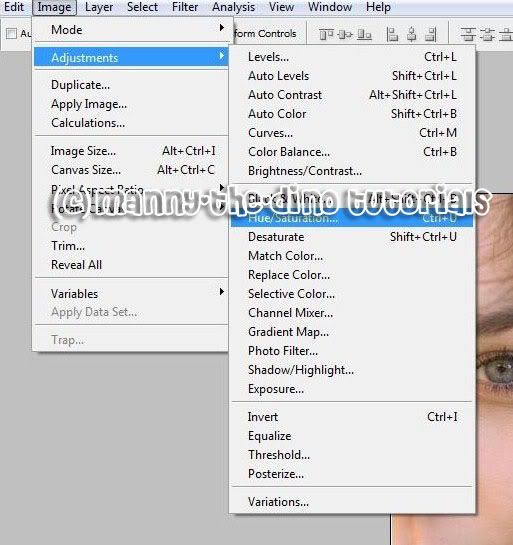
011.You can stop here if you'd like. If you want to add some color to your gloss, simply go Image>Adjustments>Hue/Saturation.
012.Check off the Colorize box & play around with the Hue for color.

013.Bring that layer's opacity down to 70%.
014.And you are done! You now look all "glamified". "D
If you got lost or have any questions, comment the tutotial & I'll get back to you as soon as I can. :D
I did this tutorial in Photoshop CS3 Extended which is why some of you may have problems. However, that doesn't mean this tutorial won't work in other versions of Photoshop. Just try it out.
Want to add a little shine to your lips? (Sorry guys but this doesn't apply to you. Unless you want to "experiment".) Well you have yet once again clicked on the right tutorial. I will show you dolls how to apply lip gloss to your lucious lips. Here's the before:
Here's the after:
To glossing!
001.C'mon, open your picture.
002.Select your Pen Tool (P).
003.Make sure your settings match mine.
004.Now trace around your lips.
005.After that, right click on your selection & select "Make Work Path".
006.Enter 5 as your pixels.
007.Now make a new layer.
008.Go Filter>Artistic>Plastic Wrap.
009.Apply the following settings:
Highlight Strength: 17
Detail: 10
Smoothness: 15
010.Now double click on your "Layer 1" & change it's blending mode to Overlay.
011.You can stop here if you'd like. If you want to add some color to your gloss, simply go Image>Adjustments>Hue/Saturation.
012.Check off the Colorize box & play around with the Hue for color.
013.Bring that layer's opacity down to 70%.
014.And you are done! You now look all "glamified". "D
If you got lost or have any questions, comment the tutotial & I'll get back to you as soon as I can. :D
Tutorial Comments
Showing latest 10 of 12 comments

Um, your name logos are so big on these they are even covering a part of the girl's lips on here in the lip gloss demonstration oO.
By Butterface89 on Jul 26, 2010 4:44 pm

Step 8 doesn't work for me. It says the area is empty.
By naythan82 on Sep 26, 2009 2:38 pm

OMG babe thank you! The gloss looked really screwed actually, but as soon as I changed the color to dark red-ish it looked amazinggg LOVE!
By tattjunk on Dec 27, 2008 5:17 pm

dead link?
By sine on Aug 11, 2008 3:04 am
your pictures don't work anymore =[
By xteeenaaa on Aug 10, 2008 12:24 am

i did it
it looks gr8t!
thx=]
By cityprincess205 on Aug 1, 2008 7:53 pm
OMG!!!
Love It!
By 9ii6yhunglaydee on Jul 8, 2008 8:39 pm

cool =]
By AutumnSky on Jun 12, 2008 11:34 pm

Coooool!!
By EleanorMorgan on Feb 27, 2008 7:55 am

I love it.
By takle_monster on Feb 21, 2008 10:03 pm
Tutorial Details
| Author |
manny-the-dino
|
| Submitted on | Feb 21, 2008 |
| Page views | 66,494 |
| Favorites | 132 |
| Comments | 12 |
| Reviewer |
MissHygienic
|
| Approved on | Feb 21, 2008 |