Tutorial
Click on thumbnailed images to enlarge
This is a really easy reflect effect with a shimmer on it. This is the final product we will be doing.

The purpose of this is not to duplicate what I made but to learn the technique so you can apply it to whatever. That said, here we go. (right click all images to view full size)
1. Make a new doc for this I made it 400w x 400h and added some text to it.
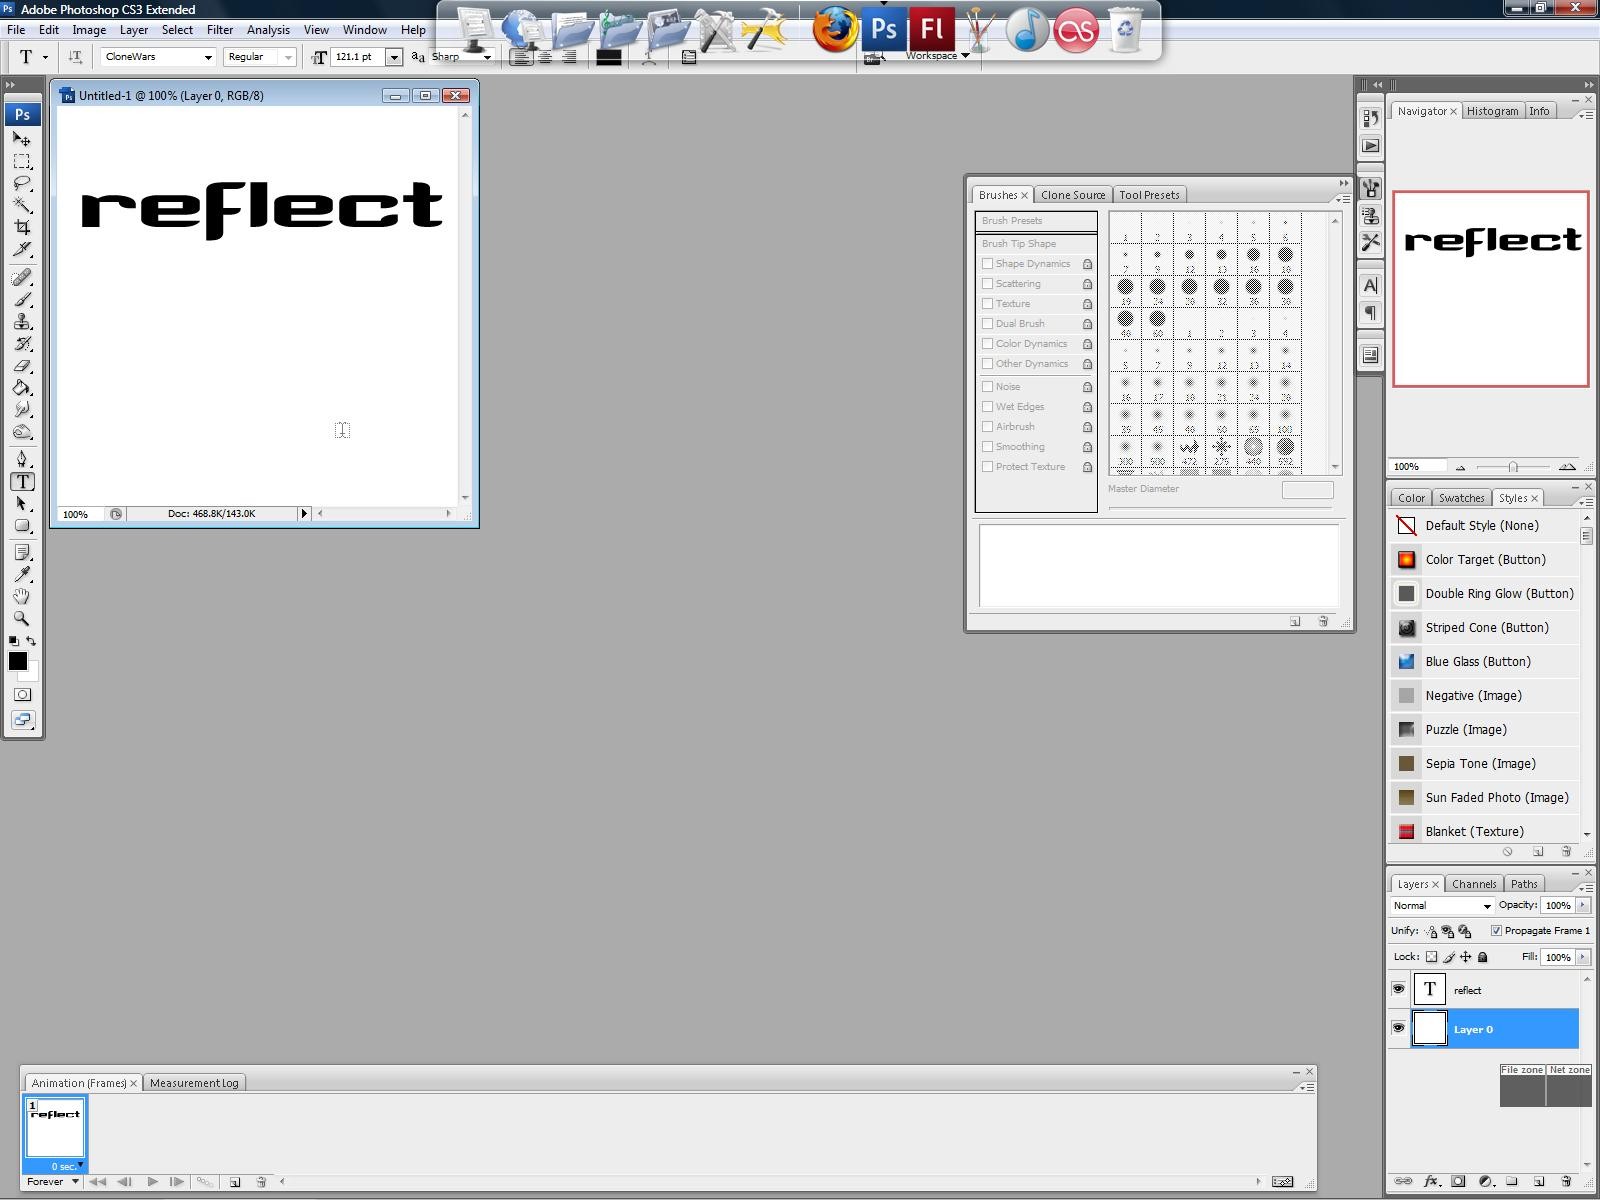
2. Now duplicate the text layer and hit EDIT>TRANSFORM>FLIP VERTICAL, then hit EDIT>FREE TRANSFORM and move the layer down till it is just under the original layer, I use the arrow keys to make sure they stay aligned. You should now have this...
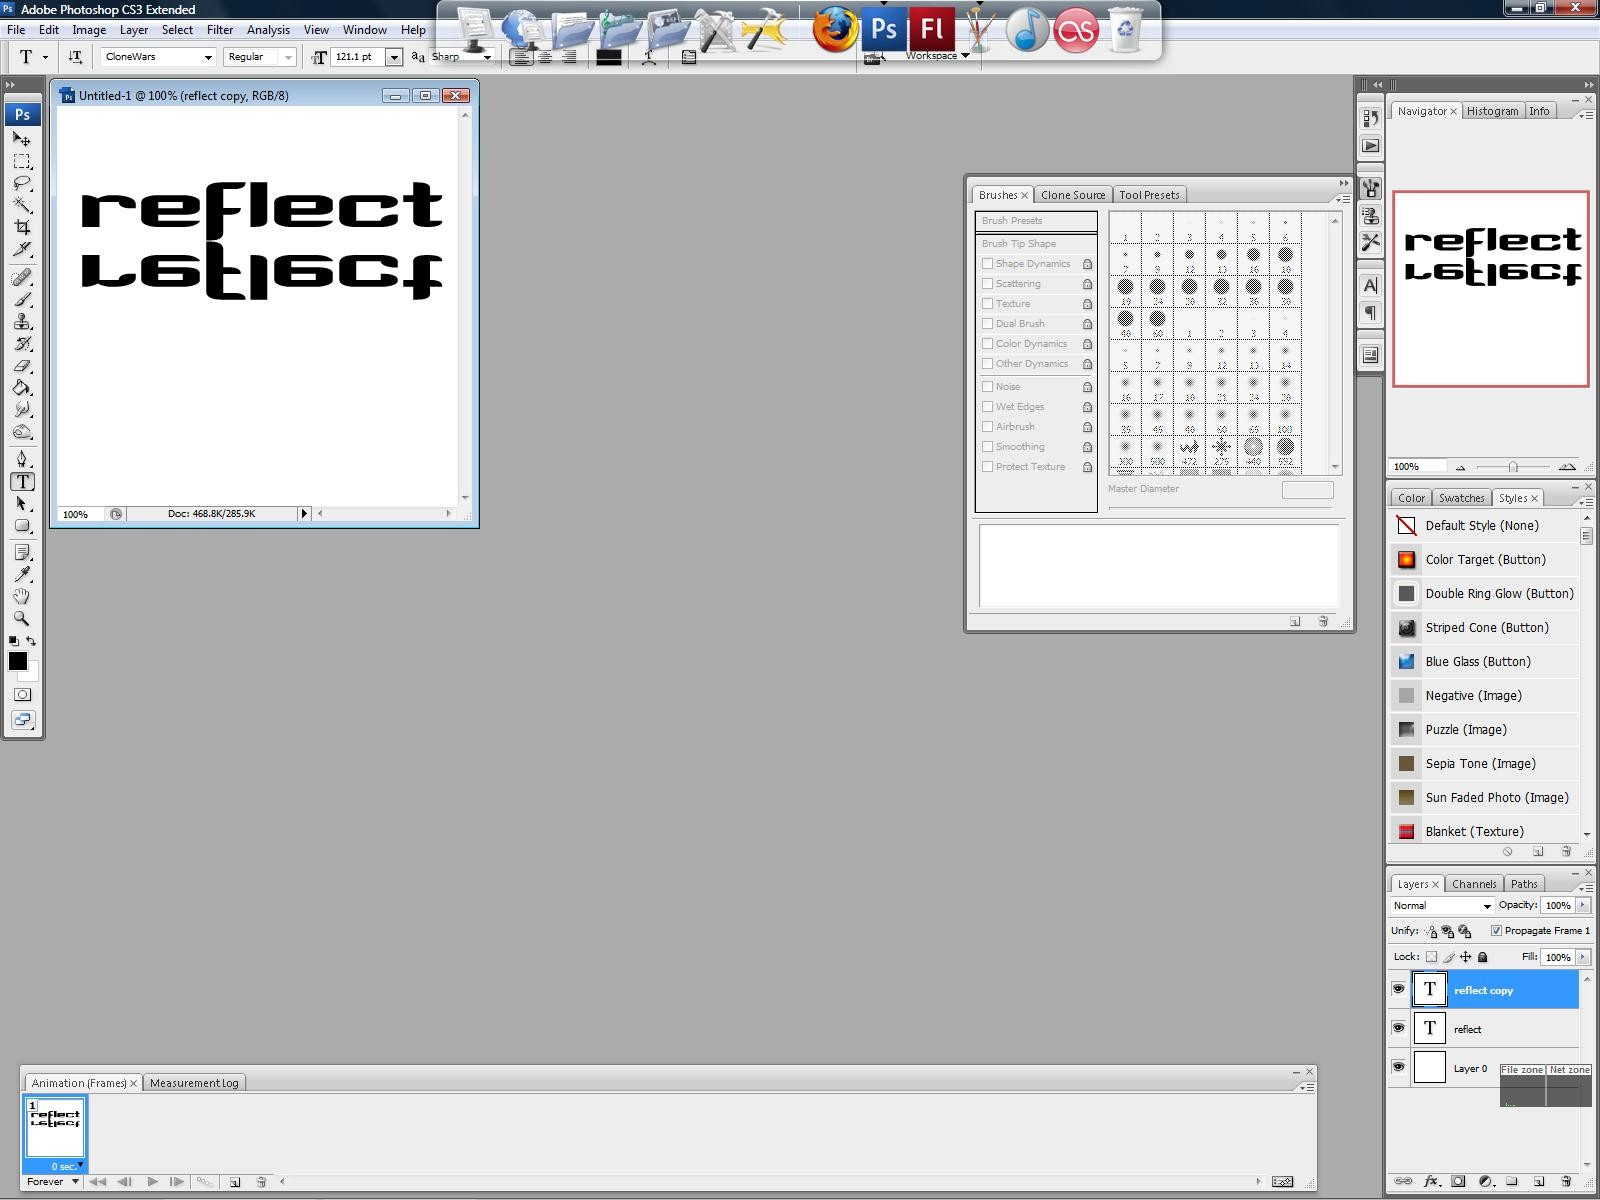
3. Now hit LAYER>LAYER STYLE>BLENDING OPTIONS and lower the opacity to 40% like so...

4. Ok, now that the text is ready we have to add a couple more things. Click LAYER>NEW>LAYER to add a new layer above your existing ones, now select your gradient tool and make a gradient (fading to transparent, same background color, I have white for this so I used white) once you make the gradient, use your move tool (the black arrow icon on the left) to slide up the gradient till you get the desired effect.
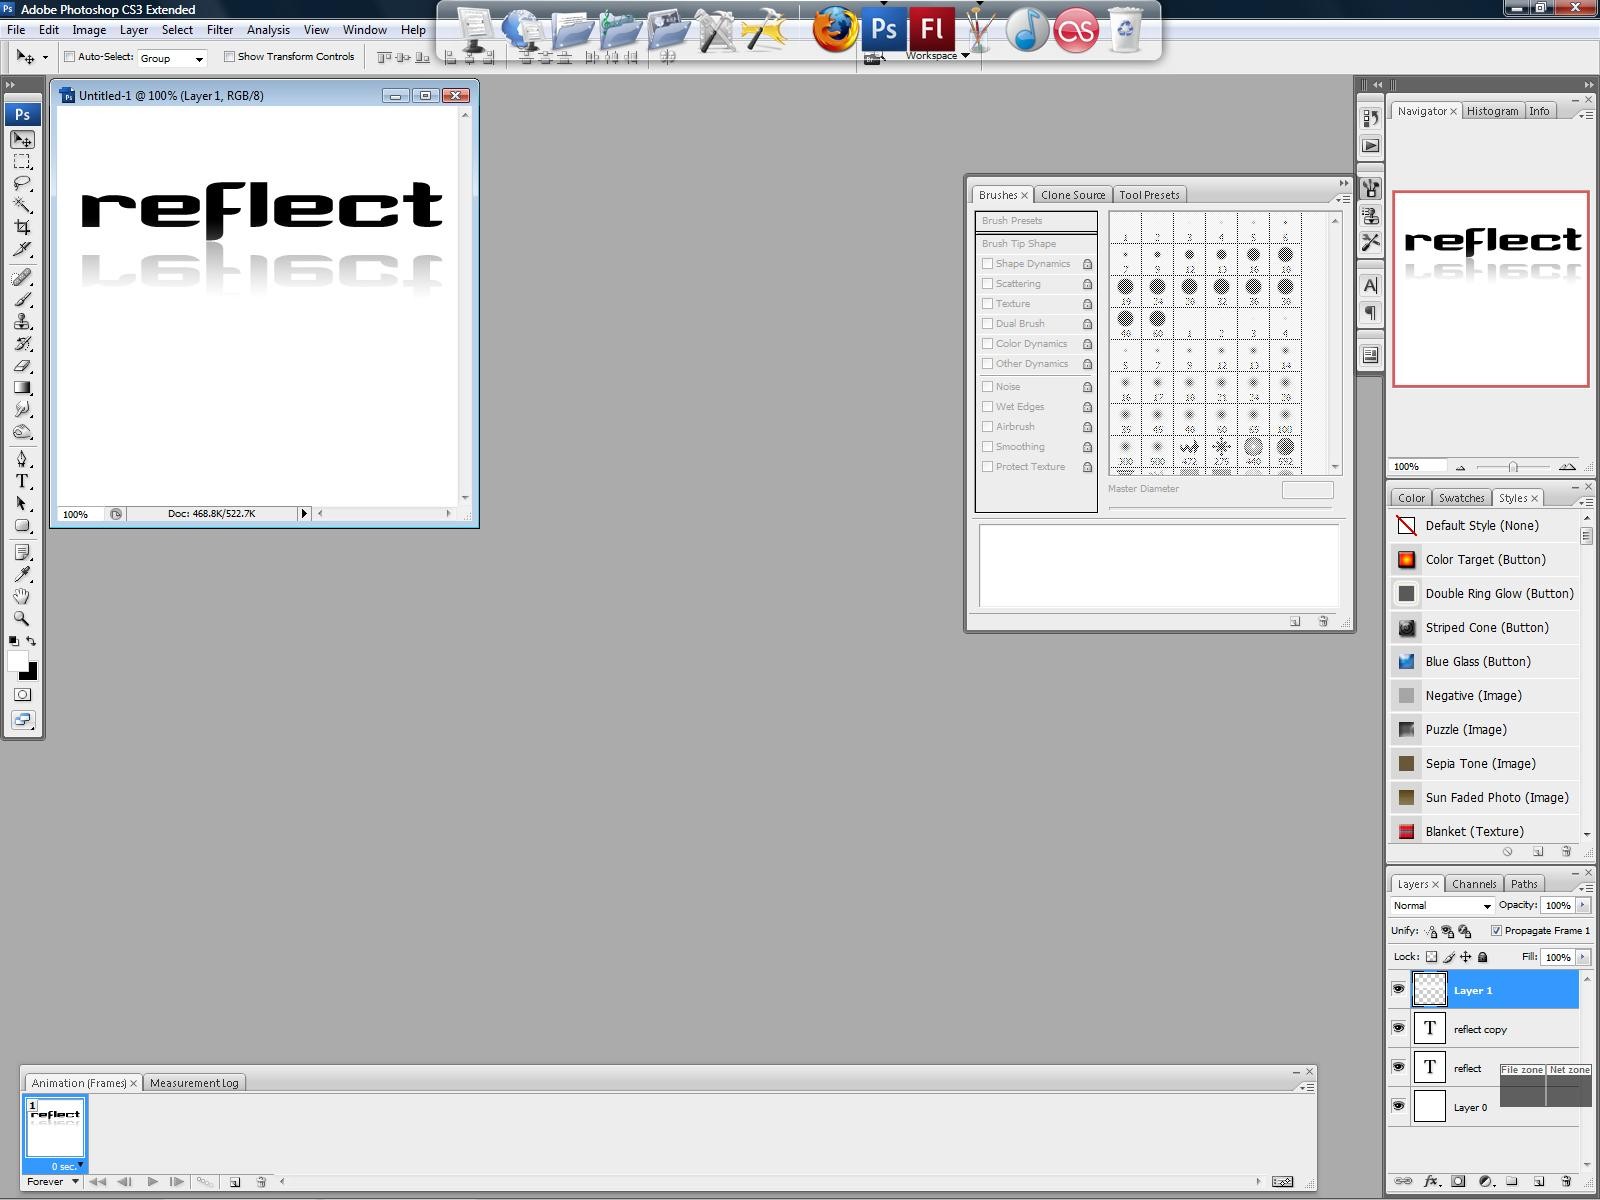
5. ok, now turn OFF the gradient layer you just made and the background layer. Click the little eye icon next to each layer to do so. Select one of your text layers then click LAYER>MERGE VISIBLE to merge the text into one layer. now again, hit LAYER>NEW>LAYER to add a new layer which should be just above the text and below the gradient we made earlier.
Select your gradient tool again. Make your foreground some color, I used a light blue for this and make a small gradient on the left side of your image.
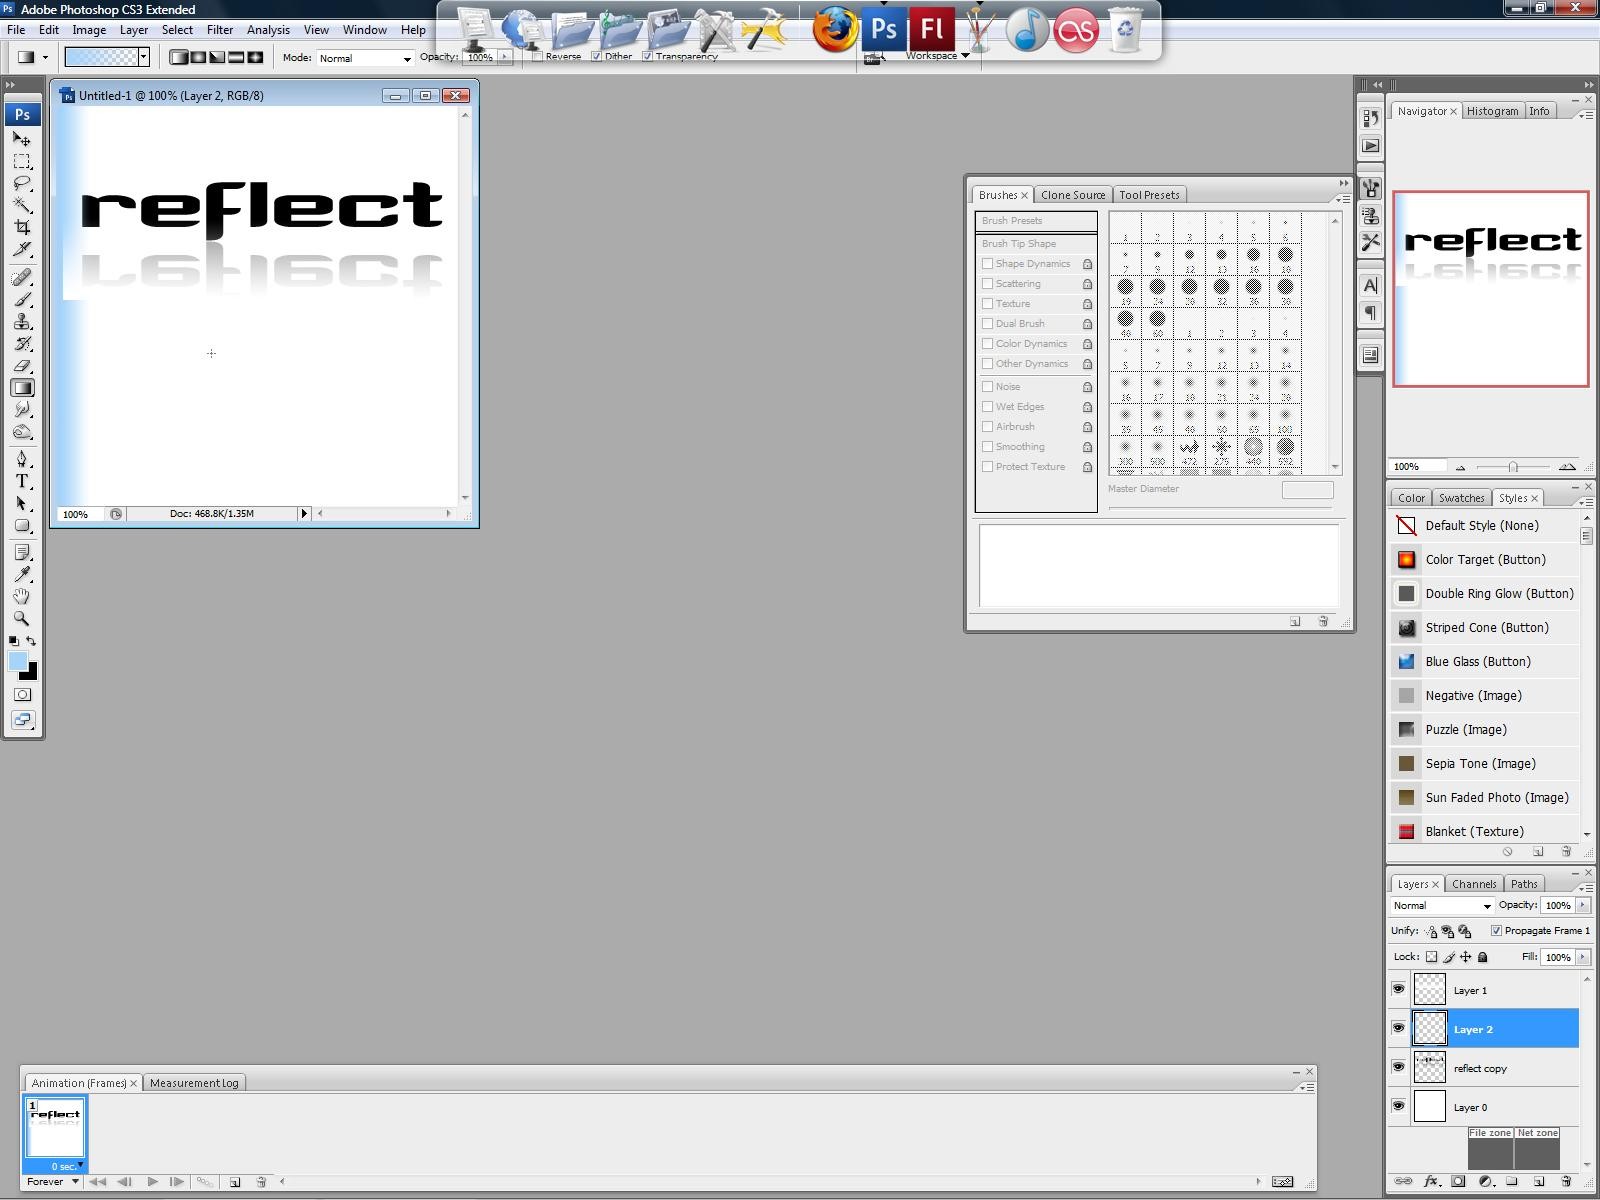
6. Once that is done, hit EDIT>TRANSFORM>FLIP HORIZONTAL then hit EDIT>FREE TRANSFORM and rotate your gradient just a bit. You should have it like this so far.
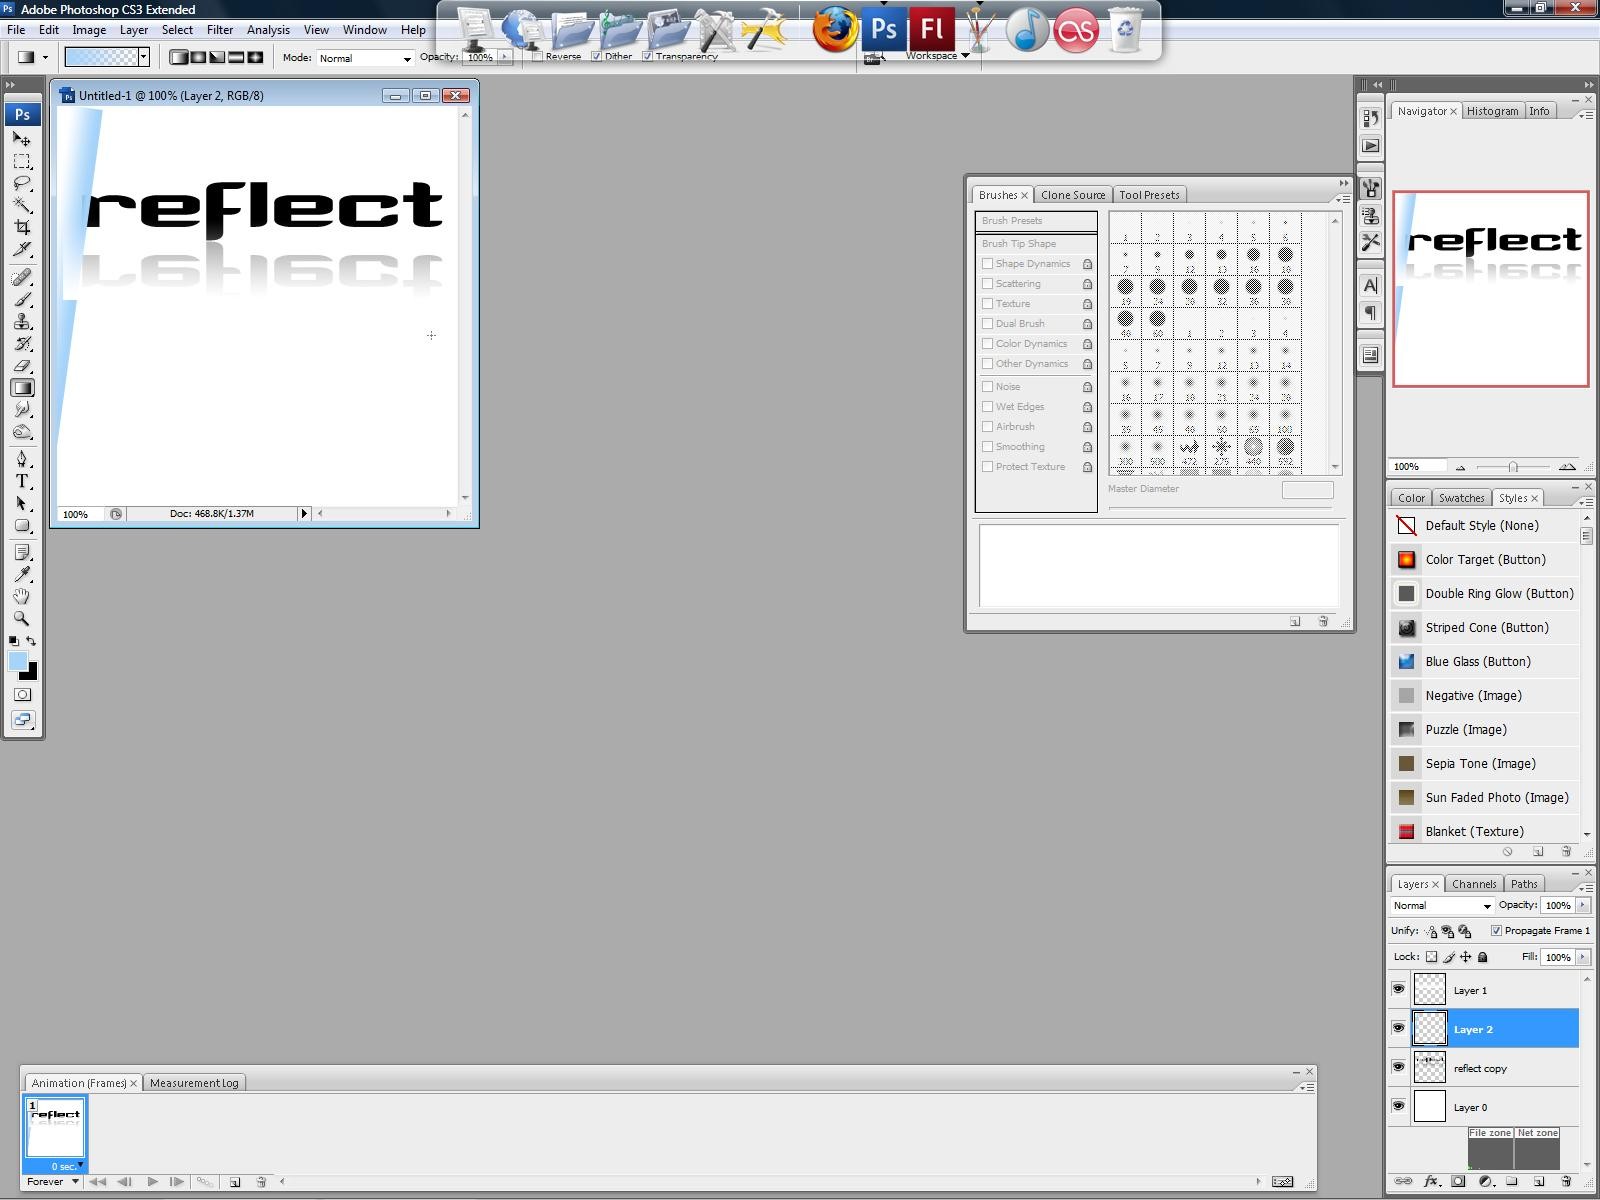
Right click that layer and hit CREATE CLIPPING MASK...
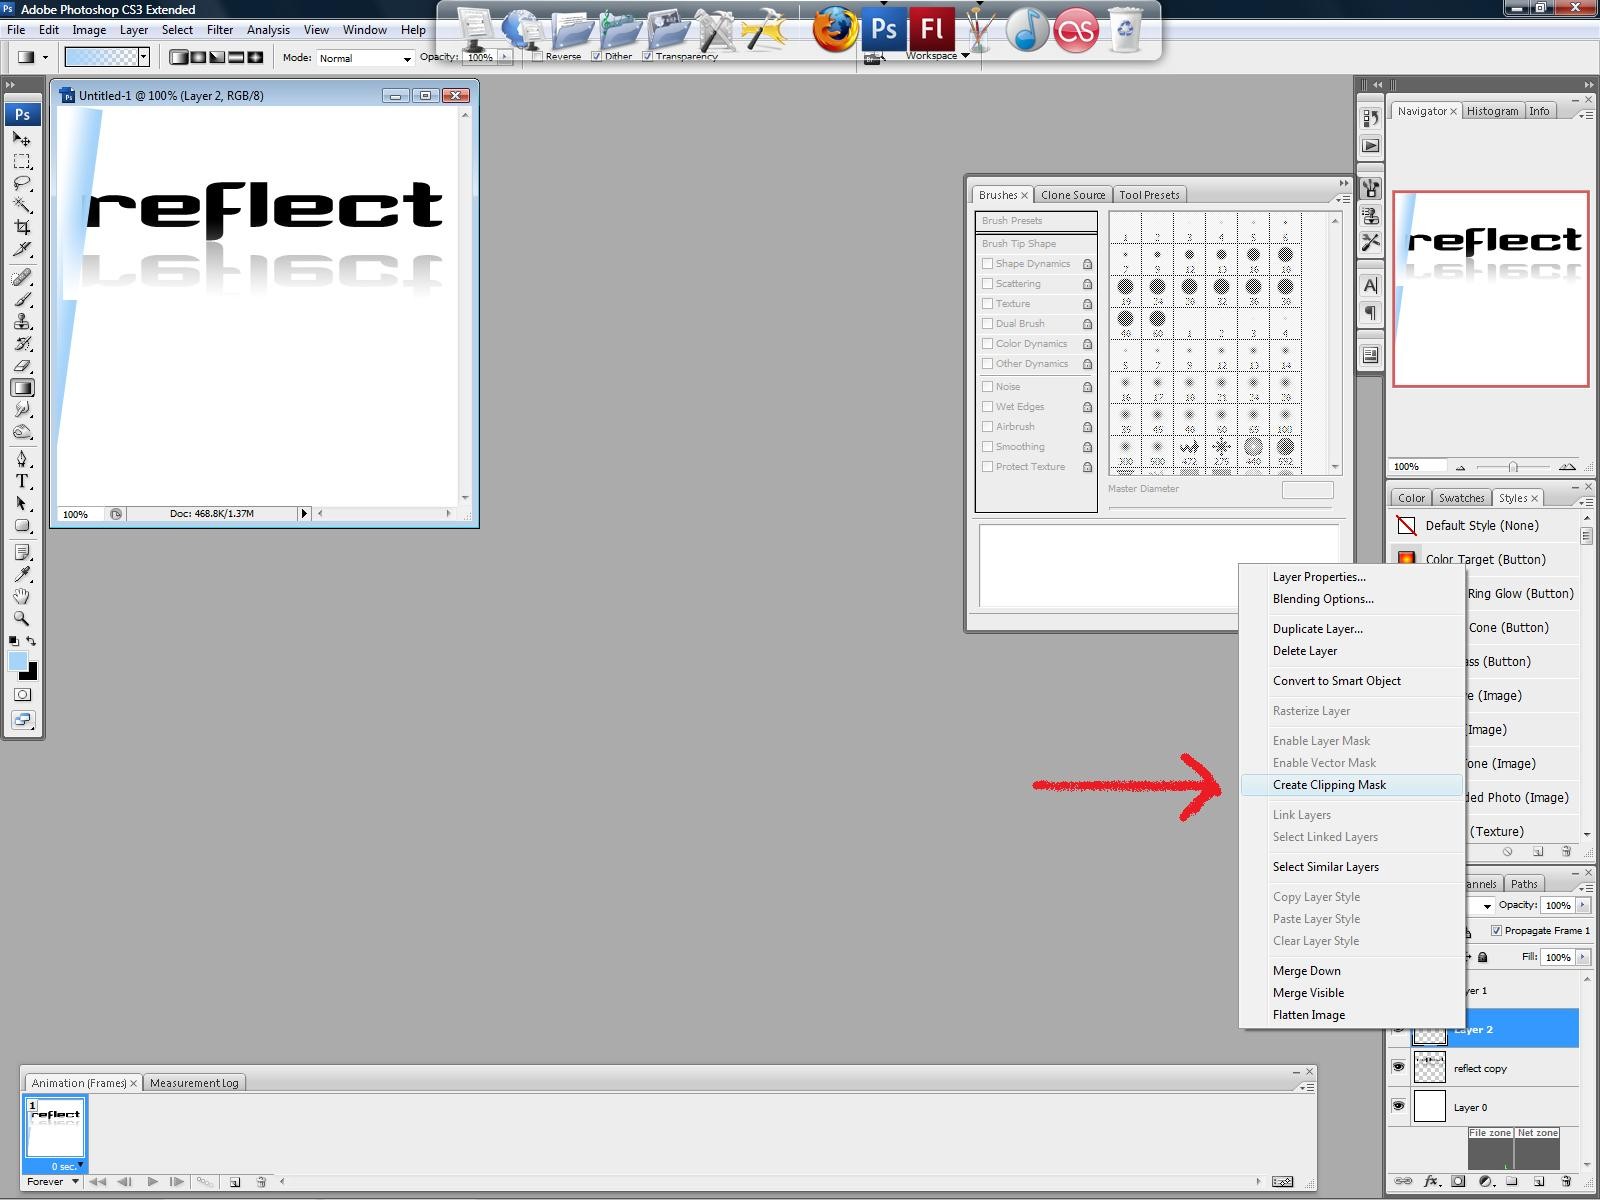
The gradient should "disappear" now, no worries it is just inside the text layer, select your move tool and drag it to the right to see what I mean.
Be sure and move the gradient off stage to the left before continuing, thanks.
7. Now to animate. If you don't already, click WINDOW>ANIMATE to bring up your animation window. Click the icon under your first frame to make a new frame, hovering over the little icons brings a pop up that explains what each does. The one we want is "duplicate current frame"
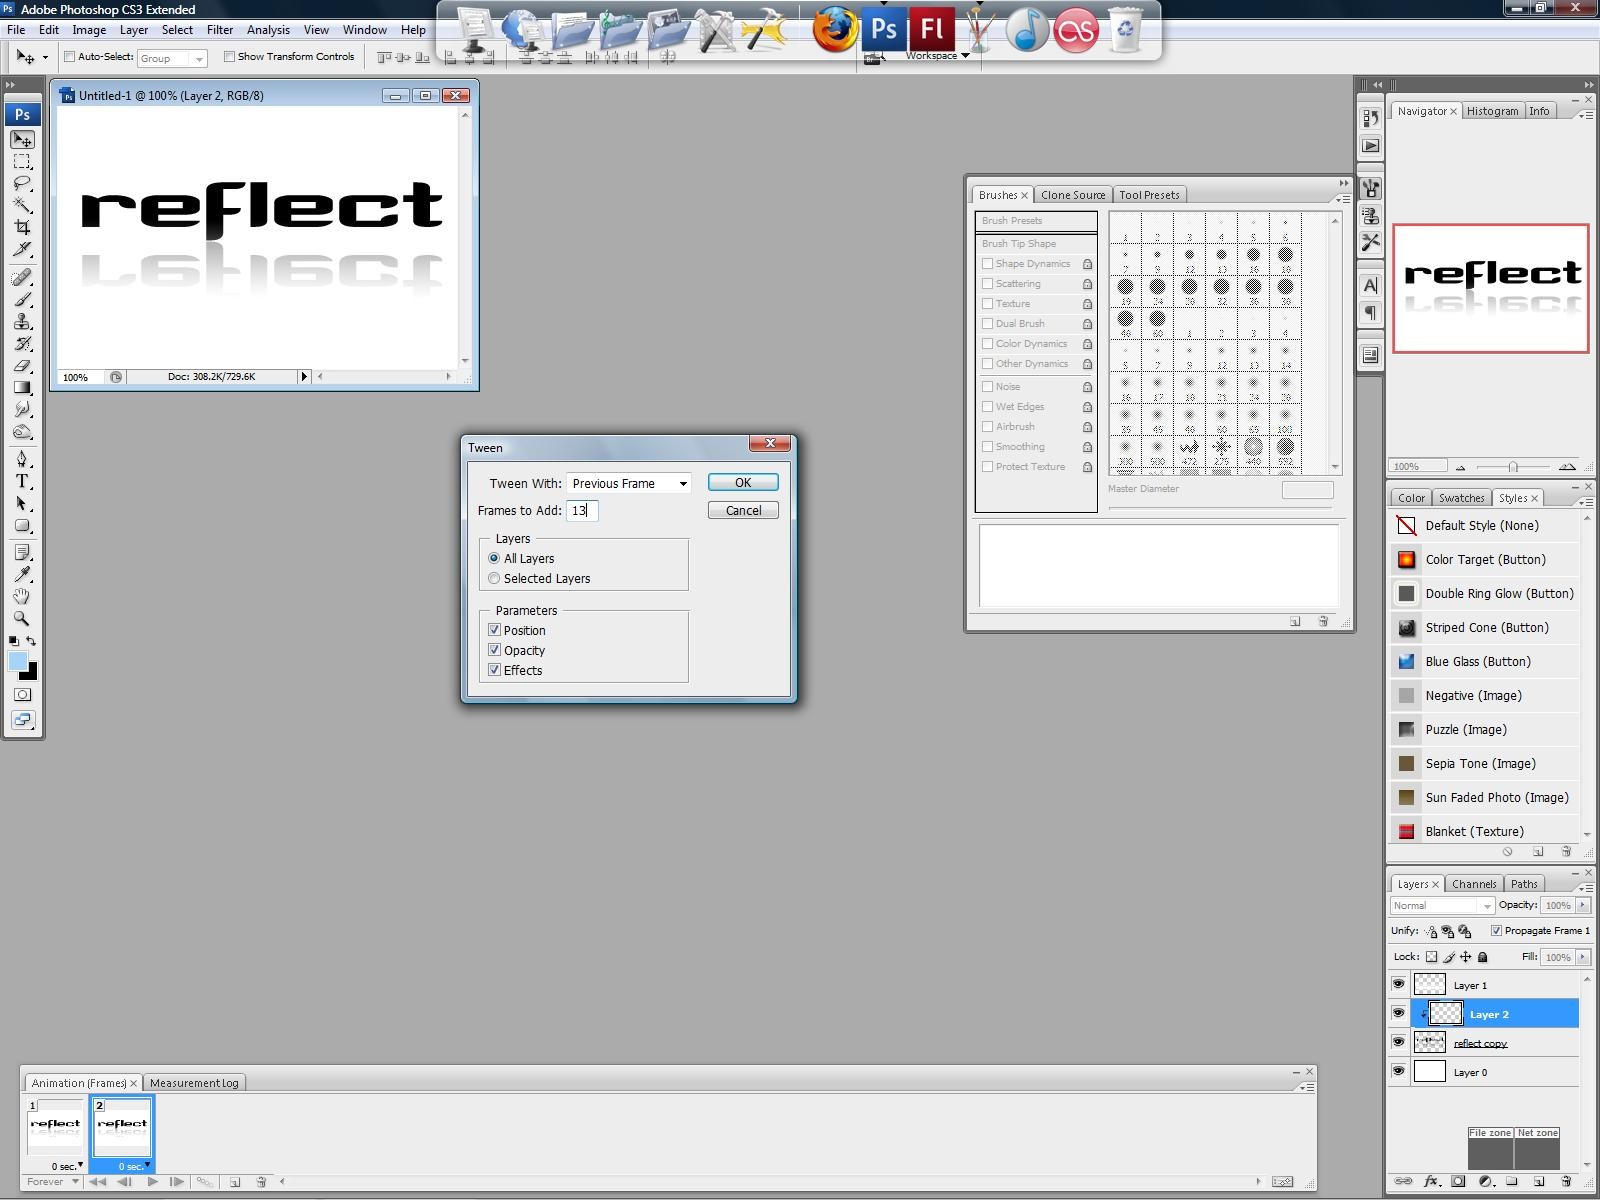
now you should have two frames, in the second frame, use your move tool to drag the blue gradient over to the right side off stage. Then select the tween icon from the icons under the frames and add a twee, like so
Now on the last frame, click the 0 sec. text just under it, it will open this little window...
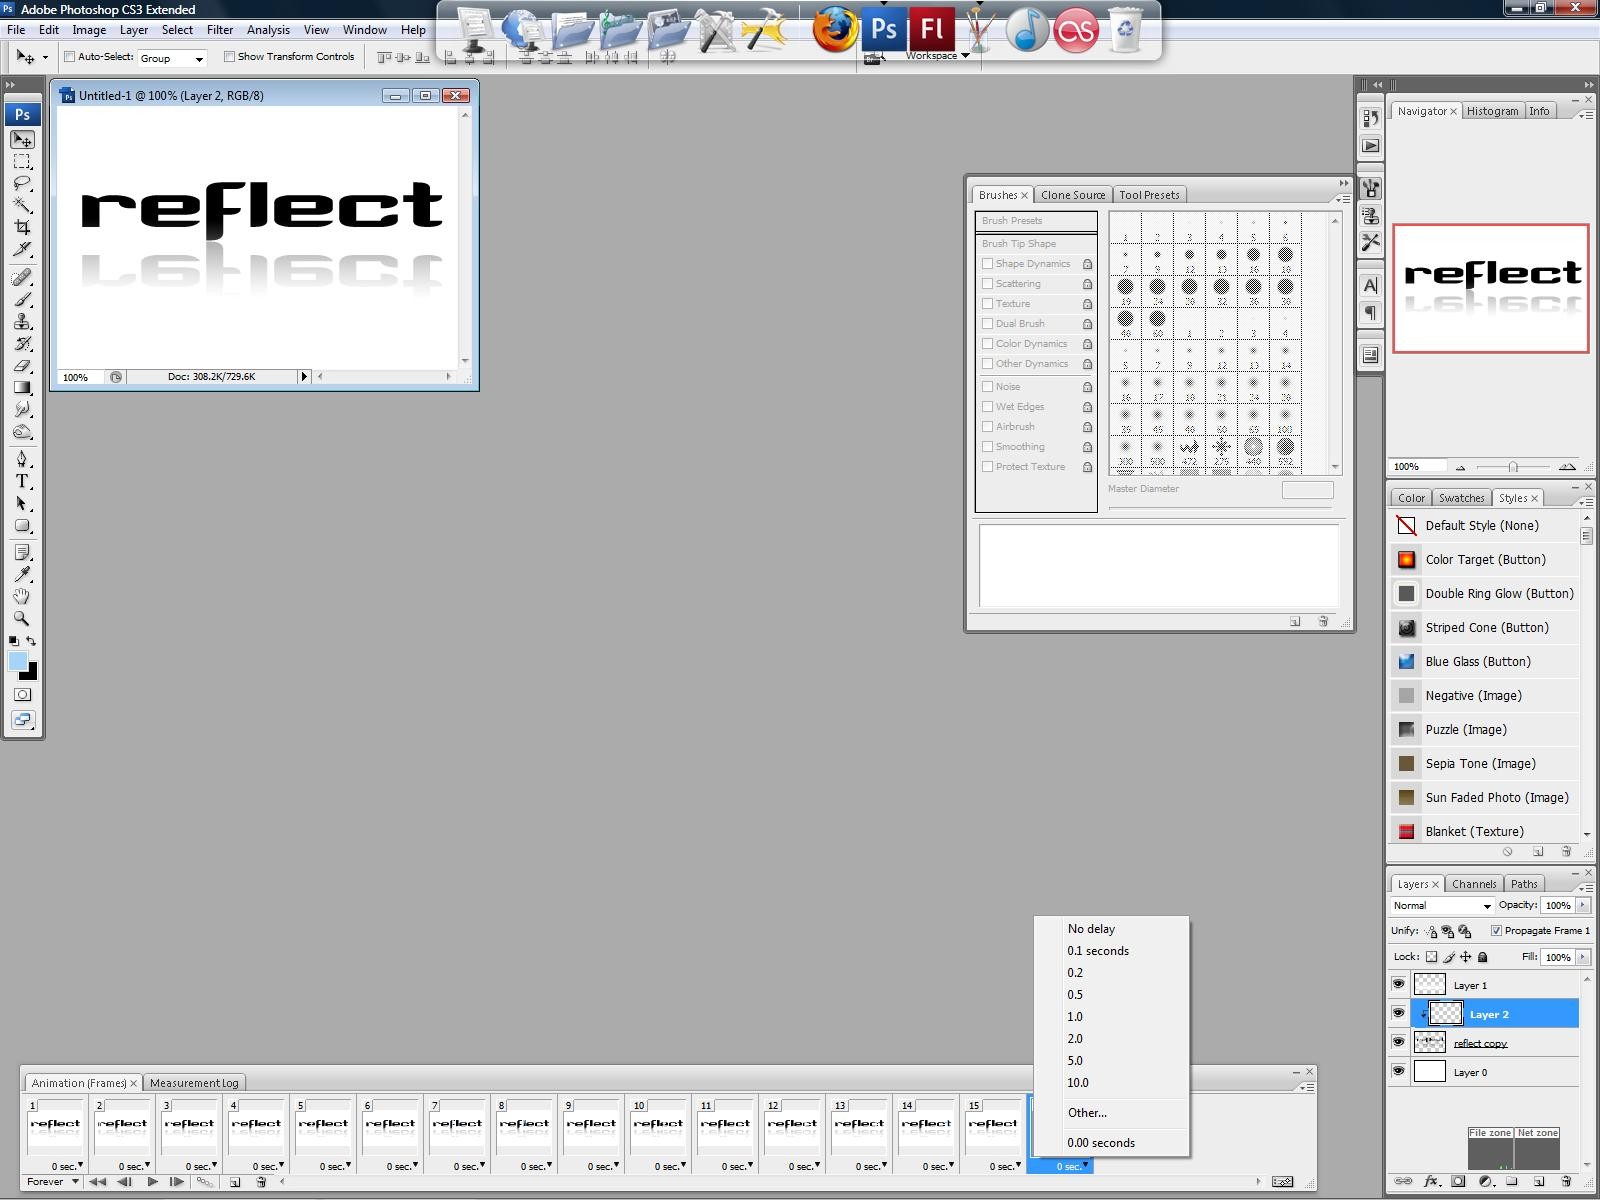
Set the delay there to 1 second, it will make the effect not repeat all stupid like, lol. Hit FILE>SAVE FOR WEB AND DEVICES done.
(c) The Photoshop Group

The purpose of this is not to duplicate what I made but to learn the technique so you can apply it to whatever. That said, here we go. (right click all images to view full size)
1. Make a new doc for this I made it 400w x 400h and added some text to it.

2. Now duplicate the text layer and hit EDIT>TRANSFORM>FLIP VERTICAL, then hit EDIT>FREE TRANSFORM and move the layer down till it is just under the original layer, I use the arrow keys to make sure they stay aligned. You should now have this...

3. Now hit LAYER>LAYER STYLE>BLENDING OPTIONS and lower the opacity to 40% like so...

4. Ok, now that the text is ready we have to add a couple more things. Click LAYER>NEW>LAYER to add a new layer above your existing ones, now select your gradient tool and make a gradient (fading to transparent, same background color, I have white for this so I used white) once you make the gradient, use your move tool (the black arrow icon on the left) to slide up the gradient till you get the desired effect.

5. ok, now turn OFF the gradient layer you just made and the background layer. Click the little eye icon next to each layer to do so. Select one of your text layers then click LAYER>MERGE VISIBLE to merge the text into one layer. now again, hit LAYER>NEW>LAYER to add a new layer which should be just above the text and below the gradient we made earlier.
Select your gradient tool again. Make your foreground some color, I used a light blue for this and make a small gradient on the left side of your image.

6. Once that is done, hit EDIT>TRANSFORM>FLIP HORIZONTAL then hit EDIT>FREE TRANSFORM and rotate your gradient just a bit. You should have it like this so far.

Right click that layer and hit CREATE CLIPPING MASK...

The gradient should "disappear" now, no worries it is just inside the text layer, select your move tool and drag it to the right to see what I mean.
Be sure and move the gradient off stage to the left before continuing, thanks.
7. Now to animate. If you don't already, click WINDOW>ANIMATE to bring up your animation window. Click the icon under your first frame to make a new frame, hovering over the little icons brings a pop up that explains what each does. The one we want is "duplicate current frame"
now you should have two frames, in the second frame, use your move tool to drag the blue gradient over to the right side off stage. Then select the tween icon from the icons under the frames and add a twee, like so

Now on the last frame, click the 0 sec. text just under it, it will open this little window...

Set the delay there to 1 second, it will make the effect not repeat all stupid like, lol. Hit FILE>SAVE FOR WEB AND DEVICES done.
(c) The Photoshop Group
Tutorial Comments
Showing latest 3 of 3 comments

myt aswell make the screen shots smaller.
btw, nice tut thou :)
By -retired- on Apr 12, 2009 10:17 am
great tutorial
By N4th4li3L on Apr 13, 2008 12:34 am
nice tutorial.
By twodreamlovers on Dec 31, 2007 12:08 am
Tutorial Details
| Author |
elrene06
|
| Submitted on | Dec 28, 2007 |
| Page views | 23,205 |
| Favorites | 67 |
| Comments | 3 |
| Reviewer |
themarkster
|
| Approved on | Dec 28, 2007 |

