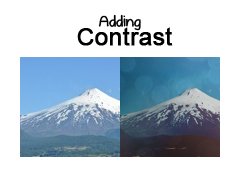
Tutorial
Click on thumbnailed images to enlarge
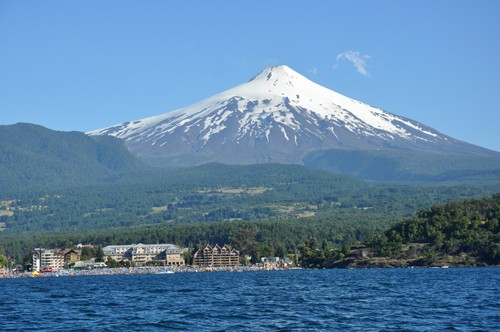
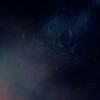
First, open a dull image, such as this one from stock.xchng
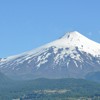
Then, crop it to a 100x100 icon.
(this was my crop)
Next, create a new layer (layer-new layer) and fill it with a nice orange. (f07e19)
Set that to softlight at 23% opacity.
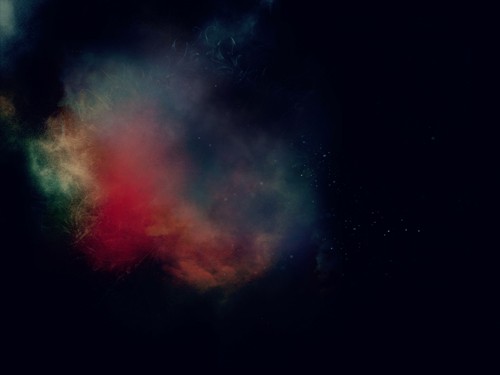
Then, use this texture (I can't remember the correct source I got it from). Shrink it, crop it, do what you like. Then place it on top of the other layers and set it at overlay at 100%.
(my crop)
Now come the many layers:
Layer-new adjustment layer- selective color (numbers go from cyan down to black)
Reds -99 0 +8 0
Yellows -96 0 +21 -30
Blacks 0 0 0 +64
Set this at normal at 65%.
Layer-new adjustment layer- selective color
Reds -56 0 0 0
Blacks 0 0 0 +11
Set this at normal at 100%.
Create a new layer. Fill it with cf9da9.
Set this at Exclusion at 19%.
Layer-new adjustment layer- Hue/Saturation
The drop down list should say Master; leave it like that.
Hue 0
Saturation +16
Lightness 0
Normal at 39%.
Layer-new adjustment layer- Hue/Saturation
The drop down list should say Master; leave it like that.
Hue 0
Saturation +20
Lightness 0
Normal at 56%.
Layer-new adjustment layer- selective color
Reds -100 0 +8 0
Yellows -96 0 +21 -30
Blacks 0 0 0 +64
Normal at 31%.
Layer-new adjustment layer- selective color
Reds -56 0 0 0
Yellows 0 0 0 +11
Normal at 21%.
Create a new layer. Fill it with cf9da9.
Set this layer at Exclusion at 11%.
layer-new adjustment layer-Hue/Saturation
The drop down list should say Master; leave it like that.
Hue 0
Saturation +16
Lightness 0
Normal at 100%.
Layer-new adjustment layer- selective color
Reds -50 +50 +50 0
Yellows 0 +30 +30 +30
Neutrals +10 +10 +10 -10
Blacks 0 0 0 +10
Normal at 29%.
Create a new layer. Fill it with pure black (000000).
Set this at darken at 17%.
Next, create a new layer. Use a gradient going from pure white (ffffff) to transparent. Begin at the top right and drag it close to the bottom left.
(this was my gradient.)
Set that at Softlight at 100%.
Then, duplicate that layer. Set this to Softlight at 24%.
Open a nice texture similar to this one. (I call it the brokeh texture.)
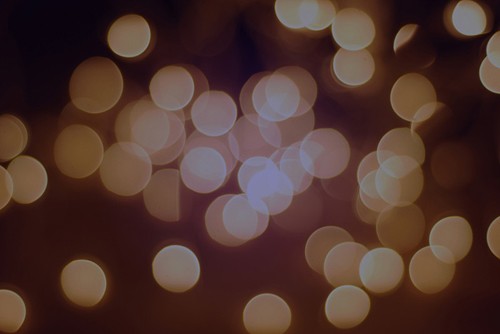
Now crop it, shrink it, do what you please. This was mine.

Set this at Softlight at 28%.
Layer-new adjustment layer- selective color
Reds -5 0 0 0
Blues -12 -29 +100 +49
Whites +1 +9 -4 -15
Blacks 0 -3 -2 -2
Normal at 100%.
Finally. Done.
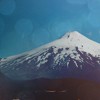
My result:
If anyone follows this, I'd love to see their result. :]
Then, crop it to a 100x100 icon.
(this was my crop)
Next, create a new layer (layer-new layer) and fill it with a nice orange. (f07e19)
Set that to softlight at 23% opacity.
Then, use this texture (I can't remember the correct source I got it from). Shrink it, crop it, do what you like. Then place it on top of the other layers and set it at overlay at 100%.
(my crop)
Now come the many layers:
Layer-new adjustment layer- selective color (numbers go from cyan down to black)
Reds -99 0 +8 0
Yellows -96 0 +21 -30
Blacks 0 0 0 +64
Set this at normal at 65%.
Layer-new adjustment layer- selective color
Reds -56 0 0 0
Blacks 0 0 0 +11
Set this at normal at 100%.
Create a new layer. Fill it with cf9da9.
Set this at Exclusion at 19%.
Layer-new adjustment layer- Hue/Saturation
The drop down list should say Master; leave it like that.
Hue 0
Saturation +16
Lightness 0
Normal at 39%.
Layer-new adjustment layer- Hue/Saturation
The drop down list should say Master; leave it like that.
Hue 0
Saturation +20
Lightness 0
Normal at 56%.
Layer-new adjustment layer- selective color
Reds -100 0 +8 0
Yellows -96 0 +21 -30
Blacks 0 0 0 +64
Normal at 31%.
Layer-new adjustment layer- selective color
Reds -56 0 0 0
Yellows 0 0 0 +11
Normal at 21%.
Create a new layer. Fill it with cf9da9.
Set this layer at Exclusion at 11%.
layer-new adjustment layer-Hue/Saturation
The drop down list should say Master; leave it like that.
Hue 0
Saturation +16
Lightness 0
Normal at 100%.
Layer-new adjustment layer- selective color
Reds -50 +50 +50 0
Yellows 0 +30 +30 +30
Neutrals +10 +10 +10 -10
Blacks 0 0 0 +10
Normal at 29%.
Create a new layer. Fill it with pure black (000000).
Set this at darken at 17%.
Next, create a new layer. Use a gradient going from pure white (ffffff) to transparent. Begin at the top right and drag it close to the bottom left.
(this was my gradient.)
Set that at Softlight at 100%.
Then, duplicate that layer. Set this to Softlight at 24%.
Open a nice texture similar to this one. (I call it the brokeh texture.)
Now crop it, shrink it, do what you please. This was mine.
Set this at Softlight at 28%.
Layer-new adjustment layer- selective color
Reds -5 0 0 0
Blues -12 -29 +100 +49
Whites +1 +9 -4 -15
Blacks 0 -3 -2 -2
Normal at 100%.
Finally. Done.
My result:
If anyone follows this, I'd love to see their result. :]
Tutorial Comments
Showing latest 2 of 2 comments

beautiful~~
WOW Gold http://www.game675.com
By Alisa1209 on Mar 5, 2012 8:25 am

Awesome, i love this effect. Used it to create an awesome book cover idea for one of my upcoming stories. Heheh awesome!
By SkyeDesign on Jul 30, 2011 9:09 am
Tutorial Details
| Author |
xchangminniex
|
| Submitted on | May 11, 2011 |
| Page views | 9,751 |
| Favorites | 3 |
| Comments | 2 |
| Reviewer |
manny-the-dino
|
| Approved on | Jun 21, 2011 |