
Tutorial
Click on thumbnailed images to enlarge
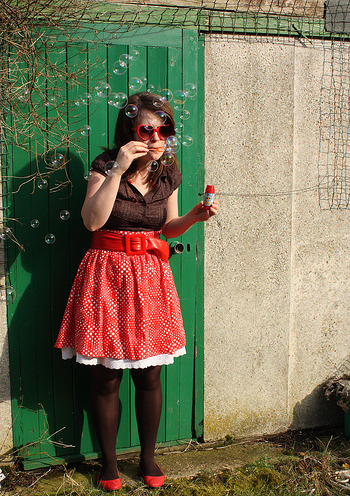
Have your image ready to go in Paint Shop Pro X. The image I'm using was taken from here: http://www.flickr.com/photos/dreamincolour/3346453259
Anyways, we're turning this:
Into this:

1 On the top, go to ADJUST > SMART PHOTO FIX
2 A window will pop up and this is where you can change the settings.
In the "BRIGHTNESS" section...
I changed OVERALL to 41, SHADOWS to -40, and HIGHLIGHTS to 30.
In the "BLACK AND WHITES" section...
I changed BLACK to 2, and WHITE to 2.
In the "SATURATION" section...
I changed it to 30.
In the "FOCUS" section...
I changed it to 63.
Hit OK when you're done!
3 Go to LAYERS > DUPLICATE
4 Go to ADJUST > SHARPEN > HIGH PASS SHARPEN
5 A window will pop up and this is where you can change the settings.
I changed the RADIUS to 121.00, STRENGTH to 55, and BLEND MODE to OVERLAY. You don't need to copy my settings, this is all up to you. Hit OK when you're comfy with the settings.
6 Go to LAYERS > PROPERTIES...
Set the BLEND MODE to BURN and OPACITY at 50.
7 Okays, you're done. It wasn't too hard, and the reason why I like editing my pictures like this is because it sharpens and defines color better. If you weren't using the example image, you may need to change the layer properties to what makes your image look best. :)
Anyways, we're turning this:
Into this:
1 On the top, go to ADJUST > SMART PHOTO FIX
2 A window will pop up and this is where you can change the settings.
In the "BRIGHTNESS" section...
I changed OVERALL to 41, SHADOWS to -40, and HIGHLIGHTS to 30.
In the "BLACK AND WHITES" section...
I changed BLACK to 2, and WHITE to 2.
In the "SATURATION" section...
I changed it to 30.
In the "FOCUS" section...
I changed it to 63.
Hit OK when you're done!
3 Go to LAYERS > DUPLICATE
4 Go to ADJUST > SHARPEN > HIGH PASS SHARPEN
5 A window will pop up and this is where you can change the settings.
I changed the RADIUS to 121.00, STRENGTH to 55, and BLEND MODE to OVERLAY. You don't need to copy my settings, this is all up to you. Hit OK when you're comfy with the settings.
6 Go to LAYERS > PROPERTIES...
Set the BLEND MODE to BURN and OPACITY at 50.
7 Okays, you're done. It wasn't too hard, and the reason why I like editing my pictures like this is because it sharpens and defines color better. If you weren't using the example image, you may need to change the layer properties to what makes your image look best. :)
Tutorial Comments
Showing latest 4 of 4 comments

i dont have smart photo fix on psp 9... maybe i do but its not in the adjust menu
By emmijane on Mar 21, 2010 3:25 am

The way you pop out the colors is so gorgeous.
By creole on Jul 20, 2009 2:15 am

a bit too sharpened for my taste but awesome anyway :D daaaamn i dont have psp :(
By fiercest on Jul 1, 2009 8:54 am

I like this. (:
By futura on Jul 1, 2009 4:53 am
Tutorial Details
| Author |
robinneboo
|
| Submitted on | Jun 30, 2009 |
| Page views | 16,734 |
| Favorites | 24 |
| Comments | 4 |
| Reviewer |
manny-the-dino
|
| Approved on | Jun 30, 2009 |