Tutorial
Click on thumbnailed images to enlarge
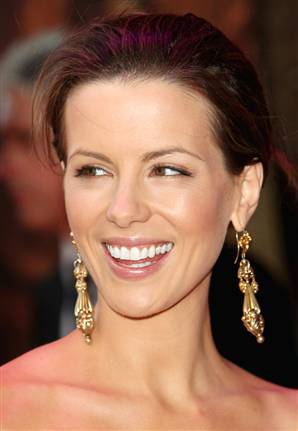
1. Grab your image. I'll be using this Kate Beckinsale picture:
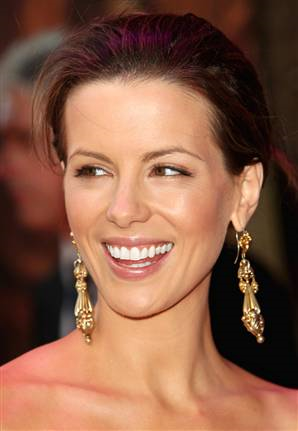
Her skin looks a bit bright do most likely to the flash. We can fix that by clicking on the 'Makeover Tool' and selecting Suntan [the little sun] on the Tool Options palette.
With these settings:
Size: 32
Strength: 30 [as I only wanted her skin slightly darker]
... simply go over the exposed skin and you're done. Do not worry about going over teeth or eyes as it won't affect them.
So far;
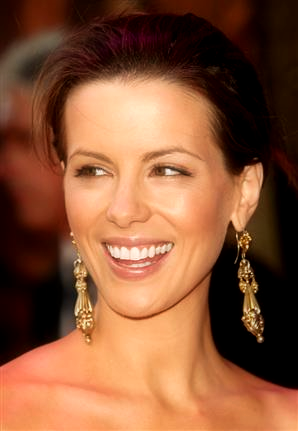
2. Go now to Effects -- Photo Effects -- Film and Filters w. these settings:
Film looks: Glamour
Creative filters: Warming
[it'll set you up with a skin tone colour, leave it as is. As for the Density I used 10 but you can play around with it until it suits you. However, keep it subtle; the higher the integer the more orangy your picture will become]
So Far;
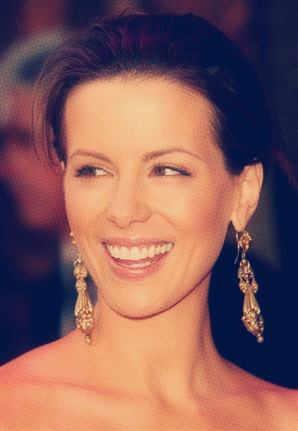
3. Once you've done that, duplicate the layer twice. Hide the top most duplicate by clicking the Eye next to it on the Layers Palette then select the visible duplicate. After it is selected go to Effects --- Artistic Effects --- Halftone
Leave everything as is except make sure the 'Use as overlay' box is checked.
Set the Blend mode to Screen with opacity 25, press OK.
4. Click on the Eye in the top most layer again to make it visible.
Repeat the Halftone effect to this layer but instead of Screen set it to Overlay with opacity 6. Press Ok.
Set the layer to Soft Light with opacity 100.
5. Create a new Raster layer and set it bewteen the two layers we've been working with. Fill it with #328ffc then set the blend mode to Exclusion with opacity 51.
And you're done!
My result;
Her skin looks a bit bright do most likely to the flash. We can fix that by clicking on the 'Makeover Tool' and selecting Suntan [the little sun] on the Tool Options palette.
With these settings:
Size: 32
Strength: 30 [as I only wanted her skin slightly darker]
... simply go over the exposed skin and you're done. Do not worry about going over teeth or eyes as it won't affect them.
So far;
2. Go now to Effects -- Photo Effects -- Film and Filters w. these settings:
Film looks: Glamour
Creative filters: Warming
[it'll set you up with a skin tone colour, leave it as is. As for the Density I used 10 but you can play around with it until it suits you. However, keep it subtle; the higher the integer the more orangy your picture will become]
So Far;
3. Once you've done that, duplicate the layer twice. Hide the top most duplicate by clicking the Eye next to it on the Layers Palette then select the visible duplicate. After it is selected go to Effects --- Artistic Effects --- Halftone
Leave everything as is except make sure the 'Use as overlay' box is checked.
Set the Blend mode to Screen with opacity 25, press OK.
4. Click on the Eye in the top most layer again to make it visible.
Repeat the Halftone effect to this layer but instead of Screen set it to Overlay with opacity 6. Press Ok.
Set the layer to Soft Light with opacity 100.
5. Create a new Raster layer and set it bewteen the two layers we've been working with. Fill it with #328ffc then set the blend mode to Exclusion with opacity 51.
And you're done!
My result;
Tutorial Comments
Showing latest 7 of 7 comments

Nice post.Thank you for taking the time to publish this information very useful!
discount handbags
[url=http://www.disc ountbagsonsale.com]discount handbags[/url]
discount handbags
[url=http://www.disc ountbagsonsale.com discount handbags]
By jackettop on Apr 14, 2011 7:56 am

Fill the color #328ffc into the new raster layer.
By blissfulxdarkness on Mar 8, 2009 12:48 am
Nice but I got lost on step #5.... fill what in and where
By mkvmoments on Mar 5, 2009 6:18 am
wow amazing thank you for this
By YeseniasDesigns on Jan 18, 2009 11:58 pm

I likes that. I will be trying this one soon.
By darealtipwifey1 on Nov 19, 2008 8:08 pm

thats amazing thanks
By nanamiluv on Oct 3, 2008 11:47 pm

cool
By digitalivory on Sep 27, 2008 9:11 pm
Tutorial Details
| Author |
blissfulxdarkness
|
| Submitted on | Sep 26, 2008 |
| Page views | 18,175 |
| Favorites | 28 |
| Comments | 7 |
| Reviewer |
technicolour
|
| Approved on | Sep 26, 2008 |