Tutorial
Click on thumbnailed images to enlarge
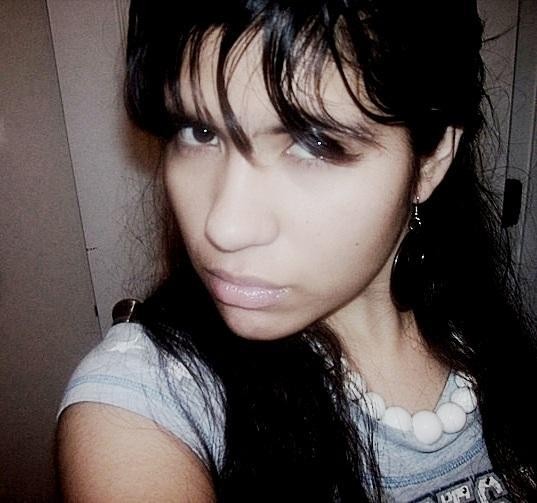
I'm using a beautiful pic of my bff steph. =]
Here's the before:
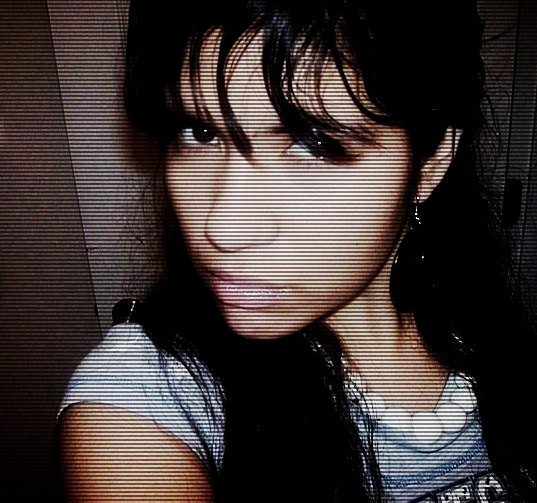
And here's the after:
Okay, so........
*Step 1: Open the pic you want to add the scanlines to.
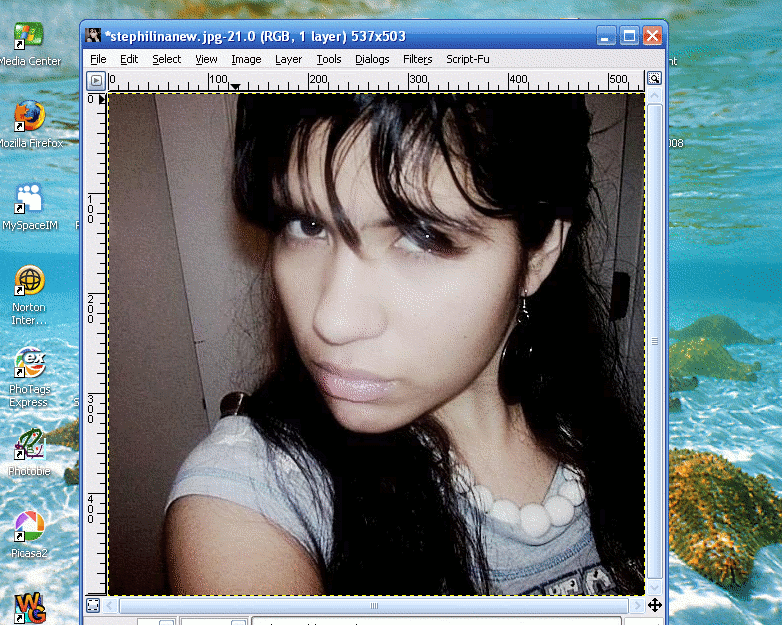
*Step 2: Duplicate the layer.

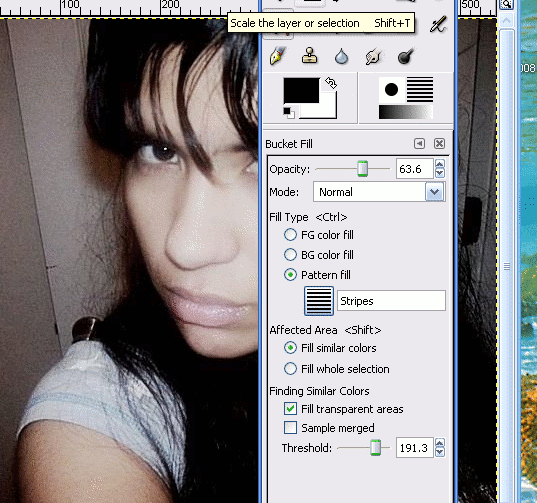
*Step 3: Go to the gimp toolbox and click on the bucket/ fill tool.
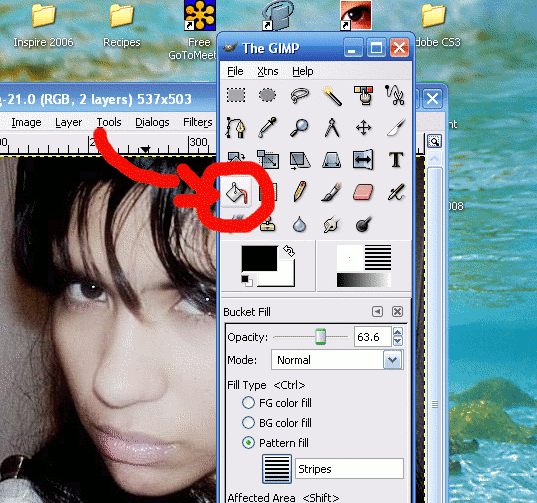
*Step 4: Set the opacity to 63.6. The mode should be normal. The fill type should be pattern fill and change your pattern to the stripes pattern [everyone w/ gimp has it.....so just click on the pattern button on the gimp toolbox and pick the plain stripes ( not the stripes fine) ]. Then click on the picture. The scanlines should be there. If it's not, double check and see if your toolbox looks like this.
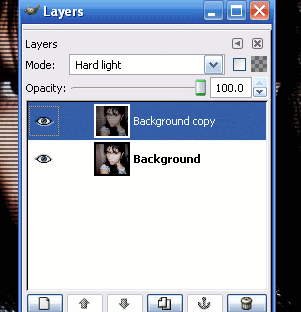
*Step 5: Go to the layer dialog and set the mode to hard light.
THERE!!!! It should look like this:
It you need any help just ask........
Here's the before:
And here's the after:
Okay, so........
*Step 1: Open the pic you want to add the scanlines to.
*Step 2: Duplicate the layer.
*Step 3: Go to the gimp toolbox and click on the bucket/ fill tool.
*Step 4: Set the opacity to 63.6. The mode should be normal. The fill type should be pattern fill and change your pattern to the stripes pattern [everyone w/ gimp has it.....so just click on the pattern button on the gimp toolbox and pick the plain stripes ( not the stripes fine) ]. Then click on the picture. The scanlines should be there. If it's not, double check and see if your toolbox looks like this.
*Step 5: Go to the layer dialog and set the mode to hard light.
THERE!!!! It should look like this:
It you need any help just ask........
Tutorial Comments
Showing latest 7 of 7 comments

Amaaaaazinq
By jazzyg96 on Dec 25, 2009 6:33 pm

thank you so muchh (:
By wifeyxtypeox on Sep 18, 2009 3:49 am

Woohoo thanks!
By xxmidnightblackxx on Jan 13, 2009 2:58 am
thanks! this really works. :D
By xxmidnightblackxx on Nov 27, 2008 9:54 pm

thanks for this So much!
By theerinkal on Aug 17, 2008 1:26 am

Thanks for the tut its awesome but theres one thing I had to do differently when I tried to do the bucket fill on the duplicate layer I had to click it several times in each color region and then it still wasnt consistent. Instead of creating a duplicate layer, I created a new layer in white, did the bucket fill, then set the opacity to about 15 percent and the mode to hard light. = ]
By cjanae on Jul 6, 2008 5:37 am
hey do u know how to do that but with photofiltre??
By XxpiryXx on Apr 13, 2008 1:12 am