Tutorial
Click on thumbnailed images to enlarge
P.S. You can use whatever color you want......you don't have to use red like I did.
Okay, so lets start.......
Here's our before:

And here's our final result:

Awesome isn't it, anyways.........
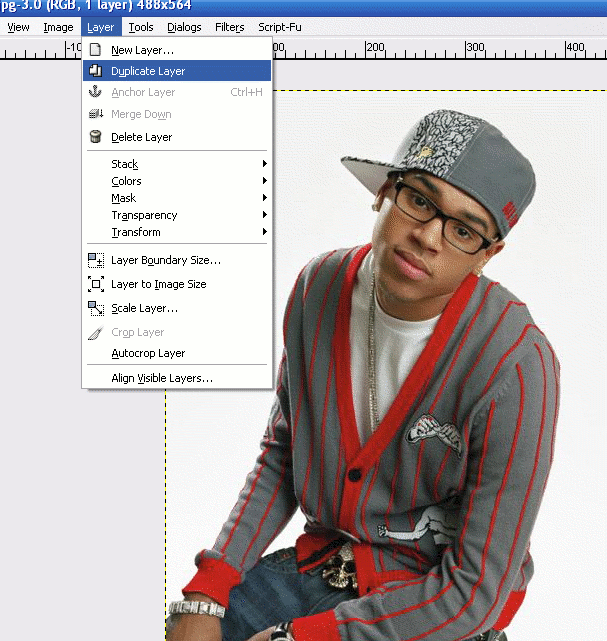
*Step 1: Open the pic you want to work on.

*Step 2: Duplicate the layer of your pic.
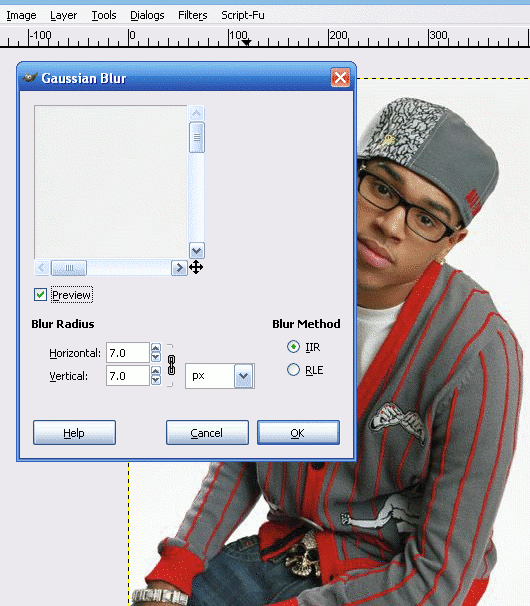
*Step 3: Go to Filters> Blur> Gaussian Blur and set it to 7.0.
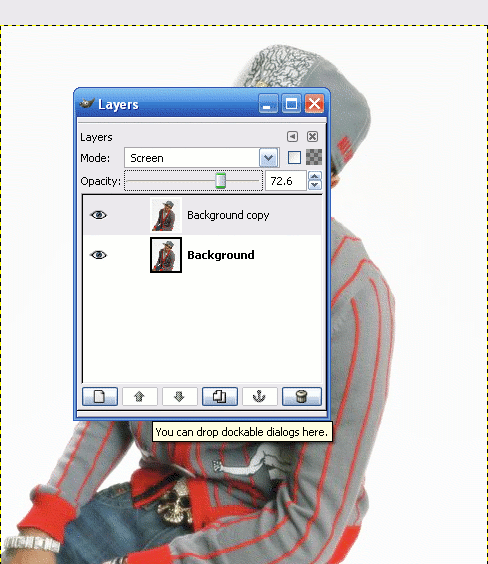
*Step 4: Go to your layers dialog and set the mode to Screen and set the opacity to 72.6%.
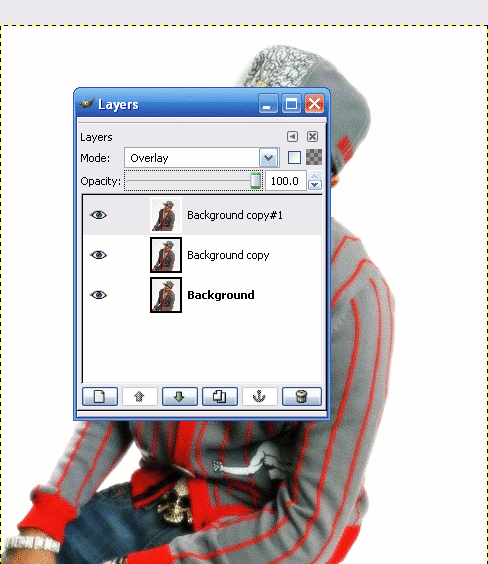
*Step 5: Duplicate the layer again and set the layer mode to overlay w/ the opacity of 100%.
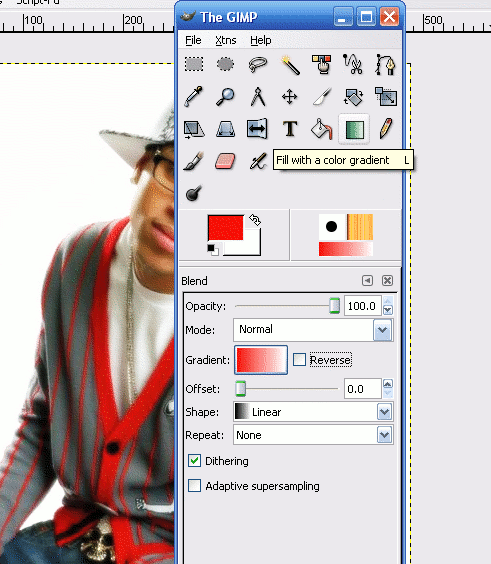
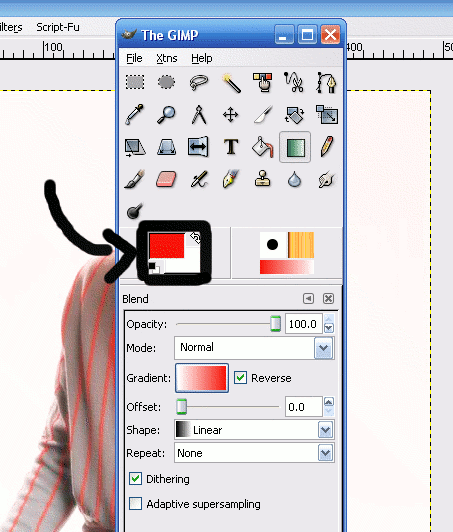
*Step 6: Click on the gradient tool on the gimp toolbox and make your gradient settings look like this:
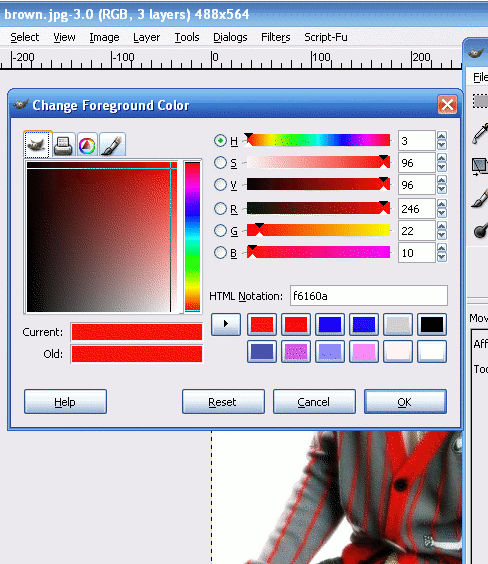
*Step 7: Click on the background and foreground color tool:
.........then change the color to whatever you want to work with. I chose red.
*Step 8: Make a diagonal at the middle of the picture and the gradient should automatic be seen on the picture.
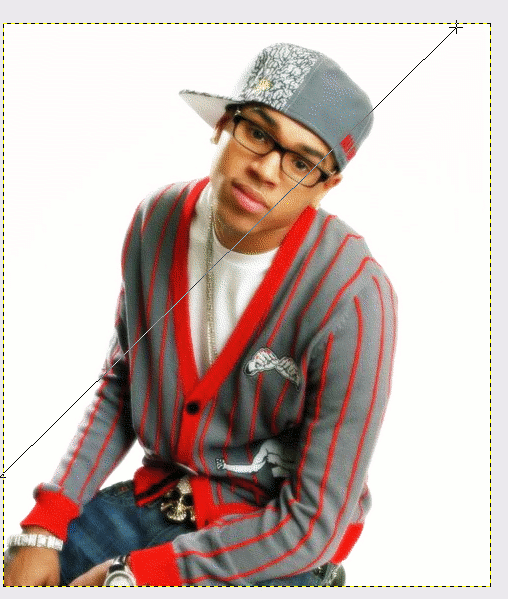
Your final product should look like this:
Enjoy!!!! And if you have any q/a's my email is chena_1991@yahoo.com or just ask me on here. =] buh-bye now.
Okay, so lets start.......
Here's our before:
And here's our final result:
Awesome isn't it, anyways.........
*Step 1: Open the pic you want to work on.
*Step 2: Duplicate the layer of your pic.
*Step 3: Go to Filters> Blur> Gaussian Blur and set it to 7.0.
*Step 4: Go to your layers dialog and set the mode to Screen and set the opacity to 72.6%.
*Step 5: Duplicate the layer again and set the layer mode to overlay w/ the opacity of 100%.
*Step 6: Click on the gradient tool on the gimp toolbox and make your gradient settings look like this:
*Step 7: Click on the background and foreground color tool:
.........then change the color to whatever you want to work with. I chose red.
*Step 8: Make a diagonal at the middle of the picture and the gradient should automatic be seen on the picture.
Your final product should look like this:
Enjoy!!!! And if you have any q/a's my email is chena_1991@yahoo.com or just ask me on here. =] buh-bye now.
Tutorial Comments
Showing latest 2 of 2 comments

Its called gimp. Its kinda like photoshop.
http://www.gimp.or g/
By Maccabee on Jan 29, 2009 11:46 am

I really like this.
what's the software?
where and how do i download?
By kelloveb0on on Feb 29, 2008 12:17 am