Tutorial
Click on thumbnailed images to enlarge
**NOTE**
I did this tutorial in Photoshop CS3 Extended which is why some of you may have problems. However, that does't mean this tutorial won't work in other versions of Photoshop. Just try it out.
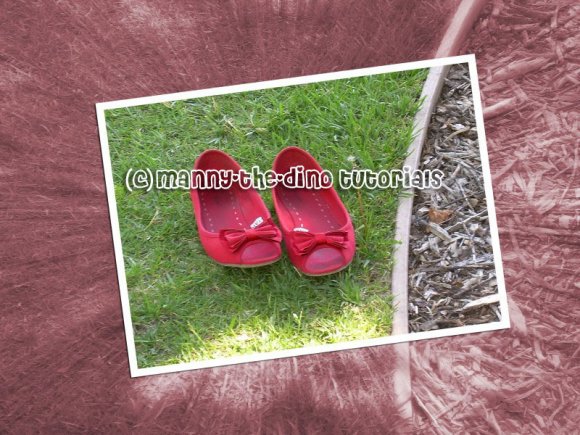
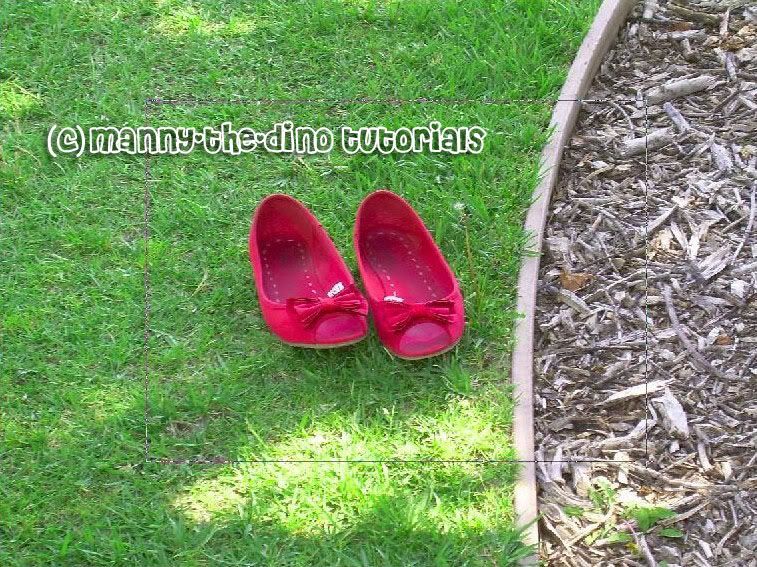
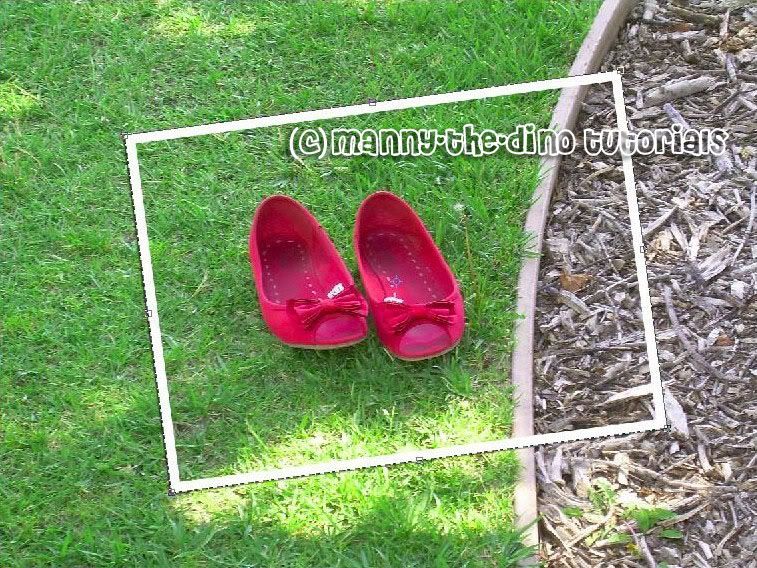
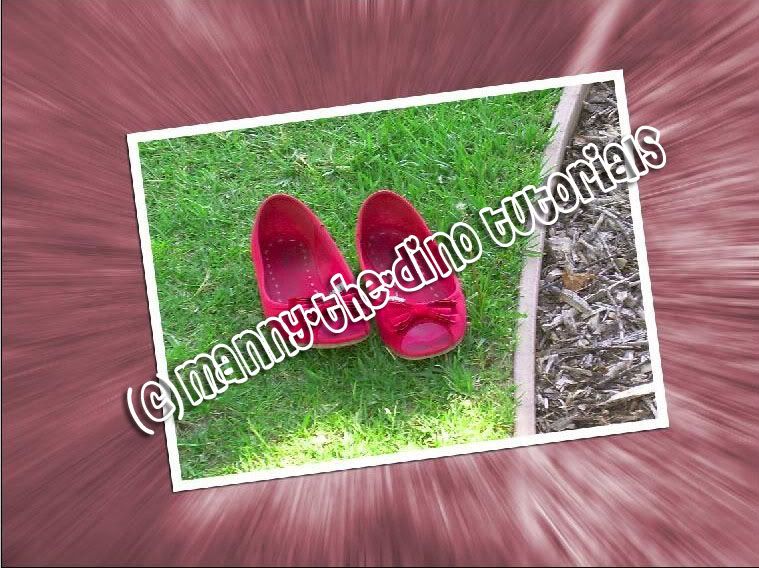
Want a really cool "photo within a photo" effect? Well you've come to the right place, my darling! :) I'm going to be using a picture I took of of my shoes. Here's the before:

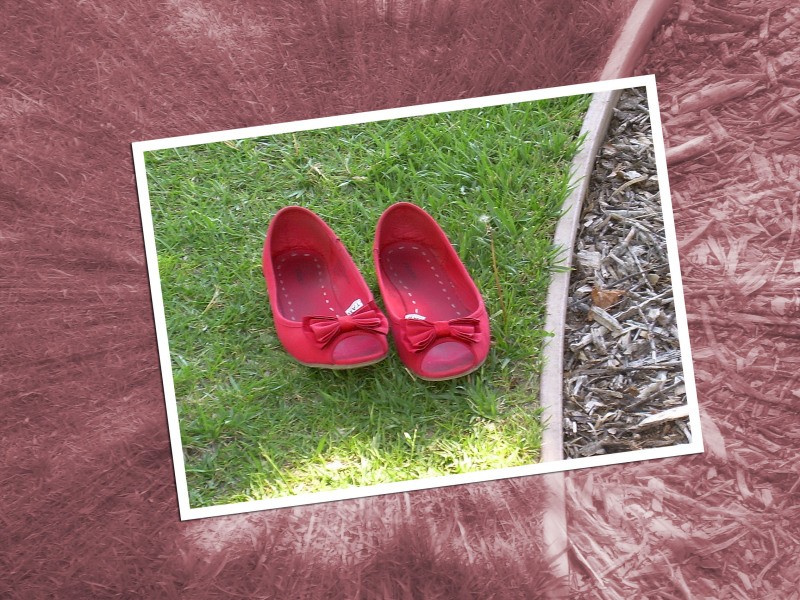
Here's the after:

Go!
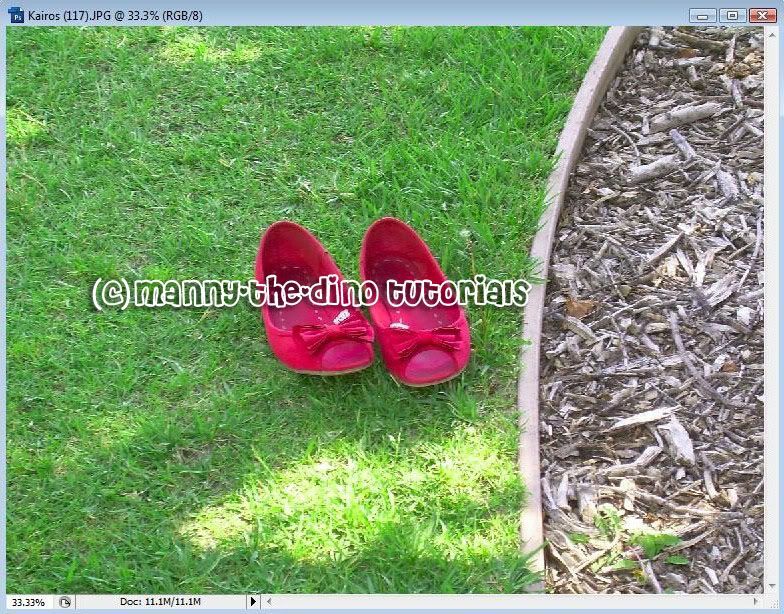
001.First, open your picture.
002.Do a ctrl+j & rename your layer "Smaller Version".

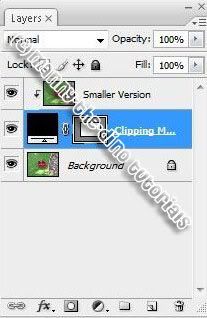
003.With your "Smaller Version" layer selected, hold down ctrl & click on the "Create a New Layer" button. You should get a new layer between your "Smaller Version" & "Background" layers. Rename it "Clipping Mask".
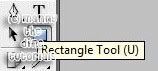
004.Select your Rectangle Tool (U).
005.Make a rectangle around the object you want to put emphasis on. In my photo, I chose to do my shoes.
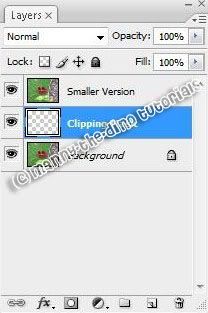
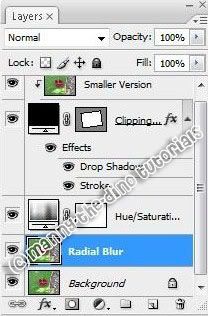
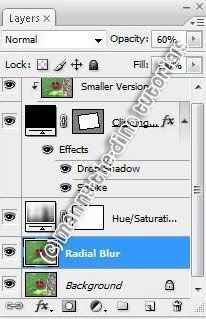
006.Now it's time to clip 2 layers together. In order to do that, hold down alt in-between your "Smaller Version" & "Clipping Mask" layer. You should see an arrow with 2 little circles showing. Once you see that, click your mouse. Your layers should now look like this:
007.With your "Clipping Mask" layer select, double click it. The Layer Style pop-up should come up. Check off Stroke & apply the following settings:
Size: 30px (this part depends on your picture)
Position: Inside
Blend Mode: Normal
Opacity: 100%
Fill Type: Color
Color: #ffffff
**DON'T PRESS OK YET
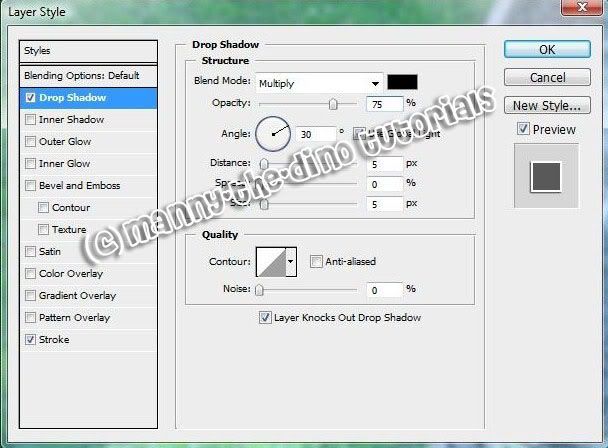
008.Now go to the part where it says Drop Shadow & apply the following settings:
Blend Mode: Multiply
Opacity: 75%
Angle: 30
Distance: 5
Spread: 0
Size: 5
009.Now you can press ok. Then do a ctrl+t & turn your picture at an angle if you'd like.
010.Select your Eyedropper Tool (I).
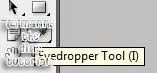
011.Use your Eyedropper Tool to take a sample from inside your smaller picture. In my example I did a part of my shoes. Once you have taken the sample, the color should appear as your foreground color in your Foreground & Background Colors.

012.Now with your "Background" layer selected, click on the "Create New Fill or Adjustment Layer" button & choose "Hue/Saturation".
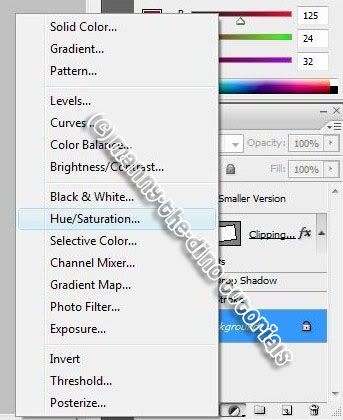
013.When the pop-up appears, check the "Colorize" box.

014.Your picture should look like this, depending on your color:

015.Now select your "Background" layer, do a ctrl+j & rename the layer "Radial Blur".
016.Go Filter>Blur>Radial Blur.

017.Enter 40 as your amount, Zoom as your Blur Method, & Best as your Quality. Oh yeah & make sure to click on the center of the little Blur Center box there. The red dot indicates where you should click on it.

018.After pressing ok, your picture should look like this:
019.If the radial blur is too intense for your liking, bring the opacity down to 60%.
020.And there you have your final product, my love! Enjoy!! :)
If you got lost or have any questions, comment the tutorial & I'll get back to you as soon as I can. :D
I did this tutorial in Photoshop CS3 Extended which is why some of you may have problems. However, that does't mean this tutorial won't work in other versions of Photoshop. Just try it out.
Want a really cool "photo within a photo" effect? Well you've come to the right place, my darling! :) I'm going to be using a picture I took of of my shoes. Here's the before:
Here's the after:
Go!
001.First, open your picture.
002.Do a ctrl+j & rename your layer "Smaller Version".
003.With your "Smaller Version" layer selected, hold down ctrl & click on the "Create a New Layer" button. You should get a new layer between your "Smaller Version" & "Background" layers. Rename it "Clipping Mask".
004.Select your Rectangle Tool (U).
005.Make a rectangle around the object you want to put emphasis on. In my photo, I chose to do my shoes.
006.Now it's time to clip 2 layers together. In order to do that, hold down alt in-between your "Smaller Version" & "Clipping Mask" layer. You should see an arrow with 2 little circles showing. Once you see that, click your mouse. Your layers should now look like this:
007.With your "Clipping Mask" layer select, double click it. The Layer Style pop-up should come up. Check off Stroke & apply the following settings:
Size: 30px (this part depends on your picture)
Position: Inside
Blend Mode: Normal
Opacity: 100%
Fill Type: Color
Color: #ffffff
**DON'T PRESS OK YET
008.Now go to the part where it says Drop Shadow & apply the following settings:
Blend Mode: Multiply
Opacity: 75%
Angle: 30
Distance: 5
Spread: 0
Size: 5
009.Now you can press ok. Then do a ctrl+t & turn your picture at an angle if you'd like.
010.Select your Eyedropper Tool (I).
011.Use your Eyedropper Tool to take a sample from inside your smaller picture. In my example I did a part of my shoes. Once you have taken the sample, the color should appear as your foreground color in your Foreground & Background Colors.
012.Now with your "Background" layer selected, click on the "Create New Fill or Adjustment Layer" button & choose "Hue/Saturation".
013.When the pop-up appears, check the "Colorize" box.
014.Your picture should look like this, depending on your color:
015.Now select your "Background" layer, do a ctrl+j & rename the layer "Radial Blur".
016.Go Filter>Blur>Radial Blur.
017.Enter 40 as your amount, Zoom as your Blur Method, & Best as your Quality. Oh yeah & make sure to click on the center of the little Blur Center box there. The red dot indicates where you should click on it.
018.After pressing ok, your picture should look like this:
019.If the radial blur is too intense for your liking, bring the opacity down to 60%.
020.And there you have your final product, my love! Enjoy!! :)
If you got lost or have any questions, comment the tutorial & I'll get back to you as soon as I can. :D
Tutorial Comments
Showing latest 10 of 27 comments

i got lost at part 6 :(
By x--mariel on Aug 25, 2008 2:39 pm

awesome! i love it. i did this to a picture of my best friend and me in dresses and it looks totally amazing. thanks :D!
By musiccismylifee on Jul 30, 2008 11:28 pm

great tutorial! thanks so much.
By eyfidelity on Jul 13, 2008 2:29 pm

i don't understand step 6. i do what you say but it doesn't show what you show on the clipping mask part.
By NYC-LOVE on Jul 11, 2008 11:02 am

awesome! i love it! thanks
By mecavulnerable on Jul 9, 2008 10:41 am
Awesome Tutorial!
By 9ii6yhunglaydee on Jul 8, 2008 6:07 pm

omg love it dude!
By purpleKat on Jun 23, 2008 5:52 pm
Ahhhmazing :] i loved it!
By AngeAutopsy on Jun 12, 2008 12:12 am

i love this so much!
By miraamad on Jun 11, 2008 3:06 pm
AWWWWWWESOME tut! I looove it :P
By Nichole06 on May 17, 2008 2:34 pm
Tutorial Details
| Author |
manny-the-dino
|
| Submitted on | Nov 29, 2007 |
| Page views | 30,981 |
| Favorites | 211 |
| Comments | 27 |
| Reviewer |
Insurmountable
|
| Approved on | Nov 29, 2007 |