Tutorial
Click on thumbnailed images to enlarge
**NOTE**
I did this tutorial in Photoshop CS3 Extended which is why some of you may have problems. However, that does't mean this tutorial won't work in other versions of Photoshop. Just try it out.
Would you like for there to be a focus with light in your photos? Well now you can do that effect with my tutorial. Here's the before:

Here's the after:

Let's begin!
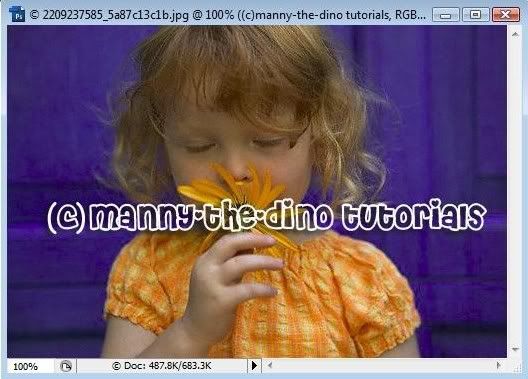
001.First, open up your picture.
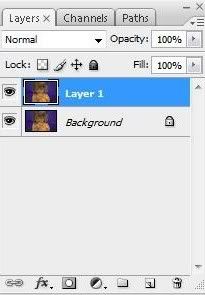
002.Next do a ctrl+j.
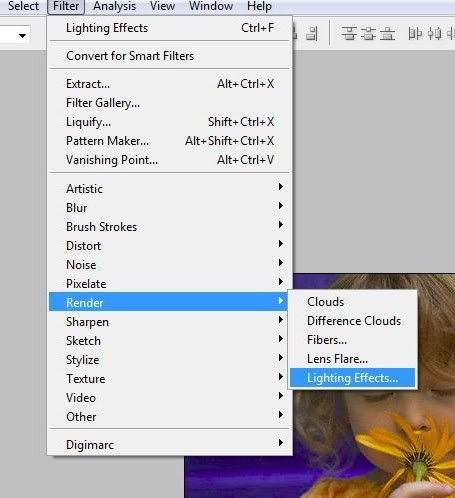
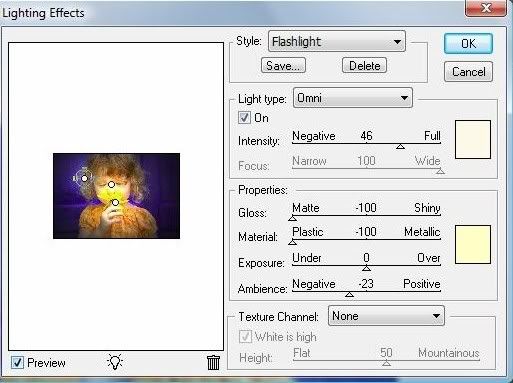
003.Now go Filter>Render>Lighting Effects.
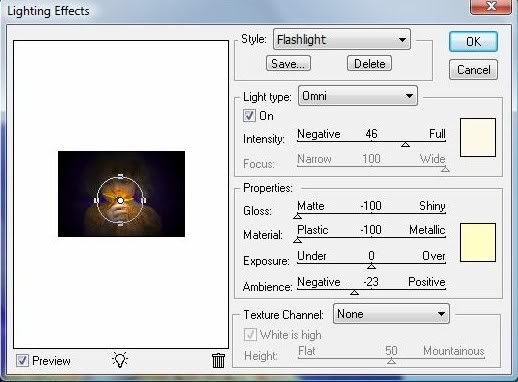
004.Apply the following settings:
Style: Flashlight
Intensity: 46
**Make sure the center of the spot of where you want the light to come from is placed where you want it to be Also make the circle bigger, if you'd like. DO NOT PRESS OK YET.
005.If you want to bring attention to another part of your picture, go ahead. You can do that by holding down Alt & clicking on the center of the circle & moving it to another spot. Also, make the circle smaller.

006.You can add more attention to more spots if you'd like.
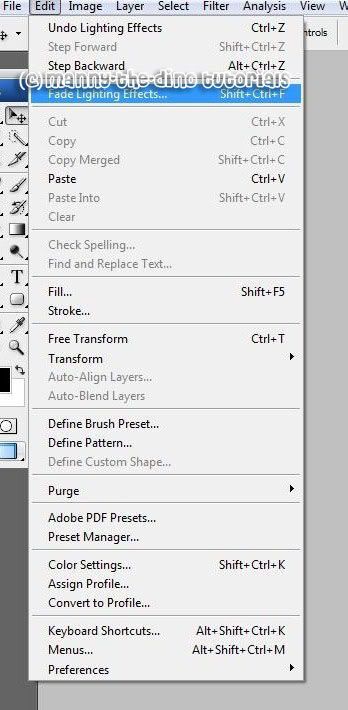
007.Now go Edit>Fade Lighting Effects.
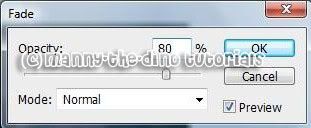
008.Enter 80% as your opacity.
009.And there you have it. You're done!

If you got lost or have any questions, comment the tutorial & I'll get back to you as soon as I can. :D
I did this tutorial in Photoshop CS3 Extended which is why some of you may have problems. However, that does't mean this tutorial won't work in other versions of Photoshop. Just try it out.
Would you like for there to be a focus with light in your photos? Well now you can do that effect with my tutorial. Here's the before:

Here's the after:

Let's begin!
001.First, open up your picture.

002.Next do a ctrl+j.

003.Now go Filter>Render>Lighting Effects.

004.Apply the following settings:
Style: Flashlight
Intensity: 46
**Make sure the center of the spot of where you want the light to come from is placed where you want it to be Also make the circle bigger, if you'd like. DO NOT PRESS OK YET.

005.If you want to bring attention to another part of your picture, go ahead. You can do that by holding down Alt & clicking on the center of the circle & moving it to another spot. Also, make the circle smaller.

006.You can add more attention to more spots if you'd like.

007.Now go Edit>Fade Lighting Effects.

008.Enter 80% as your opacity.

009.And there you have it. You're done!

If you got lost or have any questions, comment the tutorial & I'll get back to you as soon as I can. :D
Tutorial Comments
Showing latest 7 of 7 comments

Oh, I like this more than using the vignette in Lens Correction!
By TheOn3LeftBehind on Aug 15, 2008 9:30 pm
Nice.
ii love this Tut.
By 9ii6yhunglaydee on Jul 8, 2008 4:34 pm
yeeeeeyy i did it!!!! awesome!! thanks!!
By missk on Apr 22, 2008 3:06 pm
thes is a grat peche
By dilligrout on Feb 24, 2008 7:56 pm
oh wow I hella like this tutorial. awesome i've been looking for tutorials like this.
By shortcake on Dec 9, 2007 10:25 pm
Awesome tut! :) I love it :)
By skywalkers on Dec 6, 2007 9:17 pm
amazing, amazing, amazing, amazinggggg :]
IFREAKINGLOVEYOU!
By takle_monster on Nov 28, 2007 8:42 pm
Tutorial Details
| Author |
manny-the-dino
|
| Submitted on | Nov 28, 2007 |
| Page views | 20,594 |
| Favorites | 166 |
| Comments | 7 |
| Reviewer |
S-Majere
|
| Approved on | Nov 28, 2007 |


