Tutorial
Click on thumbnailed images to enlarge
Ok,im gonna teach you how to make what I call a starburst.You can use it on some of your skins.
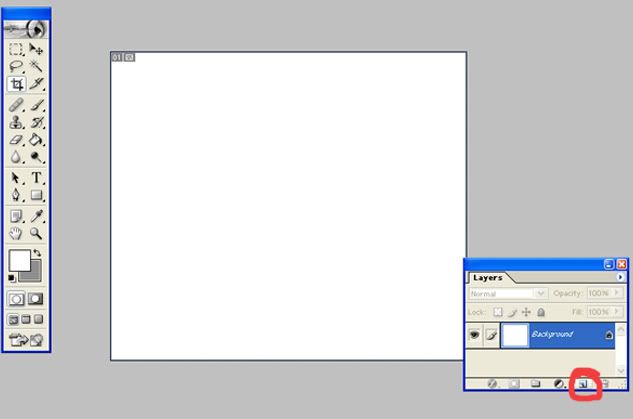
Step 1 : First, open up a new document in photoshop.You can make it any size you want.Then select layer>new>layer.Or you can open up the layers window and click the button that I have circled in red.
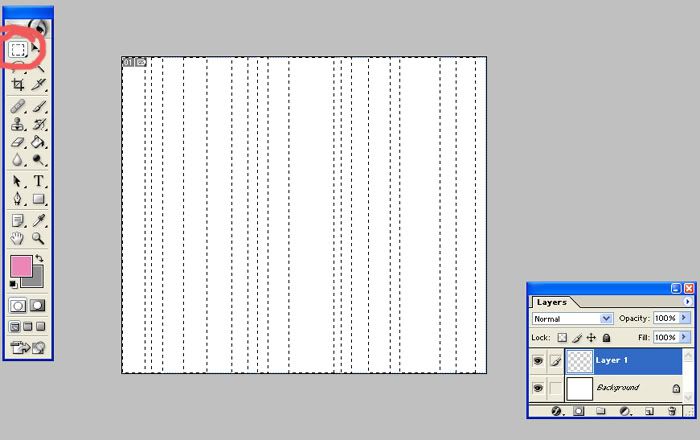
step 2 : then pick a forground color,I have chosen pink.then take the Rectangular Marquee tool and make a few lines while holding down shift.(tip : make one line before holding down shift to do the others)
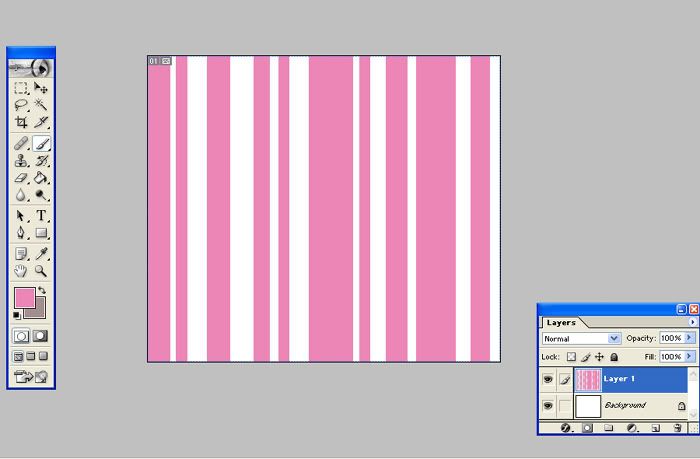
step 3 : then press alt+backspace to fill in the color you selected,then press ctrl+D to deselect.
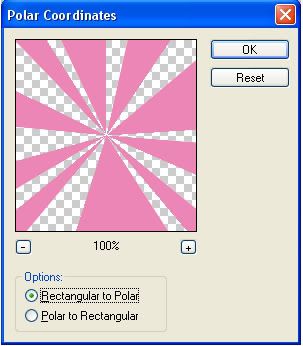
step 4 : the go to filter>distort>polar cordinates.then choose rectangular to polar.
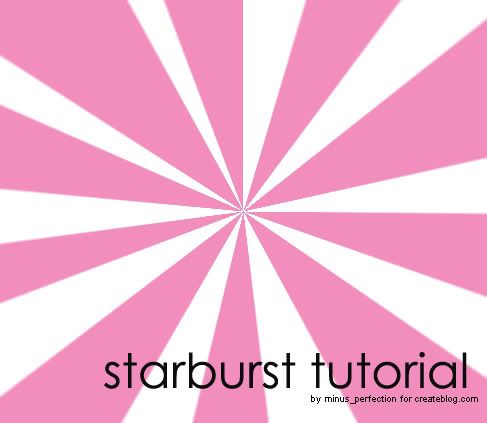
there you go! very easy! of course some of them turn out better than others.its better when you dont make very big lines.

Step 1 : First, open up a new document in photoshop.You can make it any size you want.Then select layer>new>layer.Or you can open up the layers window and click the button that I have circled in red.

step 2 : then pick a forground color,I have chosen pink.then take the Rectangular Marquee tool and make a few lines while holding down shift.(tip : make one line before holding down shift to do the others)

step 3 : then press alt+backspace to fill in the color you selected,then press ctrl+D to deselect.

step 4 : the go to filter>distort>polar cordinates.then choose rectangular to polar.

there you go! very easy! of course some of them turn out better than others.its better when you dont make very big lines.
Tutorial Comments
Showing latest 4 of 4 comments

cool and simple! thanks.
By blousey on Feb 1, 2008 9:31 am
Thankkss!
By laylay2007 on Jan 18, 2008 12:26 pm
confused lol help
By kiwi200750 on Jan 1, 2008 3:07 pm
whenever i try to do the polar thing..a thing pops up and says not enough RAM and i have plenty of that! help!
By designerblonde08 on Sep 10, 2007 6:26 pm
Tutorial Details
| Author |
minus_perfection
|
| Submitted on | Feb 10, 2006 |
| Page views | 27,575 |
| Favorites | 106 |
| Comments | 4 |