Tutorial
Click on thumbnailed images to enlarge
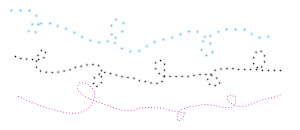
like dotted lines? such as:
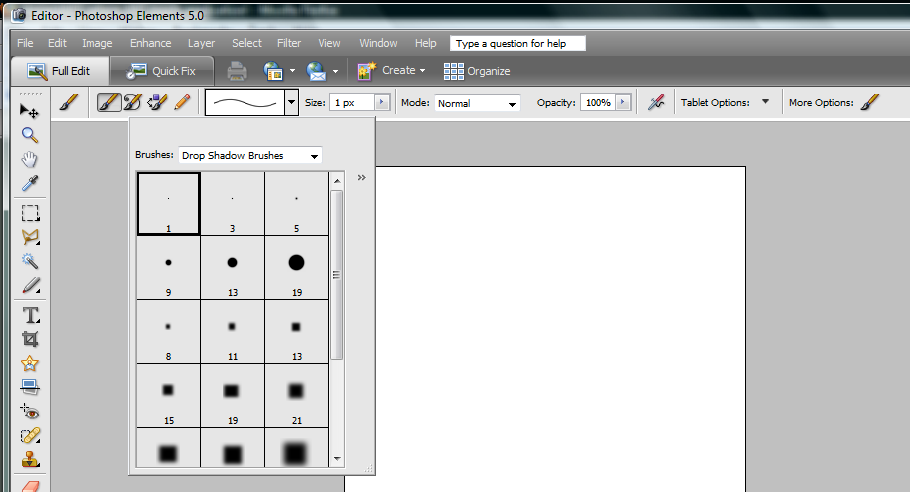
choose a brush, preferably the 1px drop shadow brush:
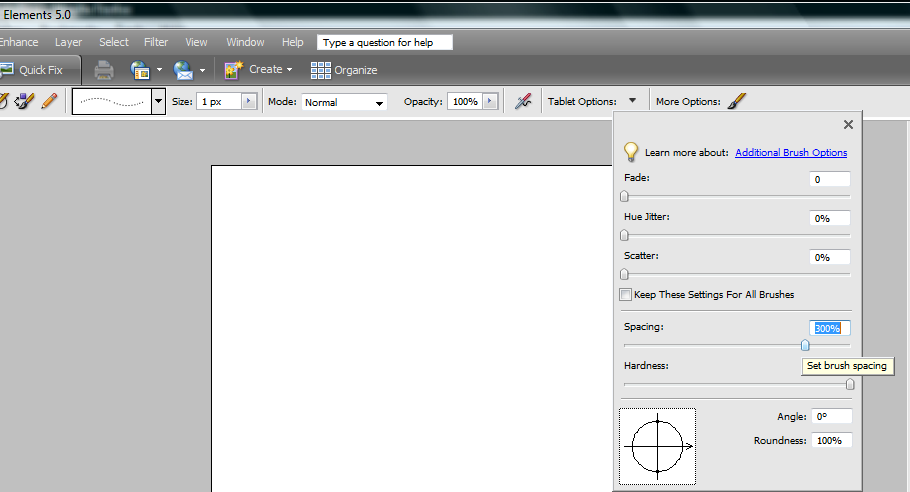
next click the 'more options', and set your settings as shown: only change the spacing to 300%
then start drawing, because you are done :D
choose a brush, preferably the 1px drop shadow brush:
next click the 'more options', and set your settings as shown: only change the spacing to 300%
then start drawing, because you are done :D
Tutorial Comments
Showing latest 6 of 6 comments

Can you do this with Adobe Photoshop too?
By MiissYER on Mar 29, 2010 8:32 pm

@MiissYER You can get it at basically any computer store with a wide range of software. You can get the newest version at best buy for about $100 or $70-$90 at super wal-marts
By xxpinkpoplegendxx on Mar 14, 2010 9:00 pm
Where can i get this program?
By MiissYER on Mar 1, 2010 4:13 pm

Oh so fabulous! And it works on Elements 4! Definitely a life saver, thanks :D Now I'm going to go crazy adding this to textures!
By calicreations on Apr 18, 2008 3:25 am
this is a great tutorial but how do you make dashed lines?
By blueyes003 on Mar 5, 2008 12:48 am

oh man thank you so much for having thisss. i've been trying to find a tutorial for photoshop 5.0 :D
By ExoticxYen on Oct 3, 2007 8:31 pm
Tutorial Details
| Author |
eeekmichelle
|
| Submitted on | Aug 25, 2007 |
| Page views | 17,943 |
| Favorites | 27 |
| Comments | 6 |
| Reviewer |
themarkster
|
| Approved on | Aug 28, 2007 |