Tutorial
Click on thumbnailed images to enlarge
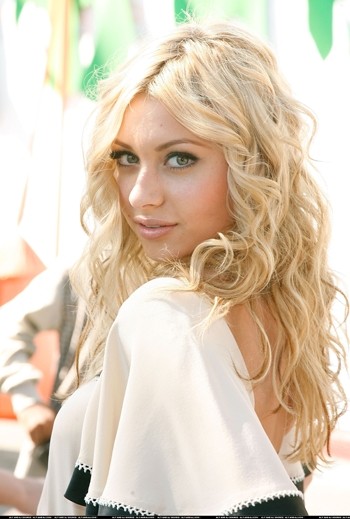
1.) Choose your picture. I will be using a picture of Aly Michalka. **It will work BEST if your picture is in HQ.If it is in HQ and it's too big, such as mine, resize it, like I did.**
2.) Duplicate your picture. Layer>>Duplicate Layer.
3.) Sharpen your picture 2-3 times.
Before & After;
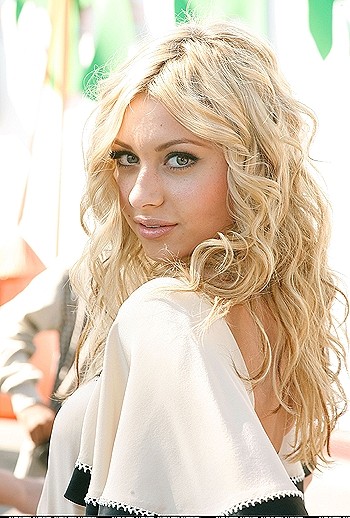
As you can see, the before&&after pictures are very different. When you sharpen your picture, the makeup such as the lipgloss pops out more and her eyes definitely pop out more. It looks quite blurred in comparison.
4.)Like I said, sharpening your picture makes your picture pop, which sort of makes unnoticable things actually noticed. In the picture, Aly has some blemishes or freckles that I would like to take out, so to get rid of it, I'm going to use the blur tool and blur her face. Do not blur her lips or eyes! Only her face!
Before & After;
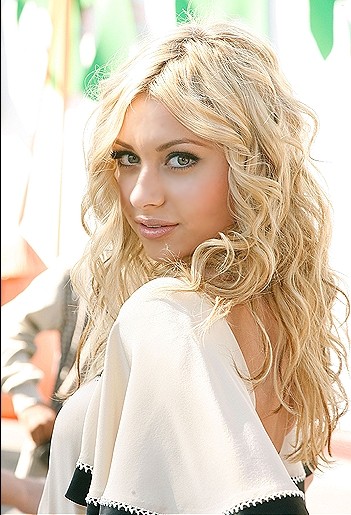
So as you can see, I've cleared her face with the handy blur tool and now her face looks smooth and beautiful.
5.) Now, this picture is beautifully taken and it's taken outside, but I want it to be brighter. So, if your picture is somewhat similiar to mine, change the blending option. In your Layers toolbox, where it says "Normal" click it and go down to "Screen". Your picture now should be brighter, but if it's TOO bright, change the opacity. I changed mine to 50%. Your picture should look somewhat like mine.
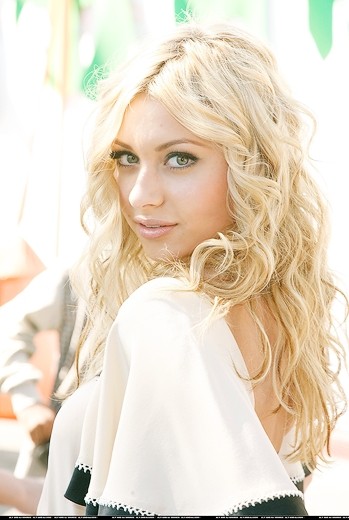
6.) This step is optional, but I enjoy doing it to make my picture cool. 8) I don't know of Photoshop under CS has this, but you guys can try.
I'm adding effect by going to Filter>Render>Lens Flare. I put my brightness to 128% and moved the lens flare to her hair.
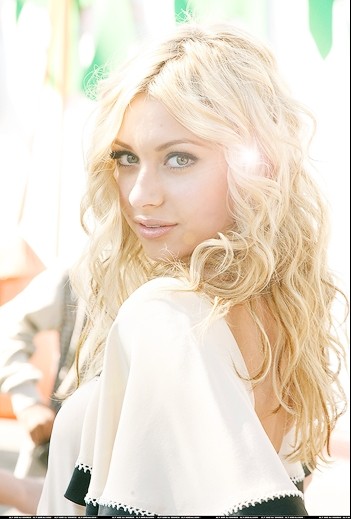
Final product;
Hope you enjoyed this tutorial, if any questions, PM me!
Tutorial Comments
Showing latest 10 of 18 comments

It's a good tut, But it's not like you can see her skin at the end with the glare Hah

I just started using Photoshop and all the tutorials were confusing but I LOVE THIS ONE! Thank you!!!
photoshop 7.0 has lense flare

THANK YOU THANK YOU THANK YOU! UR A LIFE SAVER :]

I really liked this tutorial. It's simple and gives you great results. Honestly i tried everything with curves and all but curves is seriously annoying considering that one minute ive got grey lips and purple hair n the next my picture is completely BLAH. Thanks heaps 4 this tutorial. Made my whole time so much easier!!
Thank you black beauty, you sharpen your picture by going to Filter>Sharpen>Sharpen.

this is an excellent turtorial!! and it wasnt so complicated as the other retouching one!
how do you sharpen your picture?
Thanks for the comments, your welcome everyone. Lildarkangel, I agree with you, people overanalyze things way too much. Ladiibeautiful, if you have any problems, you can just message me but it's basically what stormbringer said.

just take the blur tool and a soft brush and blur everywhere but her eyes and her lips. If thats to hard, zoom in and blur.
Tutorial Details
| Author |
xmina
|
| Submitted on | Jul 26, 2007 |
| Page views | 39,905 |
| Favorites | 116 |
| Comments | 18 |
| Reviewer |
alovesopure
|
| Approved on | Aug 1, 2007 |