Tutorial
Click on thumbnailed images to enlarge
The font i use is Digs my Heart
here's how to make the pattern
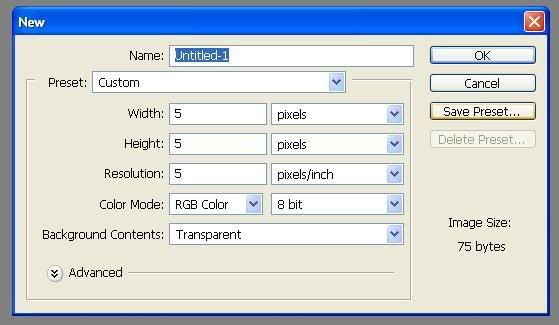
go to file>new and set the settings to this exactly
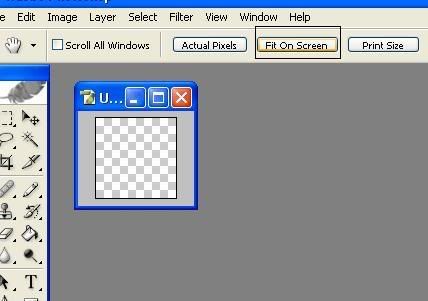
click on the hand tool above your foreground and background colors.

now click on fit to screen
The font i use is Digs my Heart
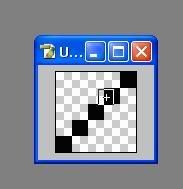
go to your pencil tool, if you can't find it right click on your brush tool and you'll see it there.

now make a diagonal line...
go to edit>define pattern

and there's your pattern.
The font i use is Digs my Heart
Start off with your text.
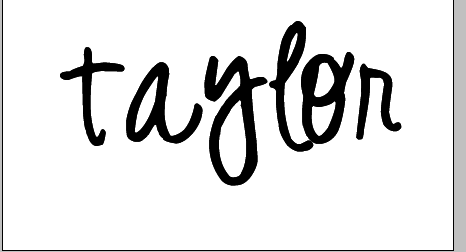
Then duplicate the layer.
Go back to the origional layer.
Right click on the layer and click on blending options.
apply these settings.
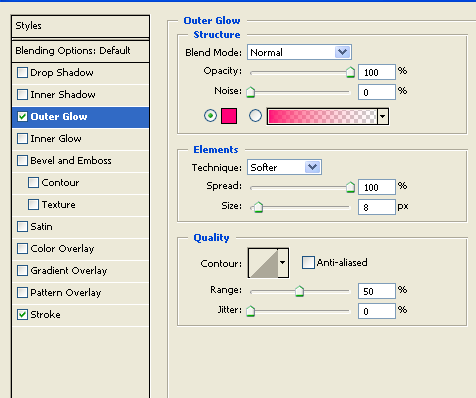
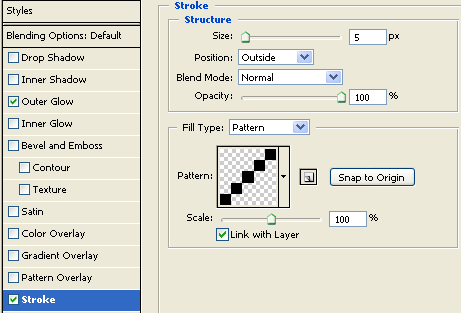
now go to your duplicated layer and apply this setting.
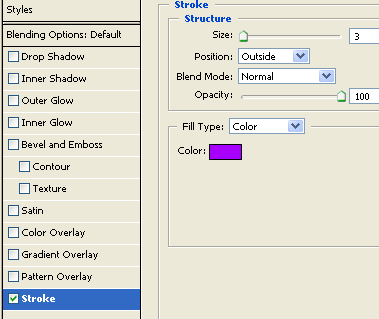
and voila. You're done.

here's how to make the pattern
go to file>new and set the settings to this exactly

click on the hand tool above your foreground and background colors.

now click on fit to screen

The font i use is Digs my Heart
go to your pencil tool, if you can't find it right click on your brush tool and you'll see it there.

now make a diagonal line...

go to edit>define pattern

and there's your pattern.
The font i use is Digs my Heart
Start off with your text.

Then duplicate the layer.
Go back to the origional layer.
Right click on the layer and click on blending options.
apply these settings.


now go to your duplicated layer and apply this setting.

and voila. You're done.

Tutorial Comments
Showing latest 10 of 47 comments

hmm weird.. the pictures show for me. idk why u cant see them
By smashedcodes on Dec 17, 2010 9:55 pm
cant see shit anymore.
By NoWorriesDesigns on Feb 1, 2010 1:15 am
wished the pictures showed up...
i would really like to do this tutorial.
(:
By xoxomochaxoxo on Dec 19, 2009 11:14 am
ahhh got it.
By NoWorriesDesigns on Sep 22, 2009 7:18 pm
i get lost after i'm supposed to define the pattern. help! i have pse7
By qeekd on Sep 7, 2009 4:28 pm
love it!
favorited :)
By Lauren-Greenie-Bean on Aug 4, 2009 4:16 pm
does this work on photoshop 7?
PLEASE HELP D:
By FuhreshhhFashoo on Jul 30, 2009 4:59 pm
whats the name of the text .
By LADiiSOULJA3 on May 9, 2009 10:19 am
oh nvm
By vixenityy on Dec 6, 2008 9:30 pm
hey i dont see define pattern on mine
its photoshop cs4 is that the reason??
also my blending options are veryyyy different from yours
By vixenityy on Dec 6, 2008 8:32 pm
Tutorial Details
| Author |
smashedcodes
|
| Submitted on | Jan 17, 2008 |
| Page views | 31,294 |
| Favorites | 256 |
| Comments | 47 |
| Reviewer |
S-Majere
|
| Approved on | Jan 18, 2008 |


