Tutorial
Click on thumbnailed images to enlarge
**NOTE**
I did this tutorial in Photoshop CS3 Extended which is why some of you may have problems. However, that does't mean this tutorial won't work in other versions of Photoshop. Just try it out.
Want to learn how to make a sheet of notebook paper? Well now you can. Just follow my tut. Here is my final result:

Let's being, shall we?
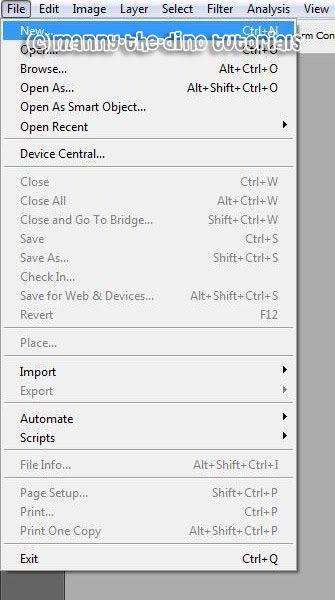
001.Open photoshop & go File>New.
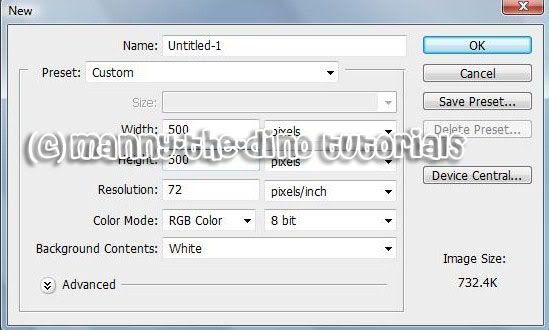
002.Make a document that's 500 x 500 pixels.
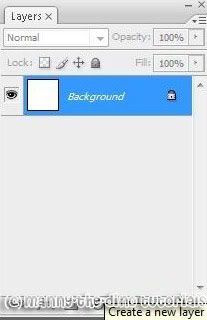
003.Create a new layer.
004.Select your Rectangle Tool (U).

005.Change your foreground to #999494 & click & drag to draw your note paper shape.

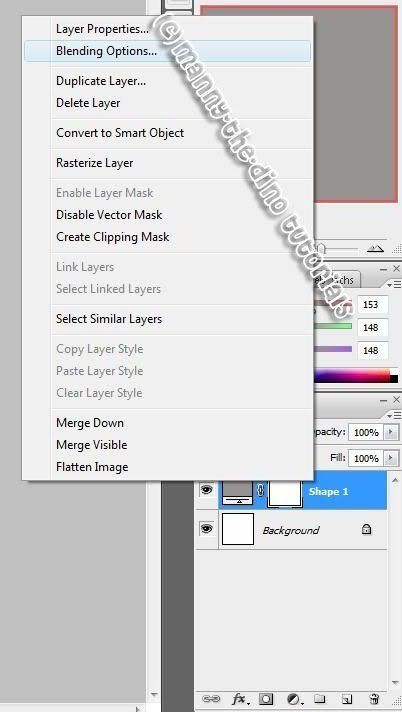
006.With your "Shape 1" layer selected, right click on it & select "Blending Options".
007.Go to the "Pattern Overlay" section, click on the arrow where the pattern shows up, then click the other arrow & select "Color Paper".
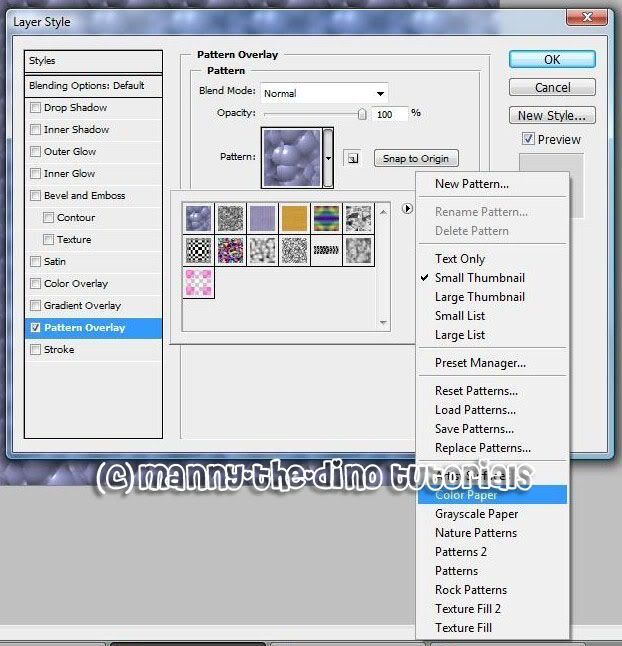
008.Then select the "Notebook" pattern.
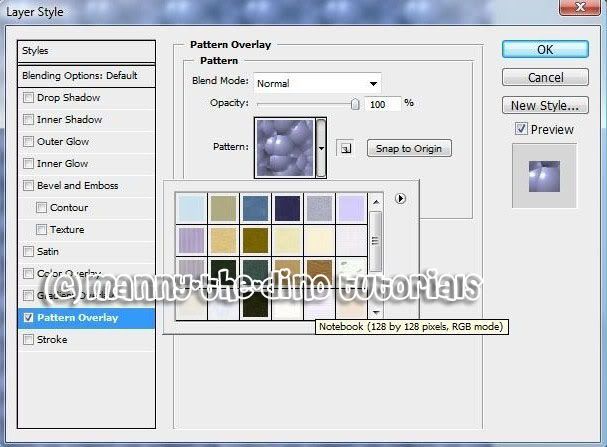
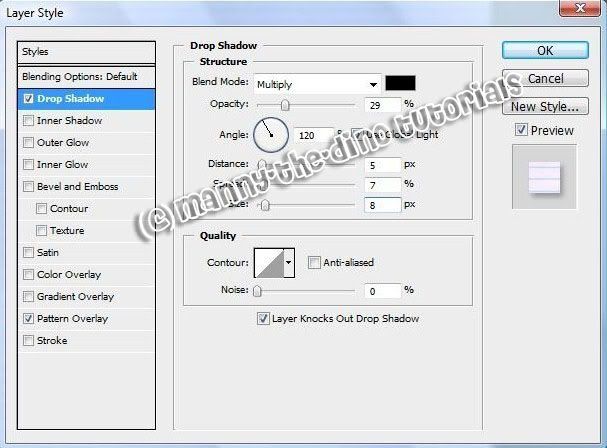
009.Go to the "Drop Shadow" section & apply the following settings:
Blend Mode: Multiply
Color: Black
Opacity: 29%
Angle: 120
Distance: 5
Spread: 7
Size: 8
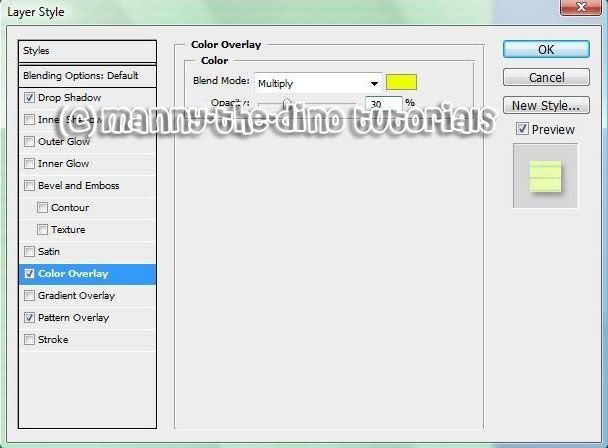
010.Now go to the "Color Overlay" section & apply the following settings:
Blend Mode: Multiply
Color: Yellow
Opacity: 30%
011.Now go to your "Stroke" section & apply the following settings:
Size: 1
Position: Inside
Blend Mode: Hard Light
Opacity: 45%
Filly Type: Color
Color: Black
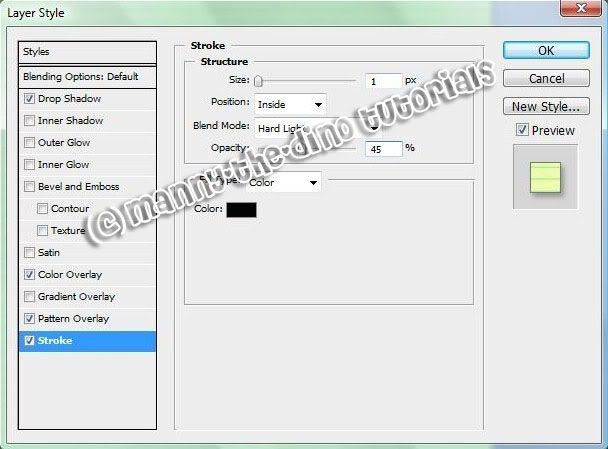
012.There is your notebook paper.

013.You can add some text & shape afterwards to make it look better.

If you got lost or have any questions, comment the tutorial & I'll get back to you as soon as I can. :D
I did this tutorial in Photoshop CS3 Extended which is why some of you may have problems. However, that does't mean this tutorial won't work in other versions of Photoshop. Just try it out.
Want to learn how to make a sheet of notebook paper? Well now you can. Just follow my tut. Here is my final result:

Let's being, shall we?
001.Open photoshop & go File>New.

002.Make a document that's 500 x 500 pixels.

003.Create a new layer.

004.Select your Rectangle Tool (U).

005.Change your foreground to #999494 & click & drag to draw your note paper shape.

006.With your "Shape 1" layer selected, right click on it & select "Blending Options".

007.Go to the "Pattern Overlay" section, click on the arrow where the pattern shows up, then click the other arrow & select "Color Paper".

008.Then select the "Notebook" pattern.

009.Go to the "Drop Shadow" section & apply the following settings:
Blend Mode: Multiply
Color: Black
Opacity: 29%
Angle: 120
Distance: 5
Spread: 7
Size: 8

010.Now go to the "Color Overlay" section & apply the following settings:
Blend Mode: Multiply
Color: Yellow
Opacity: 30%

011.Now go to your "Stroke" section & apply the following settings:
Size: 1
Position: Inside
Blend Mode: Hard Light
Opacity: 45%
Filly Type: Color
Color: Black

012.There is your notebook paper.

013.You can add some text & shape afterwards to make it look better.

If you got lost or have any questions, comment the tutorial & I'll get back to you as soon as I can. :D
Tutorial Comments
Showing latest 7 of 7 comments

how do you shape the sheet of notebook paper after you made it??
By lilrochelle5855 on Jul 27, 2009 9:05 pm
loved it!
By lilrochelle5855 on Jul 25, 2009 11:22 pm
when and how did "shape 1" layer came in??
By preciOusOne89 on Apr 1, 2009 3:05 pm
I don't have that paper pattern?
By Carinasan on Aug 31, 2008 5:56 pm
im sorry but you havnt told us how to get the shape 1 layer...
By jodi67 on Jul 8, 2008 9:00 pm
cute.
By xkrisxo on May 23, 2008 12:00 am
nice.
By turnupthevolume on Dec 23, 2007 5:26 pm
Tutorial Details
| Author |
manny-the-dino
|
| Submitted on | Nov 19, 2007 |
| Page views | 37,741 |
| Favorites | 90 |
| Comments | 7 |
| Reviewer |
SinfullySweet
|
| Approved on | Nov 19, 2007 |


