Tutorial
Click on thumbnailed images to enlarge
Before

After

So first, open your image.
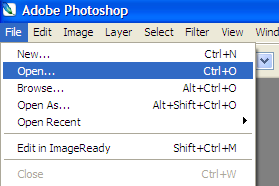
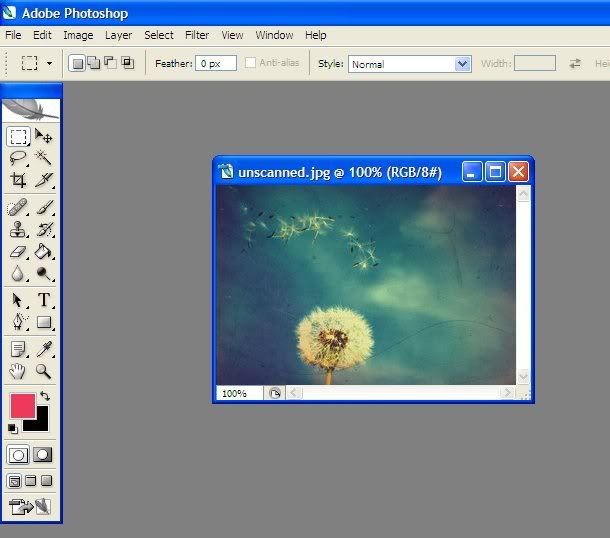
We used this vntage picture of a dandelion.
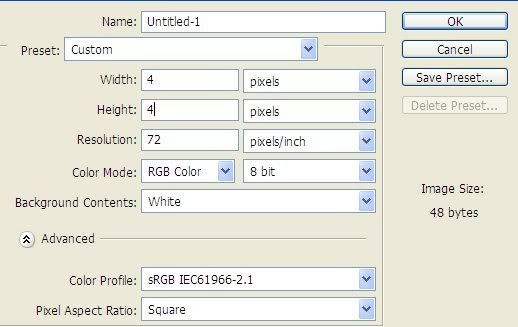
But before doing anything to that picture, we have to create our scanline pattern. So, open a NEW image. And follow my settings:
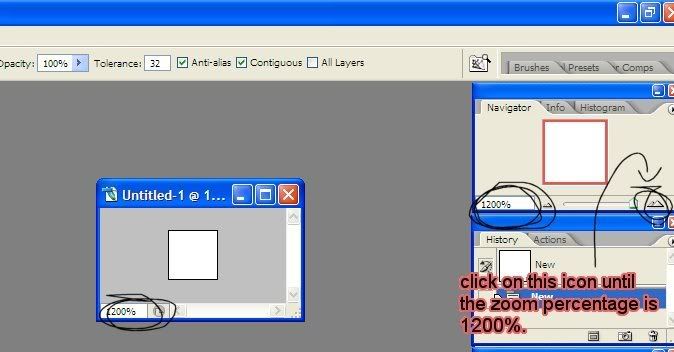
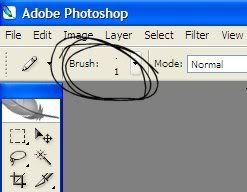
Then, zoom in. To do so, just change the settings in the navigator window at the top right corner. And do as said:
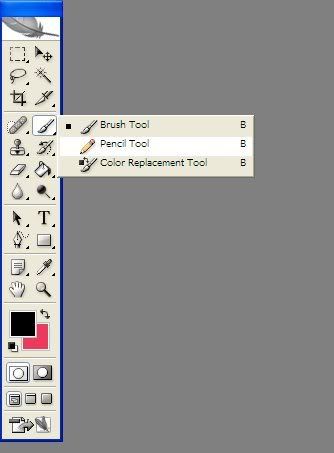
Next, go to the toolbar. Right click on the PAINTBRUSH tool, and select the Pencil tool.
Now, you have to change the brush size. Make sure it's 1 percent.
With the pencil tool, draw a straight diagonal line across the image.

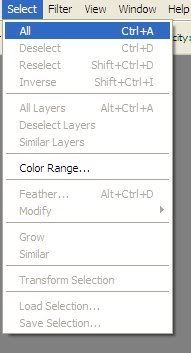
Once you got that done, go to Select >> All.
Then go to Edit >> Define Pattern.
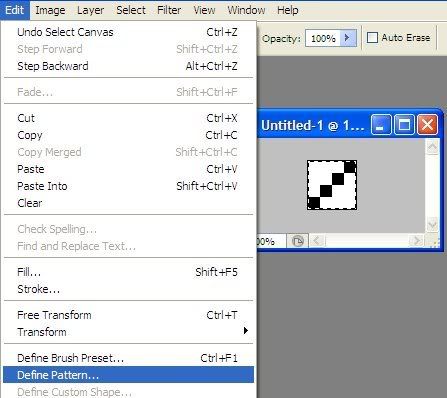
A pop-up will obviously pop-up. Click OK. Okay, so you have your own scanline pattern.
Now, back to our dandelion image. Create a new layer. Press Shift+Ctrl+N. Click OK.
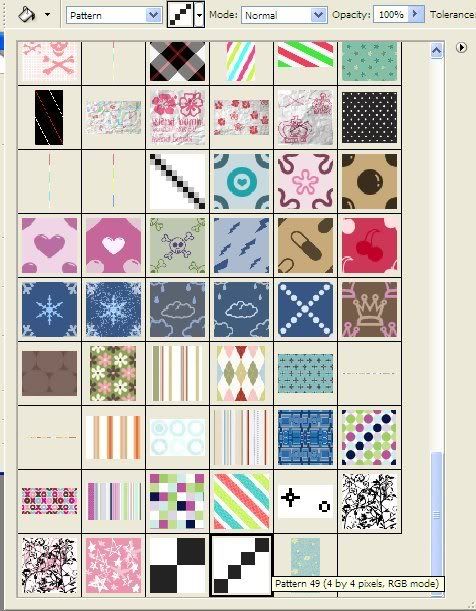
Then fill the layer with the scanline pattern we jsut created. To do so, go to the Paint Bucket Tool.
At the toolbar at the top, there is a little dropdown menu. Choose "Pattern".
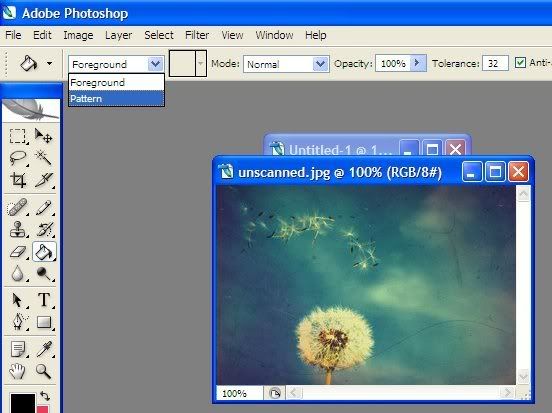
Choose the scanline pattern.
Now select the new layer we had just created, fill it. Now, double click on it, until a pop up pops up.(redundant?)
Match your settings like mine:
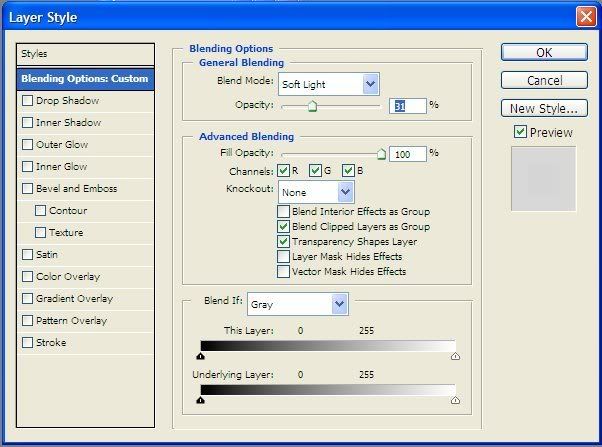
Click OK. Then look at your image now. Ta-da!!
Your outcome:
Hope it helped.
Tutorial Comments
Showing latest 10 of 10 comments

BlueGrunge- If you click on the arrow next to the gradient tool, you get a dropdown menu, just select paintbucket from there :D
nice tutorial! :D

OMG I LOVE the patterns you have!

i have no paintbucket tool..HELP

i use Adobe Photoshop Elements 5.0 and instead of little small lines i get a checkerboard effect.

The lines would be better if the background wasn't white, but transparent. Just a thought. :] Thanks for the tut.
love it ^_^
been wondering how to do this for ages!
x
i can't make a straight diagonal line.

haha, same question as below...
great tutorial.
where did you get all your patterns from?
Nice, but not all of your preview images show up at all. There are some that are just small rectangles, or squares, and show nothing for the tutorial. If you fix that, I might try and do this one.
Tutorial Details
| Author |
broken-doll
|
| Submitted on | Dec 24, 2007 |
| Page views | 25,295 |
| Favorites | 110 |
| Comments | 10 |
| Reviewer |
IVIike
|
| Approved on | Dec 24, 2007 |