Tutorial
Click on thumbnailed images to enlarge
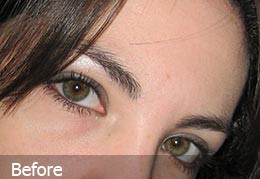
Have you ever seen those pictures of models that have their skin really soft. Photographers have their help with their costly equipment, but not always, often they also rely on simple Photoshop editing techniques to create small but amazingly perceptible alterations
So let's start...
1. Open your image by going to File → Open or press Ctrl + O look for your image and click Open
2. Now press Ctrl + J or drag the Background layer to the Create New Layer button in the layers palette to duplicate that layer
3. Now you should have two layers, the Background layer and Layer 1 layer if you pressed Ctrl + J, or Background copy if you dragged the layer to the Create New Layer button in the layers palette. Double click Layer 1 or Background copy, that is where the name is or right click and choose Layer Properties to change the name of that layer to "Mask"
4. With the Mask layer selected, press the Add Layer Mask button in the layers palette to add our mask
You should have something like this now in your layers palette
A little brief on masks:
•Black = Transparent pixels
•White = Fully opaque pixels
•Gray = Semi-transparent pixels(the darker the gray, becomes more transparent and the lighter becomes more opaque)
•When you create masks in PS it creates it Fully Opaque(White)
5. Since our mask is fully opaque we have to make it transparent, you could do that by pressing Ctrl + Backspace
6. Now before we go to our filter we have to select the image thumbnail in the layers palette. You'll notice that it is selected when it has like a black stroke on the edges

Depending on your image they are different filters that could do the work to achieve this. When working with images you'll notice that not all of them work best or worst for a specific image, so you'll have to play a little with them in order to have the best results. Filters that could do the work are:
Smart Blur or Surface Blur (Filter → Blur → Smart Blur or Surface Blur)
Reduce Noise (Filter → Noise → Reduce Noise)
For this image I'll be working with the Reduce Noise filter
7. So let's go to Filter → Noise → Reduce Noise
8. Play a little with the sliders here, and if you click and hold in the preview pane, you'll see your unfiltered one so that you can compare the original with your filtered
So here are my settings for this image

9. When you have you're desired results click Ok
You'll notice that you wont see no change when you exit the Reduce Noise filter; that is because our mask is still transparent
10. Select your mask in your layers palette by clicking in the mask thumbnail
11. After your mask thumbnail is selected, go to your toolbox and select the Brush tool or press the shortcut B, make sure your foreground color is white, and start painting to reveal the filtered parts on your mask. If for some reason you get lost while painting, you can turn off momentarily the visibility of your Background layer to see what parts you've already painted by clicking in the eyeball next to the thumbnail
 Remember that if you paint something that you shouldn't had painted, you can paint again with black and you'll return to the unfiltered part. Remember also the shortcut X here for switching between the foreground and background colors, in case you'll need to switch while painting
12. So after you've finished painting if everything is good, depending on your image, you're done. But after the filter I noticed that she still had some blemishes in her face, so I fixed that with the Healing Brush tool with a few clicks

(c) The Photoshop Group
So let's start...
1. Open your image by going to File → Open or press Ctrl + O look for your image and click Open
2. Now press Ctrl + J or drag the Background layer to the Create New Layer button
in the layers palette to duplicate that layer3. Now you should have two layers, the Background layer and Layer 1 layer if you pressed Ctrl + J, or Background copy if you dragged the layer to the Create New Layer button in the layers palette. Double click Layer 1 or Background copy, that is where the name is or right click and choose Layer Properties to change the name of that layer to "Mask"
4. With the Mask layer selected, press the Add Layer Mask button
in the layers palette to add our maskYou should have something like this now in your layers palette
A little brief on masks:
•Black = Transparent pixels
•White = Fully opaque pixels
•Gray = Semi-transparent pixels(the darker the gray, becomes more transparent and the lighter becomes more opaque)
•When you create masks in PS it creates it Fully Opaque(White)
5. Since our mask is fully opaque we have to make it transparent, you could do that by pressing Ctrl + Backspace
6. Now before we go to our filter we have to select the image thumbnail in the layers palette. You'll notice that it is selected when it has like a black stroke on the edges
Depending on your image they are different filters that could do the work to achieve this. When working with images you'll notice that not all of them work best or worst for a specific image, so you'll have to play a little with them in order to have the best results. Filters that could do the work are:
Smart Blur or Surface Blur (Filter → Blur → Smart Blur or Surface Blur)
Reduce Noise (Filter → Noise → Reduce Noise)
For this image I'll be working with the Reduce Noise filter
7. So let's go to Filter → Noise → Reduce Noise
8. Play a little with the sliders here, and if you click and hold in the preview pane, you'll see your unfiltered one so that you can compare the original with your filtered
So here are my settings for this image
9. When you have you're desired results click Ok
You'll notice that you wont see no change when you exit the Reduce Noise filter; that is because our mask is still transparent
10. Select your mask in your layers palette by clicking in the mask thumbnail
11. After your mask thumbnail is selected, go to your toolbox and select the Brush tool or press the shortcut B, make sure your foreground color is white, and start painting to reveal the filtered parts on your mask. If for some reason you get lost while painting, you can turn off momentarily the visibility of your Background layer to see what parts you've already painted by clicking in the eyeball next to the thumbnail
Remember that if you paint something that you shouldn't had painted, you can paint again with black and you'll return to the unfiltered part. Remember also the shortcut X here for switching between the foreground and background colors, in case you'll need to switch while painting12. So after you've finished painting if everything is good, depending on your image, you're done. But after the filter I noticed that she still had some blemishes in her face, so I fixed that with the Healing Brush tool
with a few clicks(c) The Photoshop Group
Tutorial Comments
Showing latest 5 of 5 comments

wow!
By sunshine07 on Oct 31, 2008 11:56 am

sweeet
By NoWorriesDesigns on Jul 6, 2008 2:14 am

i LOVED THiS
GREAT TUTORiAL
By JUiCEYFRUiT on Jun 12, 2008 4:31 pm

i also use smudge tool to fix it.
By miraamad on Jun 11, 2008 10:36 am

this is amazing! i love it! looks so natural!
By tayrawr on Mar 2, 2008 1:18 am
Tutorial Details
| Author |
elrene06
|
| Submitted on | Jan 16, 2008 |
| Page views | 33,658 |
| Favorites | 131 |
| Comments | 5 |
| Reviewer |
Relentless
|
| Approved on | Jan 16, 2008 |