Tutorial
Click on thumbnailed images to enlarge
- CLOVER LEAVES -
I had this tutorial 4 years ago using the old version PSP7, just thought I would share it :)
In this tutorial you will need:
Eye Candy 4000 - Get it HERE
Gold Gradient Pattern - Get it HERE
Leaf Selection - Get it HERE
Let's Begin!
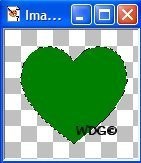
Open a new image: 400x400 - Transparent - 16.7 million colors. Go to "Selection" - "Load from disk" - open the "Leaf.sel". Set your foreground & background color to: #008000. Flood fill the leaf (that looks like a heart)..lolz
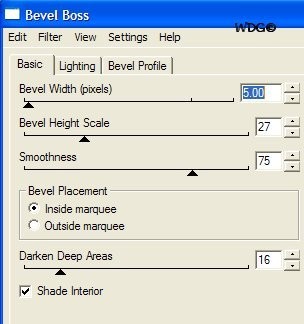
Now, go to - Effects - "Plug-in Filter" - "Eye Candy 4000" - "Bevel Boss" and follow these settings:
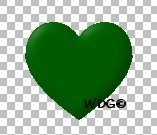
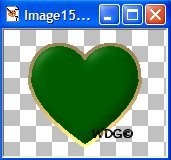
Now the leaf should look something like this: "DO NOT DESELECT"
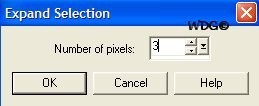
Add a new Layer - Go to "Selection" - "Modify" - "Expand 3"
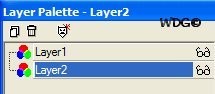
Now flood fill with the "Gold Gradient Pattern". In your "Layer Palette" - Move the Layer 2 down the bottom to Layer 1.
Go to "Layers" - "Merge" - "Merge Visible" - "Deselect".
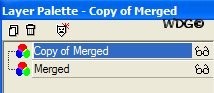
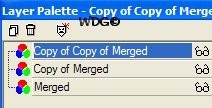
In your "Layer Palette" - Right click on "Merged" - then "Duplicate" - Now, you have "Merged & Copy of Merged" on your Layer palette.
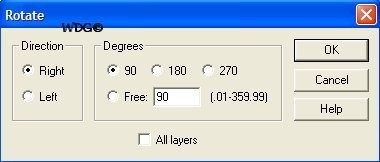
Go to - "Image" - "Rotate" and follow these settings:
Use the "mover tool" to move the leaf to the right. Back to "Layer Palette" - Right click on "Copy of Merged"
Go to - "Image" - "Mirror". Arrange the leaf so it will look like this:
For now, we'll set aside the first image for a min.
Open a new image 100x150 - Transparent - 16.7 million colors. Go to - "Selections" - "Load from disk" - open the "Stem.sel"
Flood fill the stem with your foreground & background color: #008000. Go to "Effects" - "Plug-in Filter" - "Eye Candy 4000" - "Bevel Boss" and follow the same settings we had on the first one.
Add a new Layer. Go to 'Selections" - "Modify" - "Expand 2". Flood fill with the "Gold Gradient Pattern". Move the Layer 2 down to Layer 1. "DESELECT"
Layers - "Merge" - "Merge Visible"
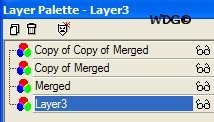
Now, go to "Edit" - "Copy" and go back to the first image and paste it "As a new Layer". Move the Layer all the way down to the bottom.
Layers - "Merge" - "Merge Visible" - And you're done! You can save it as .psp or you can export it to your picture tube.
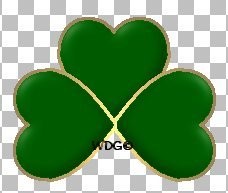
This is the final result:

Let me know if you have any question.
I had this tutorial 4 years ago using the old version PSP7, just thought I would share it :)
In this tutorial you will need:
Eye Candy 4000 - Get it HERE
Gold Gradient Pattern - Get it HERE
Leaf Selection - Get it HERE
Let's Begin!
Open a new image: 400x400 - Transparent - 16.7 million colors. Go to "Selection" - "Load from disk" - open the "Leaf.sel". Set your foreground & background color to: #008000. Flood fill the leaf (that looks like a heart)..lolz
Now, go to - Effects - "Plug-in Filter" - "Eye Candy 4000" - "Bevel Boss" and follow these settings:
Now the leaf should look something like this: "DO NOT DESELECT"
Add a new Layer - Go to "Selection" - "Modify" - "Expand 3"
Now flood fill with the "Gold Gradient Pattern". In your "Layer Palette" - Move the Layer 2 down the bottom to Layer 1.
Go to "Layers" - "Merge" - "Merge Visible" - "Deselect".
In your "Layer Palette" - Right click on "Merged" - then "Duplicate" - Now, you have "Merged & Copy of Merged" on your Layer palette.
Go to - "Image" - "Rotate" and follow these settings:
Use the "mover tool" to move the leaf to the right. Back to "Layer Palette" - Right click on "Copy of Merged"
Go to - "Image" - "Mirror". Arrange the leaf so it will look like this:
For now, we'll set aside the first image for a min.
Open a new image 100x150 - Transparent - 16.7 million colors. Go to - "Selections" - "Load from disk" - open the "Stem.sel"
Flood fill the stem with your foreground & background color: #008000. Go to "Effects" - "Plug-in Filter" - "Eye Candy 4000" - "Bevel Boss" and follow the same settings we had on the first one.
Add a new Layer. Go to 'Selections" - "Modify" - "Expand 2". Flood fill with the "Gold Gradient Pattern". Move the Layer 2 down to Layer 1. "DESELECT"
Layers - "Merge" - "Merge Visible"
Now, go to "Edit" - "Copy" and go back to the first image and paste it "As a new Layer". Move the Layer all the way down to the bottom.
Layers - "Merge" - "Merge Visible" - And you're done! You can save it as .psp or you can export it to your picture tube.
This is the final result:
Let me know if you have any question.

Tutorial Details
| Author |
Wavegirl
|
| Submitted on | Nov 14, 2007 |
| Page views | 10,977 |
| Favorites | 2 |
| Comments | 1 |
| Reviewer |
tripvertigo
|
| Approved on | Nov 14, 2007 |