Tutorial
Click on thumbnailed images to enlarge
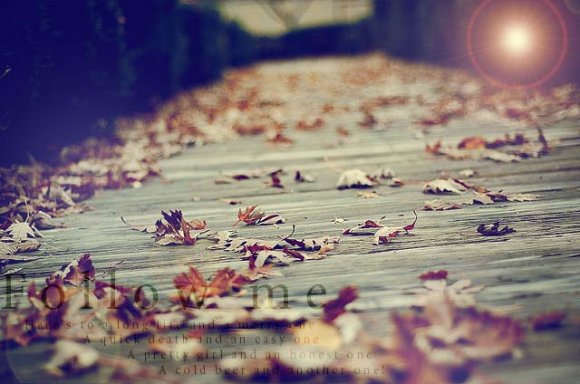
Here's my photo:

Step Two - Do NOT do anything with the photo. Leave it; Don't auto color, auto contrast, etc.
Step Three - Make a new layer & Fill it with the color #f6f695 ; Change the blending mode to 'Multiply' and change the opacity of '50%'

Step Four - Create another layer & Fill it with the color #0c0751 ; Change the blending mode to 'Lighten' , 100%

Feel free to c h a n g e the color adjustments too or a d d some touches!
Hope you enjoy this tutorial.
Easy isn't it?
Final Product:

Credits : DeviantArt.com
Tutorial Comments
Showing latest 10 of 14 comments

How did you put in those words and the effect to it???

niiice done.. just dont like the flare.. bit too much :)

@huichee - look to your right panel where you history is. Look down further on the history panel and you should see an icon next to the trash bin icon. Click on that to make your layer(s). It's to the left of the trash bin icon.
haha...actually i dont know which icon i can select my colour to #f6f695?
@huichee; You make a new layer after filling in the first color.
Hello, May i know how to fill the new layer with the color #f6f695?
@Waimf
Filter > Render > Lens Flare
Set your settings to whatever you like.
how you do the light thing in the right?

Thanks:) i love this effect thanks
@JadyxBoo - Look at the bottom of you layers panel (located right screen)
Look for the square-d icon; it's next to the garbage icon. Hope that helps.
Tutorial Details
| Author |
MiissYER
|
| Submitted on | Oct 22, 2010 |
| Page views | 25,838 |
| Favorites | 53 |
| Comments | 14 |
| Reviewer |
manny-the-dino
|
| Approved on | Nov 15, 2010 |