Tutorial
Click on thumbnailed images to enlarge
1. Create a new document, 700x500 pixels.
2. Open your base! Double click on the background layer to turn it into an unlocked layer.
I'm going to use a picture I took on vacation in New Mexico :)

3. Use the "Elliptical Marquee Tool" and select the part of your picture that you want to use for the effect
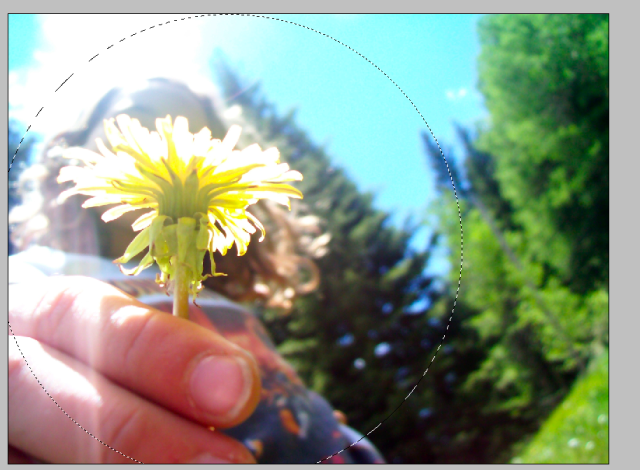
4. Select>>Inverse. Now delete the selection.
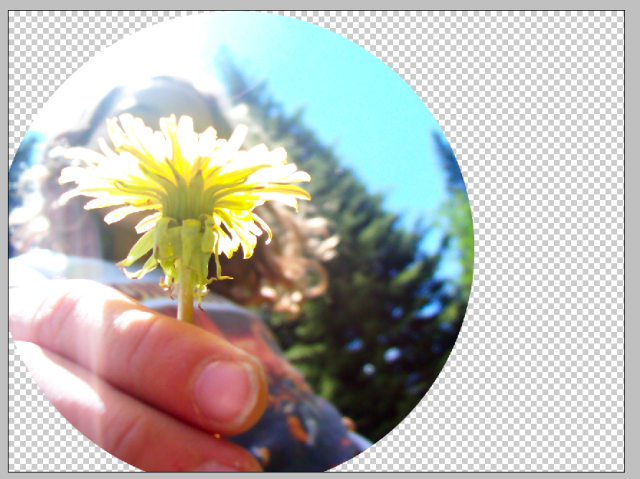
5. Now drag your picture to the blank document you created. Re-size/position it so it looks about like this:
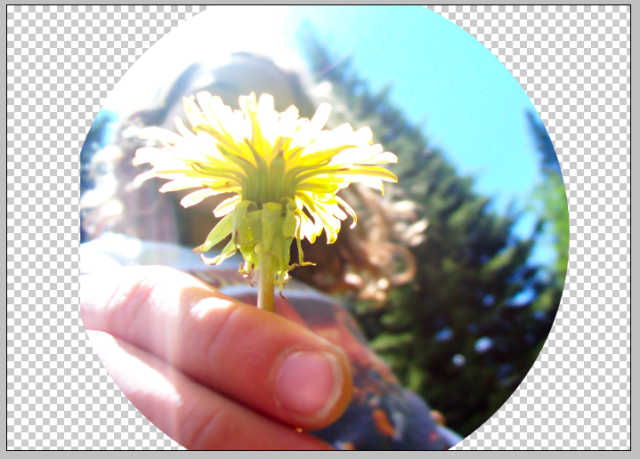
6. Filer>>Liquify. Now you'll bulge your picture.
Here's the settings I used:
Go around the edges of the picture, and then in the center. Maybe a time or two.
Here's my result: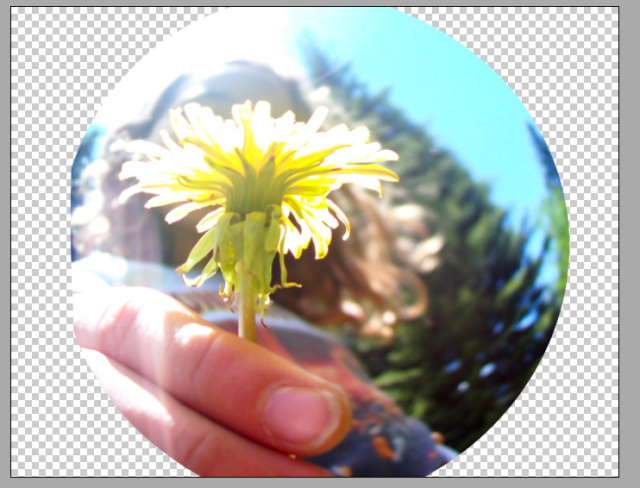
7.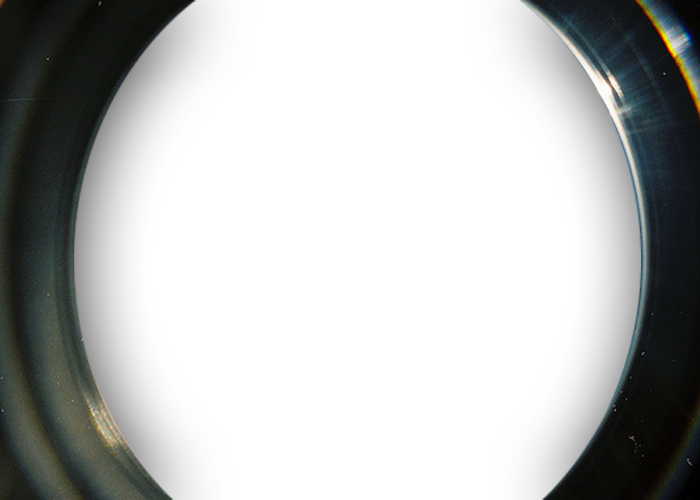
Take that and drag it to your document. Make sure it's the top layer.
You may need to resize your photo just a little bit if there's empty space between it and the lens.
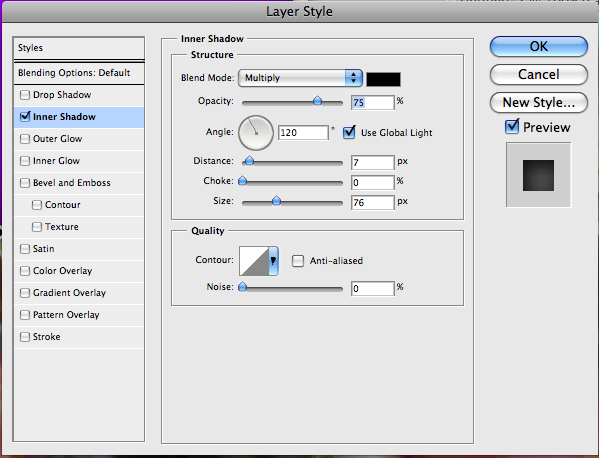
8. Here's the last step! Add these settings in Blending Options to your photo layer.
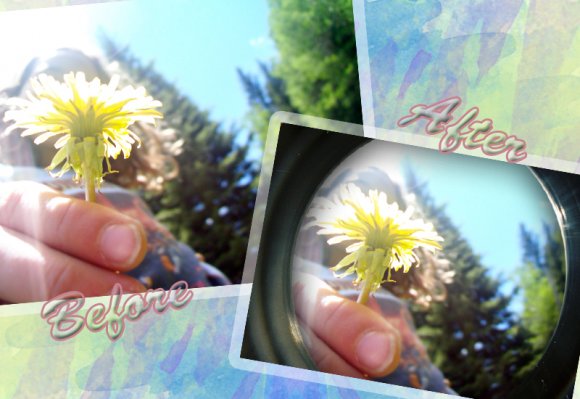
And now you're done! I hope you like your results! :D
Here's my finished product: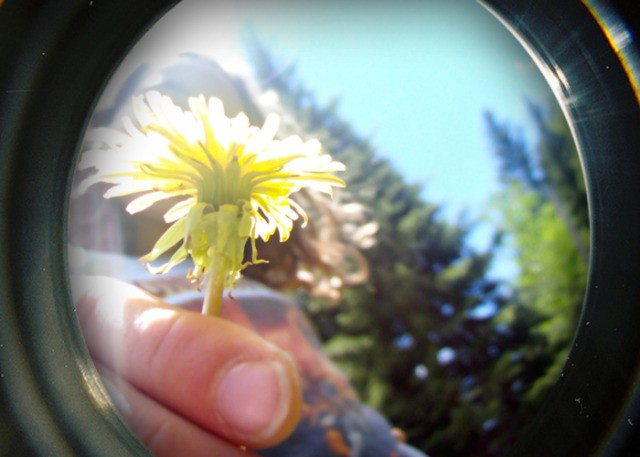
2. Open your base! Double click on the background layer to turn it into an unlocked layer.
I'm going to use a picture I took on vacation in New Mexico :)
3. Use the "Elliptical Marquee Tool" and select the part of your picture that you want to use for the effect
4. Select>>Inverse. Now delete the selection.
5. Now drag your picture to the blank document you created. Re-size/position it so it looks about like this:
6. Filer>>Liquify. Now you'll bulge your picture.
Here's the settings I used:
Go around the edges of the picture, and then in the center. Maybe a time or two.
Here's my result:
7.
Take that and drag it to your document. Make sure it's the top layer.
You may need to resize your photo just a little bit if there's empty space between it and the lens.
8. Here's the last step! Add these settings in Blending Options to your photo layer.
And now you're done! I hope you like your results! :D
Here's my finished product:
Tutorial Comments
Showing latest 9 of 9 comments

i love this tutorial:D
By jennasusanXD on May 4, 2010 12:30 am

finally! someone posted this tutorial. thanks a bunch!
By impurities on Dec 31, 2009 1:34 am

Ohh, I don't use gimp, lol
By brunette925 on Sep 12, 2009 2:22 am

You can do this on gimp too and it looks exactly the same :D
By DuhMehStuhKayShun on Sep 7, 2009 3:54 pm

Very interesting effect, and very original. Thanks for sharing! :D ~ZeroGrafics
By ZeroGrafics on Aug 3, 2009 1:45 am

Thanks >D
By AngehPangeh on Aug 1, 2009 2:39 am

a little sloppy, but the result is nice :]
btw, copying and pasting the lens picture didn't work, i had to save it first.
dunno why :/
By foundry on Jul 29, 2009 12:29 am

The final result is wicked.(:
By aliiicimo on Jul 28, 2009 3:31 pm

This tutorial was very well done. Thanks for posting this!
By YDG on Jul 28, 2009 4:41 am
Tutorial Details
| Author |
brunette925
|
| Submitted on | Jul 28, 2009 |
| Page views | 32,752 |
| Favorites | 82 |
| Comments | 9 |
| Reviewer |
A1Bassline
|
| Approved on | Jul 28, 2009 |