
Tutorial
Click on thumbnailed images to enlarge
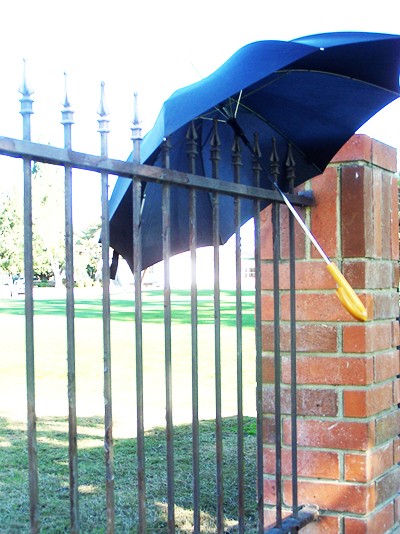
open your picture and make sure it's light. it turns out better that way.
here's mine:
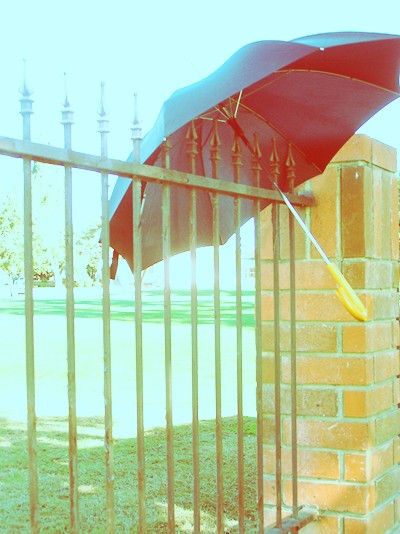
go to image>adjustments>gradient map.
click the little arrow on the right side next to the gradient. then click the other little arrow on the right side and click "Pastels." Click OK.
Pick the gradient "Green, Yellow, Orange." Check the "Reverse" box.
Your picture should look like this:

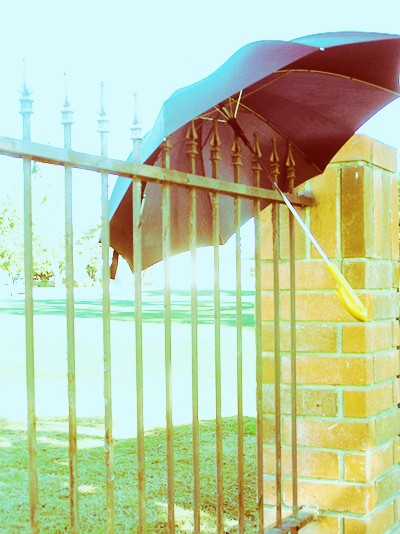
Go to edit>fade gradient map and set it to hard light. Mine is at 74% opacity, but do whatever looks best.
Here's mine:
Now back to the gradient map thing, click the arrows and choose "Simple" this time.
Pick the "Purple." Check the "Reverse" box.
Edit>fade gradient map to darken.
Duplicate your picture and set it to soft light.
And there's your stellar photo!
Some more examples of the same process:


here's mine:
go to image>adjustments>gradient map.
click the little arrow on the right side next to the gradient. then click the other little arrow on the right side and click "Pastels." Click OK.
Pick the gradient "Green, Yellow, Orange." Check the "Reverse" box.
Your picture should look like this:
Go to edit>fade gradient map and set it to hard light. Mine is at 74% opacity, but do whatever looks best.
Here's mine:
Now back to the gradient map thing, click the arrows and choose "Simple" this time.
Pick the "Purple." Check the "Reverse" box.
Edit>fade gradient map to darken.
Duplicate your picture and set it to soft light.
And there's your stellar photo!
Some more examples of the same process:
Tutorial Comments
Showing latest 10 of 18 comments

I love this. It's like antique + lomography for some images :D
By emileeexhale on May 12, 2010 3:38 am

Thank you! This is great!! adding to mems! ♥
By naythan82 on Feb 6, 2010 8:49 am

LOVE LOVE LOVE this!
By conflictingreflections on Dec 9, 2009 7:58 pm

thank youu
i love the effect!
By caarlo5 on Sep 3, 2009 8:04 am

This is pretty awesome. Thanks. (:,'
By PaigeTurner on Jul 12, 2009 3:00 am

niiiiiiice =]
By kimt08 on Jul 9, 2009 4:04 am

OMFG!! This tutorial is BEAST!!! Thank you soo much for sharing it (:
By explicit715 on Jul 3, 2009 6:28 pm
sweet
By forgetit on Jun 12, 2009 6:50 pm
Beautiful, love it :)
By KylieKARNIVORE on May 31, 2009 2:54 am

Yay! Someone finally did a Tutorial on this. (;
By ntv13 on May 29, 2009 3:46 am