Tutorial
Click on thumbnailed images to enlarge
1. Open a new document in Photoshop and fill it with #000000.
2. Go to Filter » Render » Lens Flare.
3. Repeat step 2 as often as you like.

4. Go to Filter » Distort » Polar Coordinates. Make sure it is set to Polar to Rectangular.

5. Repeat step 4 as often as you like.
6. Duplicate your image and set the blending options to Overlay.
7. Merge your layers and go to Filter » Distort » Twirl.

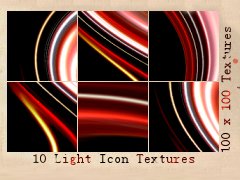
8. Crop your image to 100x100.


2. Go to Filter » Render » Lens Flare.
3. Repeat step 2 as often as you like.
4. Go to Filter » Distort » Polar Coordinates. Make sure it is set to Polar to Rectangular.
5. Repeat step 4 as often as you like.
6. Duplicate your image and set the blending options to Overlay.
7. Merge your layers and go to Filter » Distort » Twirl.
8. Crop your image to 100x100.
Tutorial Comments
Showing latest 6 of 6 comments

Wow. Nice and simple. Good job.
By aimegracen on Jun 20, 2009 1:30 am

Ooooh, this is interesting. I love it, thank you!
By FreakItsRoselynn on May 3, 2009 7:29 pm

Excuse me,
but um. do you
just download adobe photoshop. to photoshop these pictures that are shown?
By --bonjour on Mar 5, 2009 11:26 pm

Ooh, I need to try this out. x]
By creole on Feb 28, 2009 9:46 pm

Haha, that's how I make
some of my light textures. x)
By so-sarcastic on Feb 22, 2009 10:55 pm

Interesting. (:
By futura on Feb 22, 2009 3:14 am
Tutorial Details
| Author |
ohlux
|
| Submitted on | Feb 20, 2009 |
| Page views | 10,756 |
| Favorites | 31 |
| Comments | 6 |
| Reviewer |
manny-the-dino
|
| Approved on | Feb 21, 2009 |