Tutorial
Click on thumbnailed images to enlarge
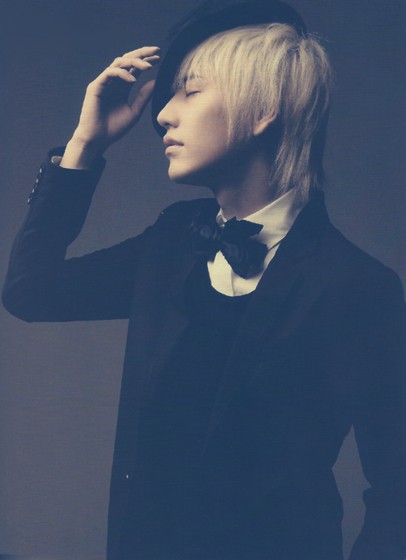
Step One: Open up any picture you want to use. I'm gonna use a timey picture of Super Junior's Kyuhyun. Don't worry, this can also be used on modern pictures also.

Step Two: Make a new layer, fill it with 0ff4fc with your fill tool, set the blending mode to Lighten, & the opacity to 38%.

Step Three: Make another layer, fill it with 620ac5, set the blending mode to Soft Light, & the opacity to 61%.

Step Four: Yet again make another layer, fill it with ad9616, set the blending mode to Linear Burn, & the opacity to 36%.
Step Five: Go back to your original layer & go to >Filter, Sharpen, Smart Sharpen.(It's actually optional, it just gives the picture a worn-out old effect.) Apply the following:

Your image should now look something like this:
Step Six: Merge your layers together by right-clicking on any layer & choosing the option "Merge Visible". Now go to >Filter, Distort, Lens Correction. Set it to the following:
Fix Red/Cyan Fringe: -46
Fix Blue/Yellow Fringe: -25
Amount: -38
Midpoint: +2
Should look like this:
Step Seven: Add a worn-out paper kind of texture. This is the one I used: Resize it to fit your picture & set the blending mode to Soft Light, & the opacity somewhere from 38 to 52 percent, I used 38%.

Step Eight: Merge your layers again & add a new layer. Fill it with 000000, set the blending mode to Color, & the opacity to 33%. Flatten you image & your done! Add a border or anything you like. XDDD
To: 
Step Two: Make a new layer, fill it with 0ff4fc with your fill tool, set the blending mode to Lighten, & the opacity to 38%.
Step Three: Make another layer, fill it with 620ac5, set the blending mode to Soft Light, & the opacity to 61%.
Step Four: Yet again make another layer, fill it with ad9616, set the blending mode to Linear Burn, & the opacity to 36%.
Step Five: Go back to your original layer & go to >Filter, Sharpen, Smart Sharpen.(It's actually optional, it just gives the picture a worn-out old effect.) Apply the following:
Your image should now look something like this:
Step Six: Merge your layers together by right-clicking on any layer & choosing the option "Merge Visible". Now go to >Filter, Distort, Lens Correction. Set it to the following:
Fix Red/Cyan Fringe: -46
Fix Blue/Yellow Fringe: -25
Amount: -38
Midpoint: +2
Should look like this:
Step Seven: Add a worn-out paper kind of texture. This is the one I used:
Resize it to fit your picture & set the blending mode to Soft Light, & the opacity somewhere from 38 to 52 percent, I used 38%.Step Eight: Merge your layers again & add a new layer. Fill it with 000000, set the blending mode to Color, & the opacity to 33%. Flatten you image & your done! Add a border or anything you like. XDDD
To: Tutorial Comments
Showing latest 10 of 21 comments

aha...I see that Super Junior pictures are very good to use adobe photoshop on...^_^...
By Cheonsa18 on Aug 12, 2010 12:38 am

Kyuhyun
By xchangminniex on Jul 1, 2009 6:21 pm

I love this! Definitely my favorite "old looking photo" tutorial! It looks actually real!
By jasminemr on May 31, 2009 1:34 am

really does work.
great tutorial.
By victoriarose on Dec 2, 2008 6:12 am

really love this!
By aQuafly on Oct 11, 2008 2:07 pm

great tutorial :D
By notusing on Sep 29, 2008 9:43 am

it really looks like an old photo.
lovely.
By xpwoppa on Sep 28, 2008 4:47 am

your tutorials r fantastic
By SXCii on Sep 6, 2008 10:02 pm
Yay, Kyuhyun.
I love this. It actually looks like a real old picture.
By yumbae on Sep 5, 2008 10:59 pm
Thankyou:) i actually understand thisxD
wow he's hot:DDD
By PyongImGone on Aug 25, 2008 2:05 am
Tutorial Details
| Author |
nonexistent
|
| Submitted on | Jul 28, 2008 |
| Page views | 46,581 |
| Favorites | 187 |
| Comments | 21 |
| Reviewer |
manny-the-dino
|
| Approved on | Jul 30, 2008 |