Tutorial
Click on thumbnailed images to enlarge
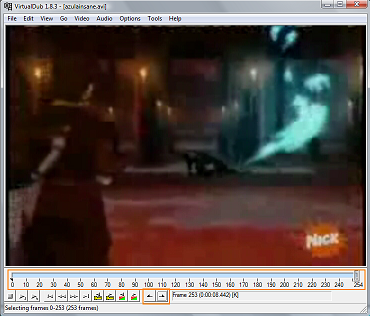
One. First, you'll need to find a scene you want to do. To select a scene you want, you'll need Virtual Dub. So, first, open your video (must be AVI). Marked in orange at the very bottom are flags. Use them to mark from where the scene starts and ends. For example, let's say you want the scene of ... Spongebob singing the campfire song (LOL.) Use the flags to mark where the scene starts and end. See if the image can help you understand.
Two. Once, you're done, go to File >> Export >> Image Sequence. Filename suffix should be bmp, minimum of digits should be 3, and output format should be Windows BMP.
Three. Once the whole Vdub thing is over, open up Imageready and go to File >> Import >> Folder as Frames. Select the folder you saved the BMP images in. Let us crop our video so it's smaller :) Take the crop tool and resize it to 50x50. Change the size if you want. Then, crop the part you want.

Okay, look at your animation window. If you have a LOT of frames, then it's time to do some deleting. Basically, delete the frames that look the same as the previous one. But, be careful! You have to choose carefully, otherwise, the animation will mess up ... Kind of ... depends. The more frames your animation has, the slower it will be.
Four. After the looong deleting, go to File >> Edit in Photoshop. Let us brighten up our image :D Yaay .. Go to layer >> new adjustment layers >> levels. Adjust the settings to your liking.
Five. Now go to the very first layer and go to image >> canvas size. Input the size to 100x100 pixels. Make sure your animation's in the middle.

Six. Now, create a new layer and paste it at the very bottom. Fill it in with white. Now, feel free to add borders .. or whatever. [See my borders tutorial if you want to make those corners which you see in a lot of animated icons].
Seven. It's time to add some text! First make all your animation layers invisible. Create a new layer at the top and type in your text. Now, make your text layer invisible and the first animation layer visible. (To make a layer visible or invisible, click on the eye.)
Eight. Now, go to File >> Edit in Imageready. [Do this part ONLY if the text frame does not appear] In your animation window, go to the very last frame and duplicate it (the button beside the trashcan). Then make the text layer visible while the last and first animation layer invisible. Yay, now you have your text frame.
Nine. Duplicate your text frame. Click on the second last frame, make the text invisible, and click on the tween button (before the duplicate button).
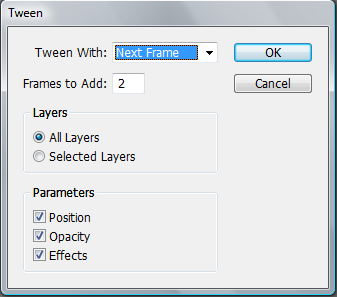
Ten. Now your two text frames should look 'faded'. Now, click on the last frame and set the delay time to 1 sec.
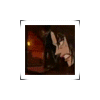
Now, you are done. Optimize it and save it. File >> Save Optimized. Hope this tutorial helps .. somehow .___. Here's my final product (why yes, I do love Azula's insanity 8D)
Tutorial Comments
Showing latest 10 of 15 comments

hi, sorry i got troubles with this tutorial, well with the software, can u help me to teach me how to use it [vdub] i download my video [avi format] and it can't be opened!! i tried with:
*avi compatible Xvid
*avi microsoft MPEG4v2
*Avi Divx MPEG4
help me please

is that virtual dub free? or will i need to go out and buy it?

virtual dub is a program for screen-capping ... something like that.

what is virtual dub?
:/

how do you download videos? o.o;

ohhhh how cute, you used Azula. :D
On the timeline, select the part where the scene you want to start, then, click on the first flag. Then, click on the part where the scene ends on the timeline, then click the second flag. Does that help now?

hahha no, I still don't... it because there nothing I can mark. is that u just click at drag with a mark or something? coz when I mark...it doesn't show anything at all....u know...
The first flag marks where the scene starts. The second flag marks where the scene end. The huge bar above it is the timelime. Get it now? :)
I don't get, when u mark the orange thing? :( can u explain how to mark that?
Tutorial Details
| Author |
cielxx
|
| Submitted on | Jul 24, 2008 |
| Page views | 19,353 |
| Favorites | 71 |
| Comments | 15 |
| Reviewer |
manny-the-dino
|
| Approved on | Jul 24, 2008 |