Tutorial
Click on thumbnailed images to enlarge
In this tutorial, you will learn how to make your image from-
This:

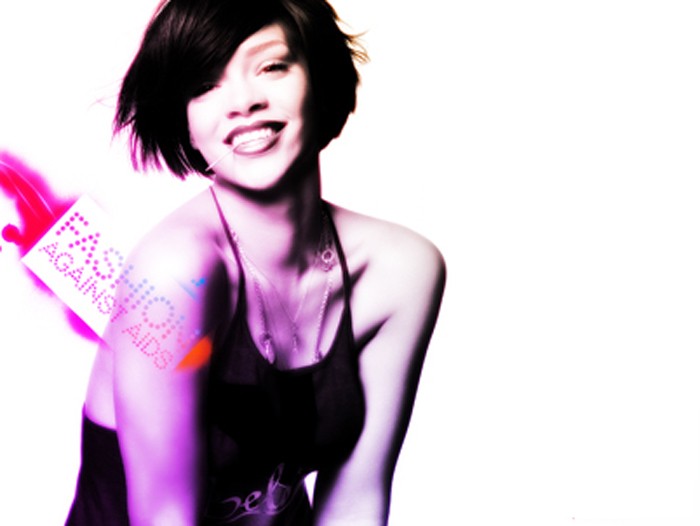
To This:
Let's Begin!
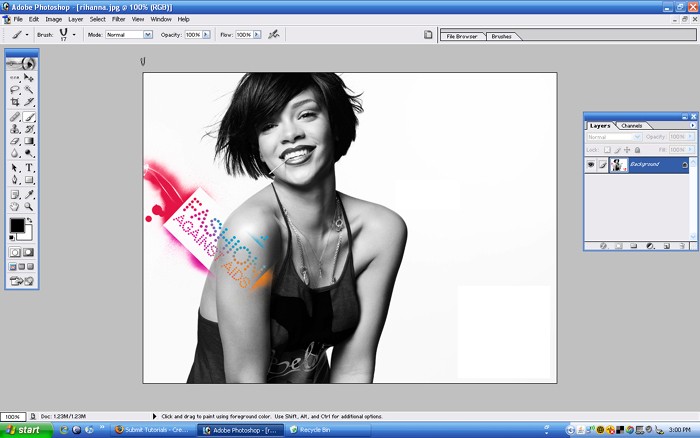
1. Open up your image
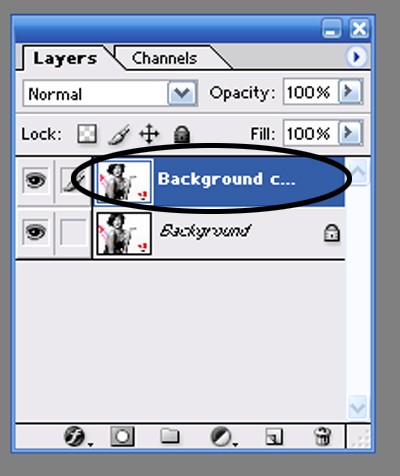
2.Go to Layer, then make a Duplicate Layer
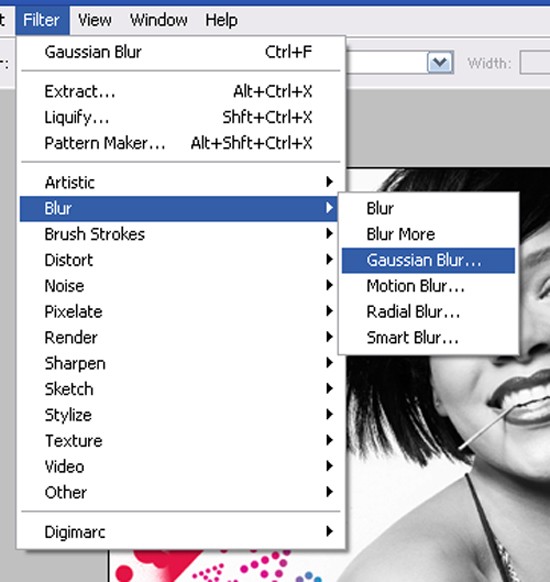
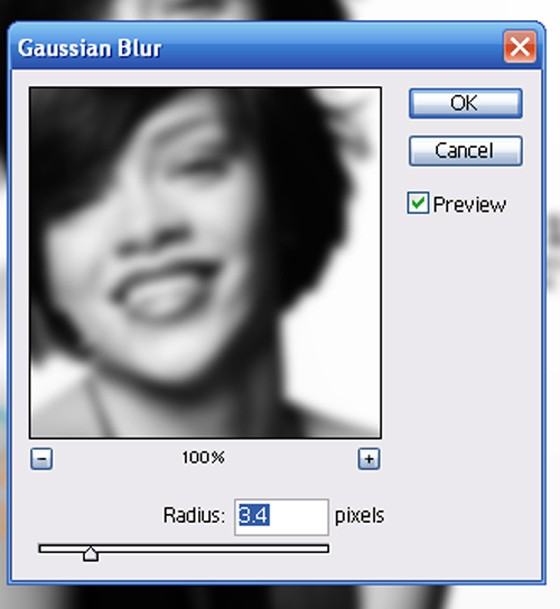
3. Go to Filter-> Gaussian Blur
4. Make it about 2 to 3.4 pixels depending on the size of your image
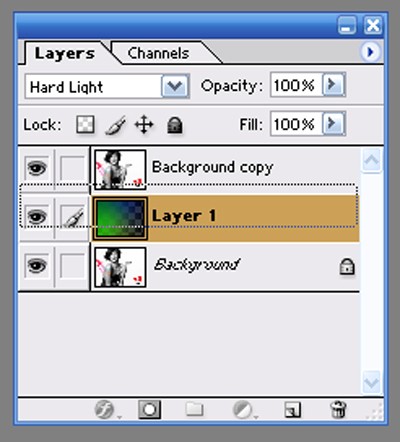
5.Go to Layer->Layer Style->Blending Options
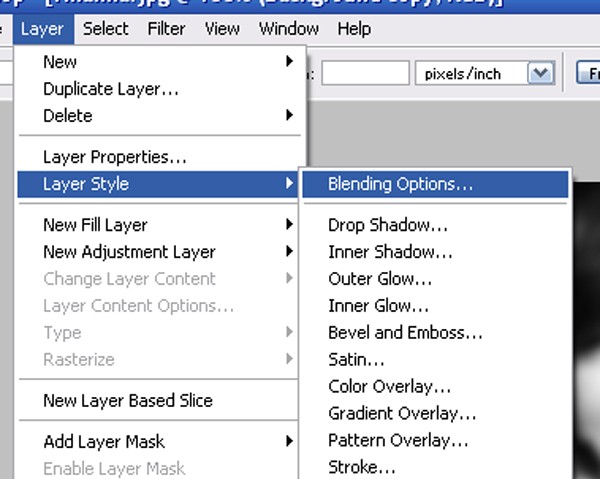
6.Go to blend mode-> Hard Light

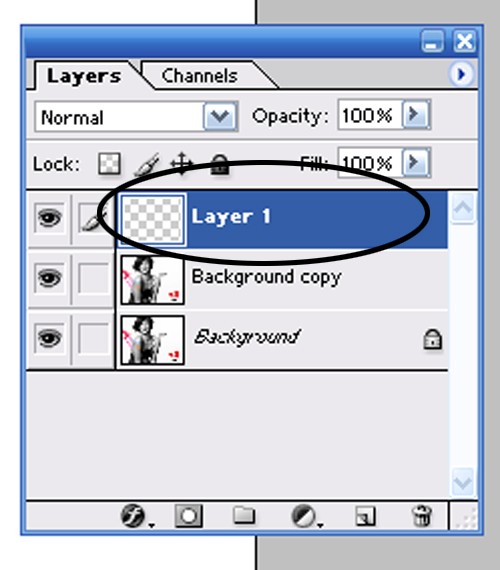
7.Press Ctrl+Shift+N to make a new layer
Now we will start coloring!
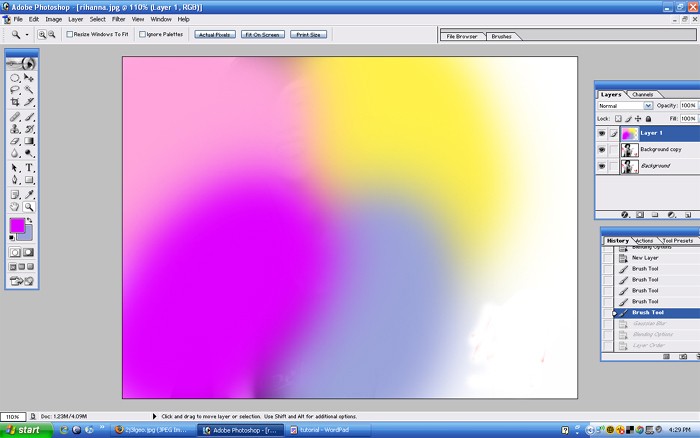
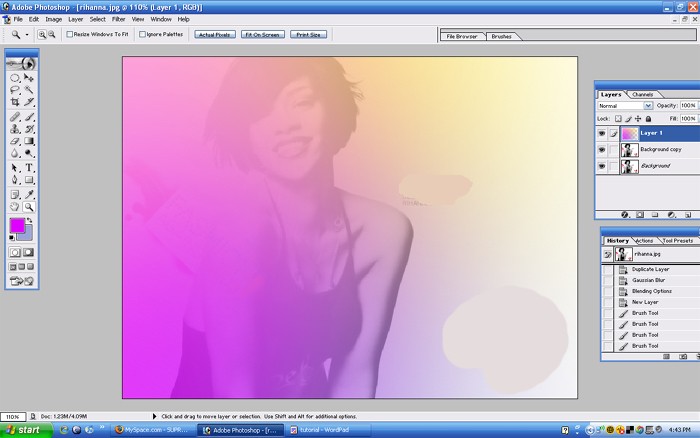
8. Use the brush to color over of your image.
Use:
FFA4DB-pink, FFF14B-yellow, DE00FF-purple, and 9BA4DB- blue
9. Go to Filter->Blur->Gaussian again, and make the pixel about 100-200 depending of the size of your image. Then press ok.
10. Go to Layer-> Layer Style-> Blending Options-> Blend Mode-> Hard Light, then press ok.
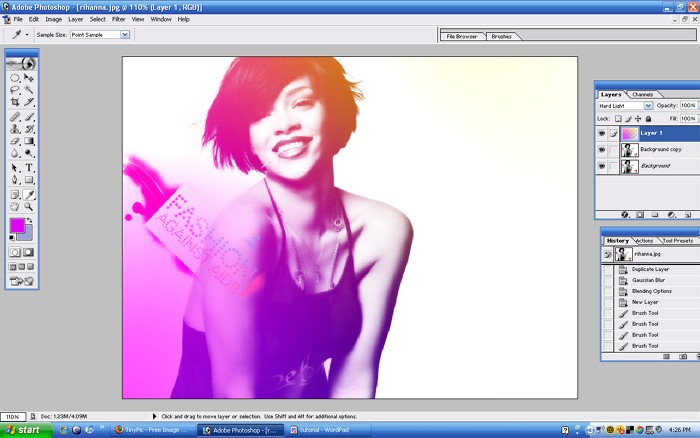
11. Make the colored layer to 70-75% opacity.

12.The drag the duplicate layer (known as Background Copy) and put it over the colored layer.
13. Click Background copy, then press Ctrl+E to emerge the two layers

And your done!
If you have any questions, feel free to PM me or comment. I hope you enjoyed this tutorial :)
Credits to CERTiFiEDGANGSTAoO9
This:
To This:
Let's Begin!
1. Open up your image
2.Go to Layer, then make a Duplicate Layer
3. Go to Filter-> Gaussian Blur
4. Make it about 2 to 3.4 pixels depending on the size of your image
5.Go to Layer->Layer Style->Blending Options
6.Go to blend mode-> Hard Light
7.Press Ctrl+Shift+N to make a new layer
Now we will start coloring!
8. Use the brush to color over of your image.
Use:
FFA4DB-pink, FFF14B-yellow, DE00FF-purple, and 9BA4DB- blue
9. Go to Filter->Blur->Gaussian again, and make the pixel about 100-200 depending of the size of your image. Then press ok.
10. Go to Layer-> Layer Style-> Blending Options-> Blend Mode-> Hard Light, then press ok.
11. Make the colored layer to 70-75% opacity.
12.The drag the duplicate layer (known as Background Copy) and put it over the colored layer.
13. Click Background copy, then press Ctrl+E to emerge the two layers
And your done!
If you have any questions, feel free to PM me or comment. I hope you enjoyed this tutorial :)
Credits to CERTiFiEDGANGSTAoO9
Tutorial Comments
Showing latest 10 of 27 comments

THANX MiNES CAME OUT GREAT!!!
By AjKiNG305 on Aug 10, 2009 11:59 pm

haha i didnt think this tutorial would be so successful for alot of people :P
By CERTiFiEdGANGStAoO9 on Mar 21, 2009 10:29 pm

oooh i tried it and the outcome was really sweet:]
By lolili on Feb 7, 2009 12:31 am
i did get the coloring to work...but i need lots of practice :-X
By labellavida on Jan 19, 2009 11:05 pm
when I get to step 8 to color the image with the brush tool ...the colors won't change they stay in this gray color and white. :(
By labellavida on Jan 19, 2009 9:54 pm

ooh snaps, this turned out better then i expected (:
By hiphopheadj on Jan 8, 2009 3:36 am

I LOVE this!
But I usually just stop after step 10.
I think it looks better there.
GREAT TUT!
By Z0MGsz on Nov 9, 2008 5:39 pm

I love this!!! Mine turned out pretty!!! Thanks!
By MiiszBreezii on Oct 5, 2008 8:13 pm

Incredible :]
*faves* for suuure:D
x
By aliiicimo on Sep 28, 2008 9:16 pm
i loveee you! tysm!
By breebutt1234 on Aug 23, 2008 5:00 pm
Tutorial Details
| Author |
CERTiFiEdGANGStAoO9
|
| Submitted on | Jun 15, 2008 |
| Page views | 26,615 |
| Favorites | 235 |
| Comments | 27 |
| Reviewer |
manny-the-dino
|
| Approved on | Jun 16, 2008 |