Tutorial
Click on thumbnailed images to enlarge
We're going to use this picture:

1.Copy and Paste the image to your profile.
2.Go to layers>>new adjustment layer>>Color Balance.
3.Set the color layers to -23,0,0.
4.Go to layers>>new adjustment layer>>Hue/Saturation/Lightness.
5.Go to layers>>new adjustment layer>>Curves.
6.Set the RGB channels to: Input-201 Output-222
7.Make another color balance layer.
8.Set the color levels to 0,0,35
9.Make a new raster layer.Fill it with #0B0E53 and set that layer to Exclusion at %22.
10.Make a new raster layer.Fill it with #FC4481 and set that layer to Lighten at %36.
11.Duplicate the base image and drag it to the top.Set that layer to Soft Light at %100.
12.Duplicate the Color Balance 2 layer and drag that to the top.
Viola,you're done!
Before:
After: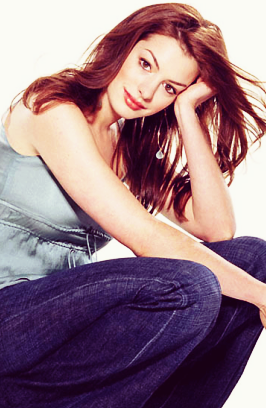
Tutorial Comments
Showing latest 8 of 8 comments

how do i duplicate the image?
By heddasully on Jan 3, 2009 5:13 am
that is true i agree with ic1008 it doesnt tell us what to put for hue/saturation/lightness. can you tell us please?
By butterfly486 on Sep 17, 2008 1:06 am

that was great, but mine didn't turn out like that
By sweetdreams08 on Jul 14, 2008 9:24 pm

mine didnt turn out like that...
By dosomethin888 on Jul 3, 2008 7:28 am

what is exclusion?! could someone tell me that. i`m totally new to paint shop pro. and i need to know what an exclusion is, plus the floodfill! thanks. xoxo.
By hpnaiv on Jul 2, 2008 1:21 am

Mine didnt turn out like that... =[
By Ladii-J-Gfx on Jun 21, 2008 11:55 pm

nice work. the finished result makes her look alot more glamorous!
By flyestillusion on Jun 19, 2008 3:48 am

Great job on this tutorial but in step number four you didn't tell us how to set the hue/saturation/lightness.
By lc2008 on Jun 10, 2008 9:31 pm
Tutorial Details
| Author |
littlevoice
|
| Submitted on | Jun 6, 2008 |
| Page views | 17,690 |
| Favorites | 24 |
| Comments | 8 |
| Reviewer |
Insurmountable
|
| Approved on | Jun 6, 2008 |