Tutorial
Click on thumbnailed images to enlarge
**NOTE**
I did this tutorial in Photoshop CS3 Extended which is why some of you may have problems. However, that doesn't mean this tutorial won't work in other versions of Photoshop. Just try it out.
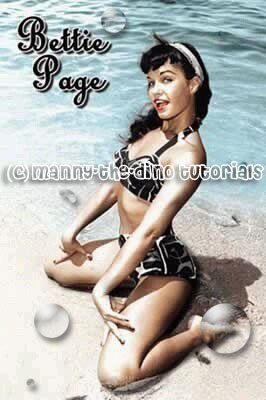
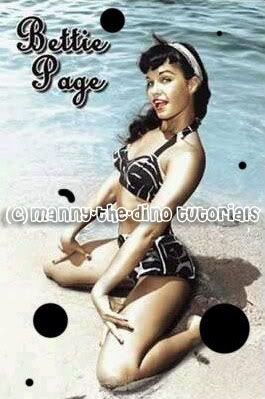
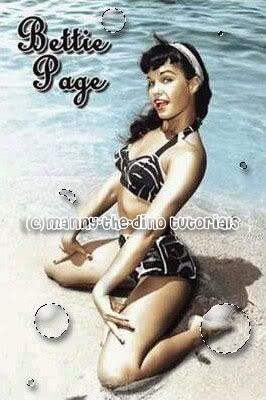
Have a picture of someone laying next to the beach in their swimsuit & would like to add a little something extra to it? Well I'll show you how to add some water drops to your picture. The Norotious Bettie Page will help me out this time. Here's the before:

Here's the after:

Let's start!
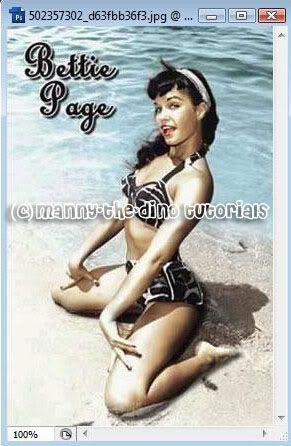
001.First, open up your photo.
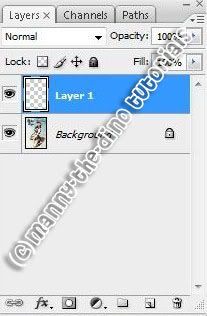
002.Make a new layer.
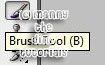
003.Now select the almighty Brush Tool (B).
004.Paint a bunch of random circles; of random sizes & shapes. These will be our water drops.
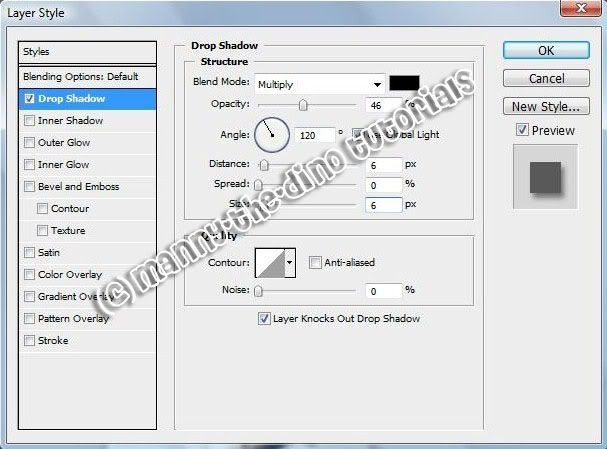
005.Doulbe click on "Layer 1," go to the Drop Shadow category & apply the following settings:
Opacity:46%
Angle: 120
Distance: 6
Size: 6
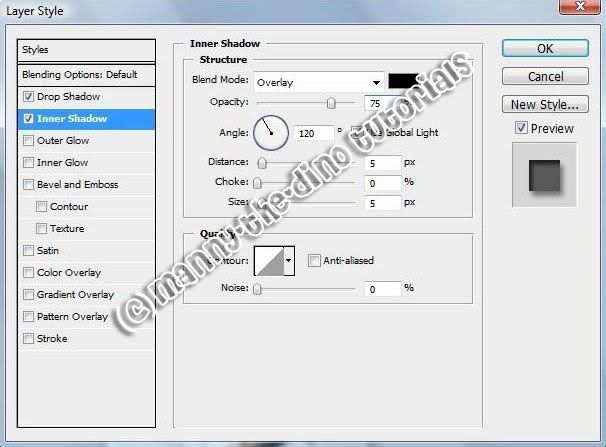
006.Go to the Inner Shadow category & apply the following settings:
Blend Mode: Overlay
Angle: 120
007.Lastly go to the Bevel & Emboss category & apply the following settings:
Depth: 501%
Size: 16
Softer: 10
Angle: 120
Highlight Mode: Screen
Opacity: 100%
Shadow Mode: Color Dodge
Opacity: 18%
Color: ffffff

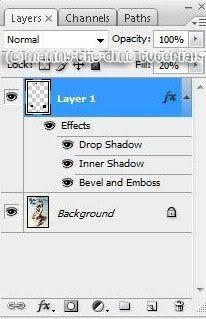
008.After pressing ok, go over to your layers' palette & change "Layer 1's" fill from 100% to 20%.
009.Now hold down ctrl while clicking on "Layer 1" to make the water drop selections active.
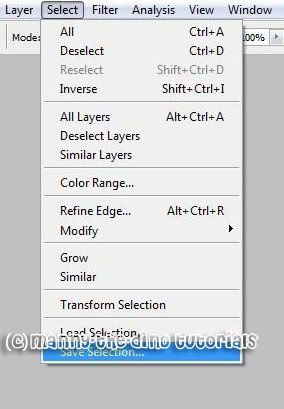
010.Go Select>Save Selection.
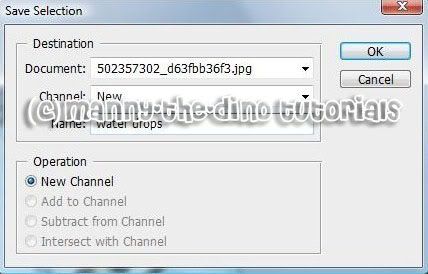
011.When the pop-up comes up, name your selection whatever you'd like. I'm naming mine "water drops."
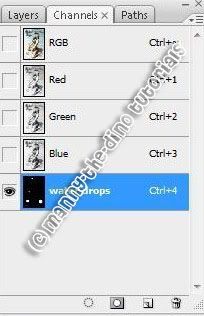
012.After doing that, go over to your Channels tab & select your selection. In my case, I would select "water drops."
013.Now go a ctrl+a & go Filter>Blur>Gaussian Blur.
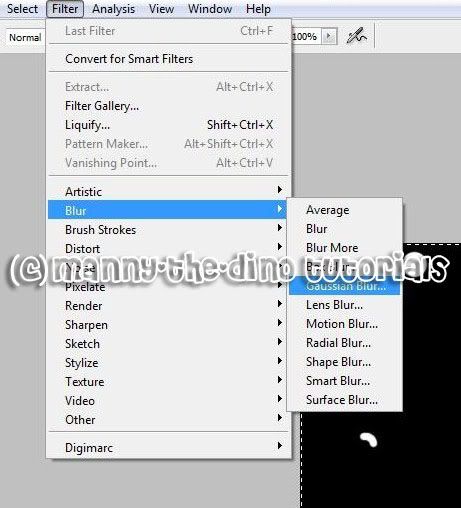
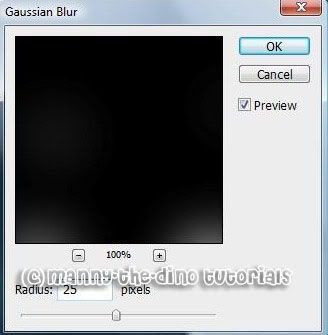
014.Enter anything between 20 & 30 as your radius. I chose 25 to be just in the middle.
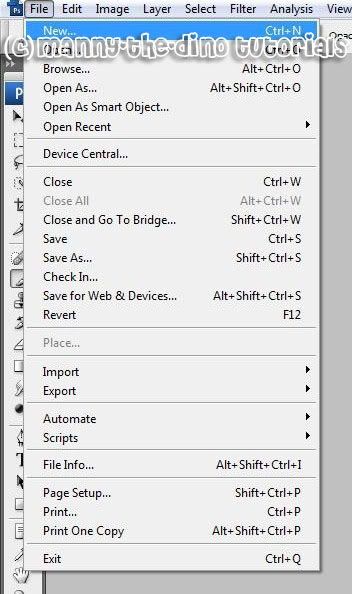
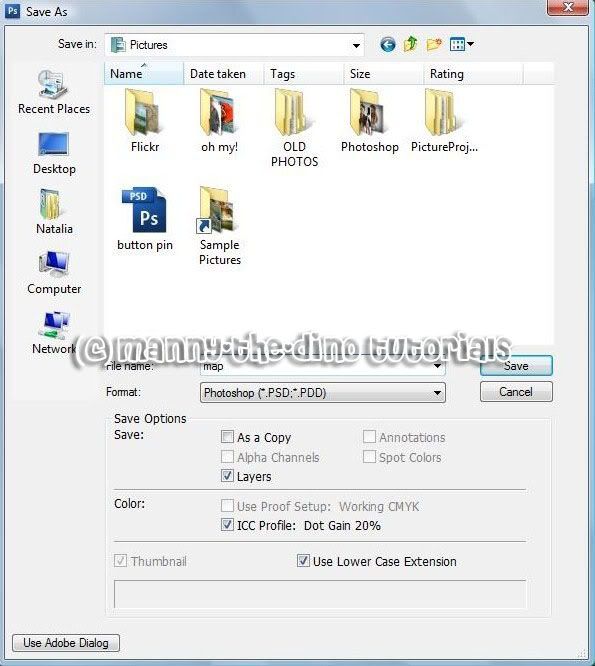
015.Do a ctrl+c & go File>New.
016.Press ok, do a ctrl+v & go File>Save As.
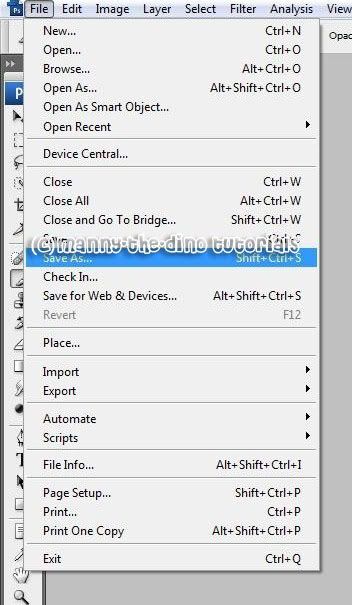
017.Save this in a place where you'll remember. I'm saving it in my "Pictures" folder & naming it "map." Also, make sure you're saving this document as a PSD.
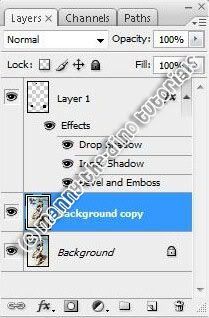
018.You can close that document now & go back to your work in progress. Have your "Background" layer selected & do a ctrl+j.
019.Go Filter>Distort>Displace.

020.Press ok & then select your PSD that we recently saved.

021.With your "Background copy" layer still selected, hold down ctrl & click on "Layer 1" to make your water drops active again.

022.Add a layer mask to your "Background copy" layer.

023.And voila! You are done, m'dear! "D
If you got lost or have any questions, comment the tutotial & I'll get back to you as soon as I can. :D
I did this tutorial in Photoshop CS3 Extended which is why some of you may have problems. However, that doesn't mean this tutorial won't work in other versions of Photoshop. Just try it out.
Have a picture of someone laying next to the beach in their swimsuit & would like to add a little something extra to it? Well I'll show you how to add some water drops to your picture. The Norotious Bettie Page will help me out this time. Here's the before:
Here's the after:
Let's start!
001.First, open up your photo.
002.Make a new layer.
003.Now select the almighty Brush Tool (B).
004.Paint a bunch of random circles; of random sizes & shapes. These will be our water drops.
005.Doulbe click on "Layer 1," go to the Drop Shadow category & apply the following settings:
Opacity:46%
Angle: 120
Distance: 6
Size: 6
006.Go to the Inner Shadow category & apply the following settings:
Blend Mode: Overlay
Angle: 120
007.Lastly go to the Bevel & Emboss category & apply the following settings:
Depth: 501%
Size: 16
Softer: 10
Angle: 120
Highlight Mode: Screen
Opacity: 100%
Shadow Mode: Color Dodge
Opacity: 18%
Color: ffffff
008.After pressing ok, go over to your layers' palette & change "Layer 1's" fill from 100% to 20%.
009.Now hold down ctrl while clicking on "Layer 1" to make the water drop selections active.
010.Go Select>Save Selection.
011.When the pop-up comes up, name your selection whatever you'd like. I'm naming mine "water drops."
012.After doing that, go over to your Channels tab & select your selection. In my case, I would select "water drops."
013.Now go a ctrl+a & go Filter>Blur>Gaussian Blur.
014.Enter anything between 20 & 30 as your radius. I chose 25 to be just in the middle.
015.Do a ctrl+c & go File>New.
016.Press ok, do a ctrl+v & go File>Save As.
017.Save this in a place where you'll remember. I'm saving it in my "Pictures" folder & naming it "map." Also, make sure you're saving this document as a PSD.
018.You can close that document now & go back to your work in progress. Have your "Background" layer selected & do a ctrl+j.
019.Go Filter>Distort>Displace.
020.Press ok & then select your PSD that we recently saved.
021.With your "Background copy" layer still selected, hold down ctrl & click on "Layer 1" to make your water drops active again.
022.Add a layer mask to your "Background copy" layer.
023.And voila! You are done, m'dear! "D
If you got lost or have any questions, comment the tutotial & I'll get back to you as soon as I can. :D
Tutorial Comments
Showing latest 3 of 3 comments

Pictures dont show up...I like your teaching...
By hairless25 on Aug 12, 2008 6:05 am

your foot is mis-proportioned w/ the drop.
By NightInsanity on Jun 8, 2008 10:04 am

cool.
By twodreamlovers on Jan 22, 2008 2:22 am
Tutorial Details
| Author |
manny-the-dino
|
| Submitted on | Jan 19, 2008 |
| Page views | 19,766 |
| Favorites | 58 |
| Comments | 3 |
| Reviewer |
libertie
|
| Approved on | Jan 20, 2008 |