Tutorial
Click on thumbnailed images to enlarge
-ANIMATED BLINKIES -
In this tutorial you need to download my blinky selection HERE.
Let's get started!
Open a new image 150x20 - Transparent - 16.7 million colors. Click on the "Zoom" tool . Click the image 4x to make it bigger. Now. go to "Selections" - 'Load from Disk" - Select "blinky1.sel". Flood fill with the color of your choice. I used Gray (#808080). DO NOT Deselect.
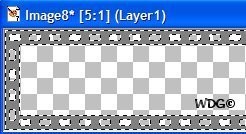
Go to "Selections" - "Load from Disk" - Select "blinky2.sel". That's for the inside part. Flood fill with the color of your choice. I used Gradient (Metallic). DO NOT Deselect.
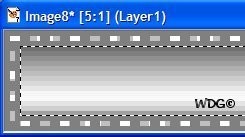
Go to "Selections" - "Load from Disk" - Select "blinky.3sel". You will see the little boxes bee selected. Flood fill with the color of your choice. I used Black (#000000). DO NOT Deselect.
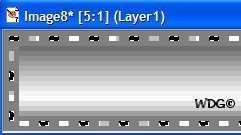
Go to "Selections" - "Load from Disk" - Select "blinky4.sel". Flood fill with the color of your choice. I used White (#ffffff). "Select None".
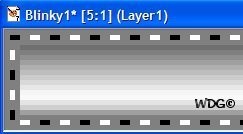
Now it's time to add a text. Click on the "Text" tool . You can use any text you want, any color you want as long it fits in the box. I used Black - Text "AvantGarde BK BT" - Size 8. Put the text on the center. Then "Select None". Save your first work as Blinky1.psp

We're almost there OK..lolz
Make a copy of your first work. Hit "Shift D" or click "Copy" then "Paste as new image". Use your "Zoom" tool . Click the copy image 4x to make it bigger.
OR
You can use the first work you have saved. Go back to "Selections" again - "Load from Disk" - Select "blinky3.sel". We are going to change the color like to the opposite side. Before I used Black, now I will use White. Flood fill it with White. DO NOT Deselect.
Go to "Selections" - "Load from Disk" - Select "blinky4.sel". The same procedure as above. But now I will use Black instead of White. Flood fill it with Black. "Select None" Save your work as Blinky2.psp

Now it's time for the Animation:
Open the "Animation Wizard"...Same size as the first frame (checked) - Next...Transparent (checked) - Next...Centered in the frame - with the canvas color (checked) - Next...Yes, repeat the animation indefinitely - 15 (checked) - Next...Load the Blinky1.psp and the Blinky2.psp
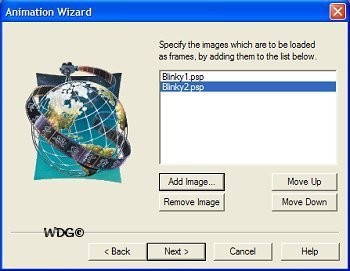
Click "Next" - "Finished". Click the "View Animation"

Then you're done. Save your work as .gif
This is the result:

Hope you understand my tutorial...Let me know if you have any questions.
In this tutorial you need to download my blinky selection HERE.
Let's get started!
Open a new image 150x20 - Transparent - 16.7 million colors. Click on the "Zoom" tool
 . Click the image 4x to make it bigger. Now. go to "Selections" - 'Load from Disk" - Select "blinky1.sel". Flood fill with the color of your choice. I used Gray (#808080). DO NOT Deselect.
Go to "Selections" - "Load from Disk" - Select "blinky2.sel". That's for the inside part. Flood fill with the color of your choice. I used Gradient (Metallic). DO NOT Deselect.

Go to "Selections" - "Load from Disk" - Select "blinky.3sel". You will see the little boxes bee selected. Flood fill with the color of your choice. I used Black (#000000). DO NOT Deselect.

Go to "Selections" - "Load from Disk" - Select "blinky4.sel". Flood fill with the color of your choice. I used White (#ffffff). "Select None".

Now it's time to add a text. Click on the "Text" tool
 . You can use any text you want, any color you want as long it fits in the box. I used Black - Text "AvantGarde BK BT" - Size 8. Put the text on the center. Then "Select None". Save your first work as Blinky1.psp
We're almost there OK..lolz
Make a copy of your first work. Hit "Shift D" or click "Copy" then "Paste as new image". Use your "Zoom" tool
 . Click the copy image 4x to make it bigger.
OR
You can use the first work you have saved. Go back to "Selections" again - "Load from Disk" - Select "blinky3.sel". We are going to change the color like to the opposite side. Before I used Black, now I will use White. Flood fill it with White. DO NOT Deselect.
Go to "Selections" - "Load from Disk" - Select "blinky4.sel". The same procedure as above. But now I will use Black instead of White. Flood fill it with Black. "Select None"
 Save your work as Blinky2.psp
Now it's time for the Animation:
Open the "Animation Wizard"...Same size as the first frame (checked) - Next...Transparent (checked) - Next...Centered in the frame - with the canvas color (checked) - Next...Yes, repeat the animation indefinitely - 15 (checked) - Next...Load the Blinky1.psp and the Blinky2.psp

Click "Next" - "Finished". Click the "View Animation"

Then you're done.
 Save your work as .gif
This is the result:

Hope you understand my tutorial...Let me know if you have any questions.
Tutorial Comments
Showing latest 3 of 3 comments

Shortie: Yes, you have to download it.
Try google.
By DIRTYM0E on Nov 24, 2008 12:51 am
this is kOol.!
but where dO i qet
animation thinq?
dO i have tO download it?
By shOrtiebiatchx23 on Jul 22, 2008 9:02 am
Your blinky selection does not work anymore. Could you please put it up again? I'd really like to learn how to do this :)
By brittXblc on Jun 21, 2008 12:24 am
Tutorial Details
| Author |
Wavegirl
|
| Submitted on | Nov 14, 2007 |
| Page views | 13,802 |
| Favorites | 8 |
| Comments | 3 |
| Reviewer |
tripvertigo
|
| Approved on | Nov 14, 2007 |

