Tutorial
Click on thumbnailed images to enlarge
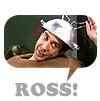
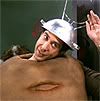
This tutorial teaches you how to turn this

into this icon
You will need the following things to make this icon:
[x] the font [url=http://www.fonts101.com/xt_fontdetails_az_FID!2035~Coopa_Blacka~font.html]Coopa Blacka[/url]
[x] Photoshop or PSP
[x] these images

Ok let's start
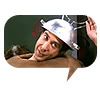
First resize, crop, and sharpen your original image.
Here is how mine came out
Then Copy and Paste this image
onto photoshop (on a new layer)
Set the layer's blending options to either Screen or Lighten. You should now have something like this
add some text and you're done!
Using "masks"
If you paste a black and white image such as the comment blog I used in this tutorial and set the layer to screen or lighten, you will get this effect. All of the black (darker parts) will not be visible and only the white and lighter parts will be visible in that layer.
Some websites with "mask" brushes available:
http://ewanism.livejournal.com
http://masterjinn.deviantart.com/
Hopefully you understand that! :D
into this icon
You will need the following things to make this icon:
[x] the font [url=http://www.fonts101.com/xt_fontdetails_az_FID!2035~Coopa_Blacka~font.html]Coopa Blacka[/url]
[x] Photoshop or PSP
[x] these images
Ok let's start
First resize, crop, and sharpen your original image.
Here is how mine came out
Then Copy and Paste this image
onto photoshop (on a new layer)
Set the layer's blending options to either Screen or Lighten. You should now have something like this
add some text and you're done!
Using "masks"
If you paste a black and white image such as the comment blog I used in this tutorial and set the layer to screen or lighten, you will get this effect. All of the black (darker parts) will not be visible and only the white and lighter parts will be visible in that layer.
Some websites with "mask" brushes available:
http://ewanism.livejournal.com
http://masterjinn.deviantart.com/
Hopefully you understand that! :D
Tutorial Comments
Showing latest 1 of 1 comments
