Tutorial
Click on thumbnailed images to enlarge
This tutorial will show you a way to achieve a cool looking retro feel.
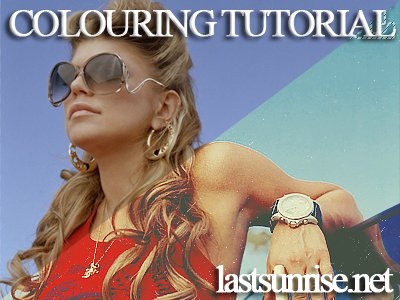
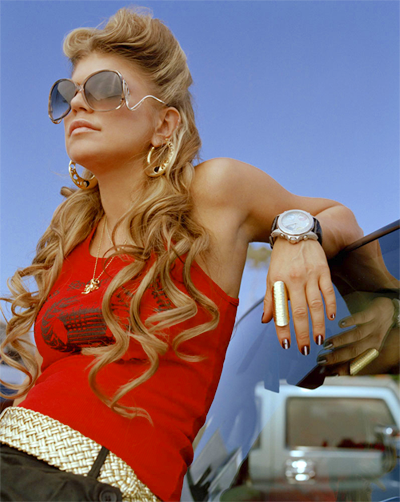
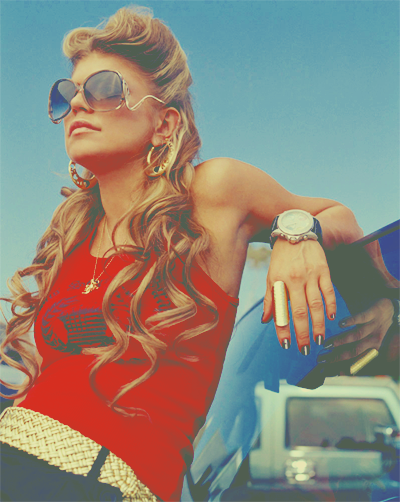
I'm using this picture of Fergie:
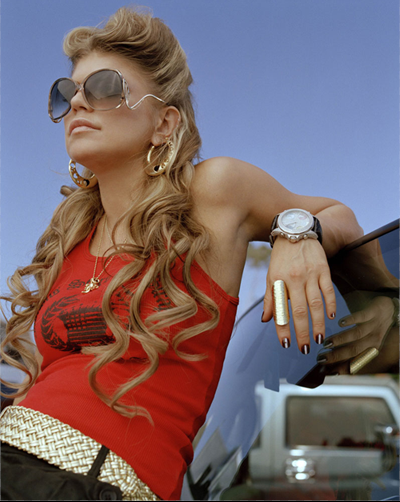
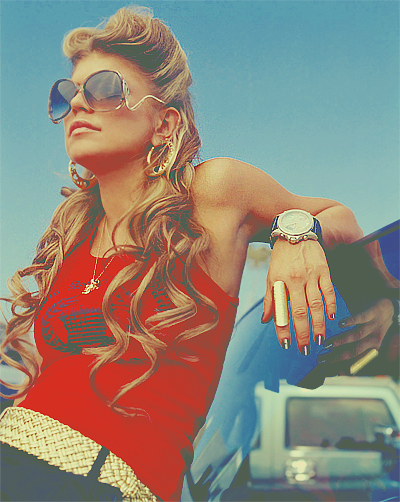
And we're going to turn that into this:
So let's do it.
Open your picture.
REMEMBER that all colour techniques work differently with each image: You have to play around to get what you're looking for.
This is what works with MY images, so you should know what you're doing to use this tutorial.
01 Variations;
We're going to touch up the orignal picture to give it a bit more oomph. (Image > Adjustments > Variations)
You get a window like this:
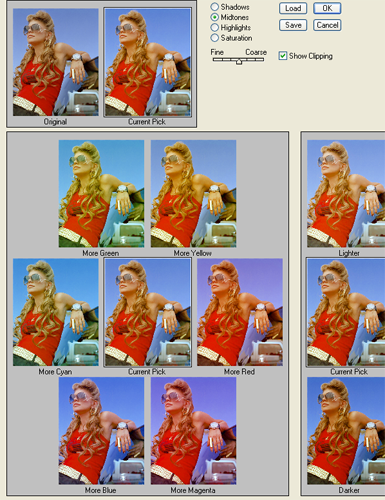
Midtone: lighten,
Highlight lighten,
Saturation more saturation.
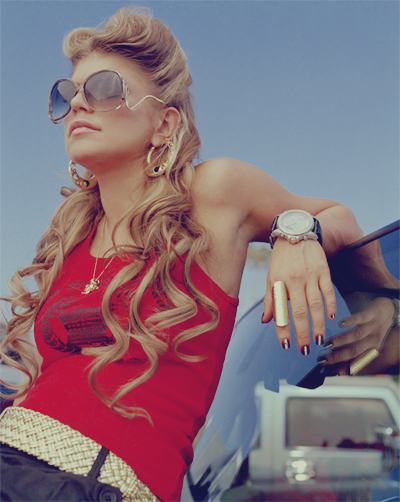
This gives Fergie a bit more of a powerful image:
02 Curves;
Okay, go Layers > New Adjusment Layer > Curves.
RGB 21, 20 / 131, 136 / 225, 212
Blue 6, 57 / 143, 140 / 225, 210
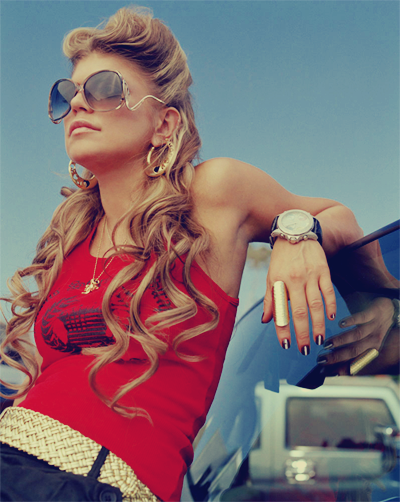
This is the result of that layer:
03 Curves;
Layers > New Adjustment Layer > Curves.
Red 0, 0 / 82, 53 / 192, 211 / 255, 255
Green 0, 0 / 73, 56 / 192, 206 / 255, 255
Blue 0, 0 / 133, 123 / 255, 255
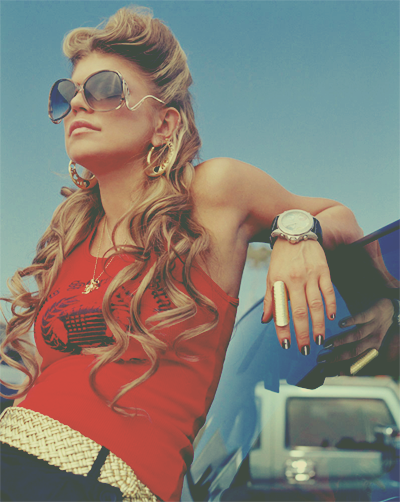
And this is what Fergie looks like now:
04 Curves;
Now add Layer > New Adjustment Layer > Curves.
RGB: 61,64 / 255, 255
Green: 62, 71 / 255, 255
Nanana, nice shadows!(:
Check out Fergie now:
Merge your layers!
05 Variations;
Image > Adjustments > Variations
Midtones Lighten
Saturation More Saturation
06 Sharpen;
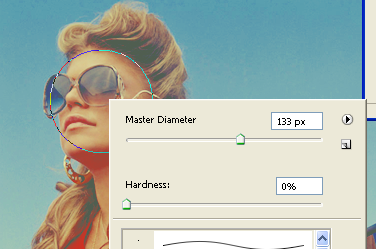
Take a soft, large brush:
I sharpened up Fergies facial areas, her hair, and the detail on her shirt, as well as her watch & hands.
07 Texture;
Add this texture: click here
Put it on Lighten, at 60%.
If you need to, erase facial area.
This is what Fergie looks like now:

08 Duplicate;
Duplicate (CTRL +J) the base image.
Desaturate (CTRL, shift + U) and move the layer to the top.
Set it to Overlay, and 50%.
I added some text, and then that was me done.
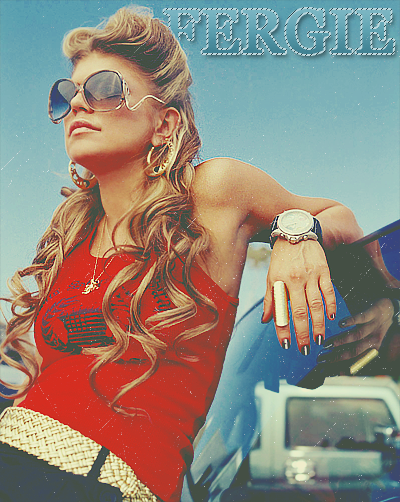
This is Fergie's final look:
You now have your final product. Save For Web > Save as PNG for best quality, especially if you have used text.
Credit to sammytheheadbutt for showing me Variations. LY(:
I'm using this picture of Fergie:
And we're going to turn that into this:
So let's do it.
Open your picture.
REMEMBER that all colour techniques work differently with each image: You have to play around to get what you're looking for.
This is what works with MY images, so you should know what you're doing to use this tutorial.
01 Variations;
We're going to touch up the orignal picture to give it a bit more oomph. (Image > Adjustments > Variations)
You get a window like this:
Midtone: lighten,
Highlight lighten,
Saturation more saturation.
This gives Fergie a bit more of a powerful image:
02 Curves;
Okay, go Layers > New Adjusment Layer > Curves.
RGB 21, 20 / 131, 136 / 225, 212
Blue 6, 57 / 143, 140 / 225, 210
This is the result of that layer:
03 Curves;
Layers > New Adjustment Layer > Curves.
Red 0, 0 / 82, 53 / 192, 211 / 255, 255
Green 0, 0 / 73, 56 / 192, 206 / 255, 255
Blue 0, 0 / 133, 123 / 255, 255
And this is what Fergie looks like now:
04 Curves;
Now add Layer > New Adjustment Layer > Curves.
RGB: 61,64 / 255, 255
Green: 62, 71 / 255, 255
Nanana, nice shadows!(:
Check out Fergie now:
Merge your layers!
05 Variations;
Image > Adjustments > Variations
Midtones Lighten
Saturation More Saturation
06 Sharpen;
Take a soft, large brush:
I sharpened up Fergies facial areas, her hair, and the detail on her shirt, as well as her watch & hands.
07 Texture;
Add this texture: click here
Put it on Lighten, at 60%.
If you need to, erase facial area.
This is what Fergie looks like now:
08 Duplicate;
Duplicate (CTRL +J) the base image.
Desaturate (CTRL, shift + U) and move the layer to the top.
Set it to Overlay, and 50%.
I added some text, and then that was me done.
This is Fergie's final look:
You now have your final product. Save For Web > Save as PNG for best quality, especially if you have used text.
Credit to sammytheheadbutt for showing me Variations. LY(:
Tutorial Comments
Showing latest 6 of 6 comments

I like the color - using the curves was confusing for me. =\
By MiissYER on Dec 1, 2010 4:48 pm

Way confused on the curves o_o
maybe you can show us a screenshot of each of them or something? Cause the effect is amazing :)
By turnupthevolume on Jun 30, 2010 10:02 pm

this is amazing.
but for the curves
how did you put 3 differet RGB's on ONE layer?
:) thanks.
By georgejetKins on Apr 19, 2010 2:21 pm
this is so pretty. i love it :D
your really good. faved!
By georgejetKins on Apr 19, 2010 1:41 pm

umm how did you create that text
this picture is realy cute
By daydaybby on Jul 22, 2009 2:48 pm

This is really cute, I like the dreamy vintage look it has (:
By SammyTheHeadbutt on Jul 22, 2009 1:46 pm
Tutorial Details
| Author |
aliiicimo
|
| Submitted on | Jul 21, 2009 |
| Page views | 14,635 |
| Favorites | 61 |
| Comments | 6 |
| Reviewer |
manny-the-dino
|
| Approved on | Jul 22, 2009 |