Tutorial
Click on thumbnailed images to enlarge
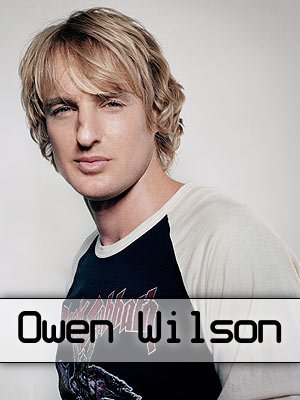
Before:

(after at bottom of tutorial)
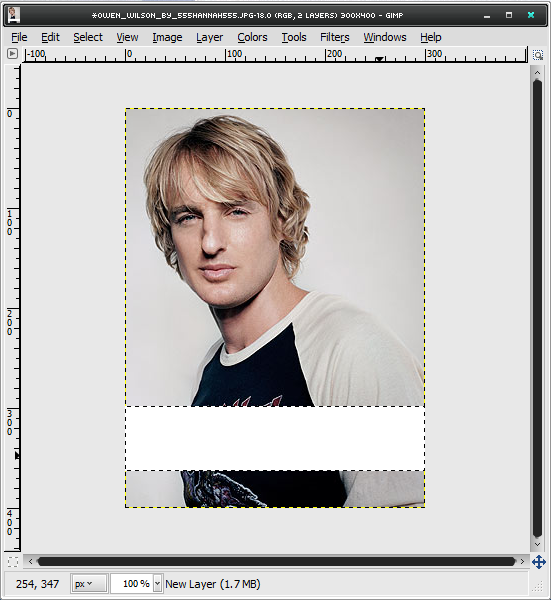
Open up any image you want, then use your rectangle select tool and select a rectangle
on any part of the image you want. Make a new layer. Then use the bucket fill tool (and make sure it is set to fill whole selection! Not fill similiar colors!) and fill the selection
with either black or white.
If behind the bar the image is black it is best to use white and if it is a lighter background use a black. Set the opacity of that layer to somewhee between 30 and 50 depending on what
looks best.
Then go to select>border> and set it to 1.
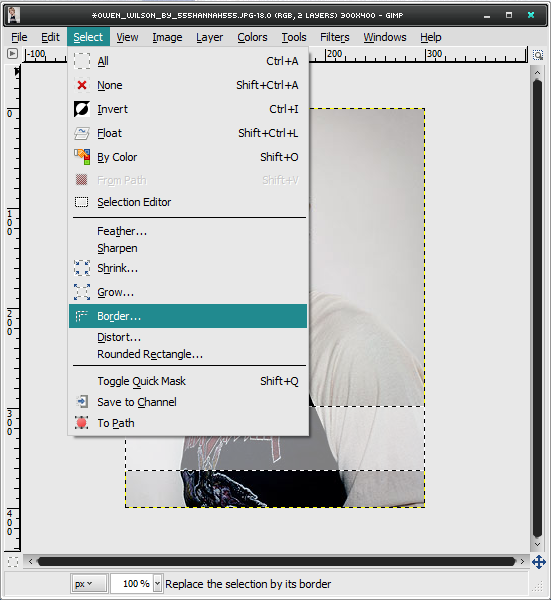
Then use the rectangle select tool and set it to subtract
from the current selection. Zoom close to one side of the selected border and remove the selection from
the border that is going down and repeat the same thing on the other side.
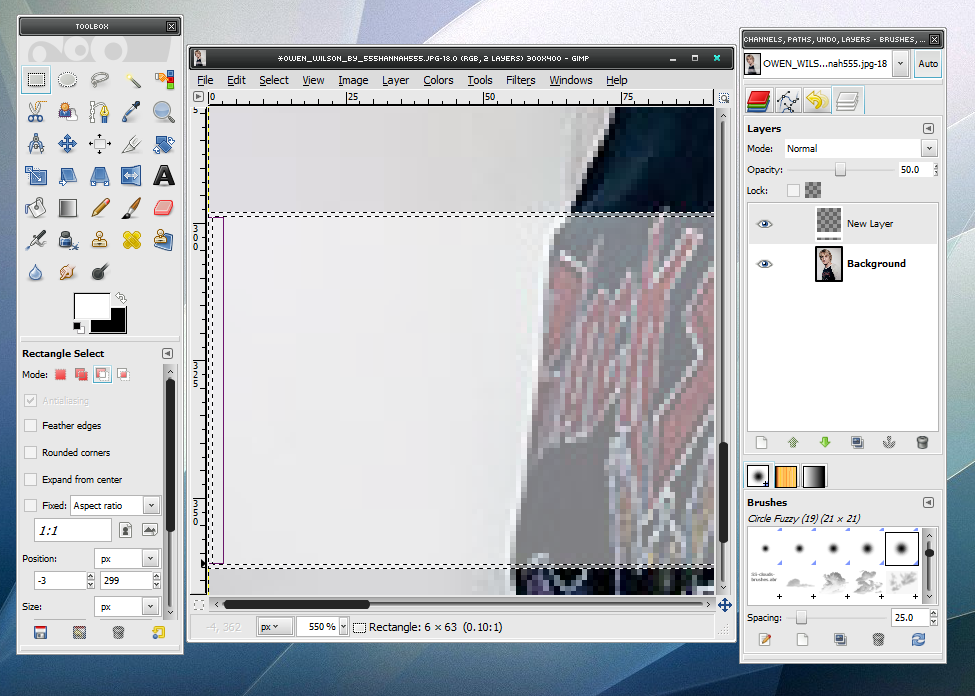
Now make a new layer use the bucket fill tool
and fill the border with black. If you want you can skip the step about removing the selection on both sides and when you finish the image just crop off both sides so you can's see the 1 pixel black border. Now you should have a image that looks like this and you can then put text on that
bar or whatever looks good.

Also for the added drop shaodw in the final image you can right click the layer with the white bar and then clcik alpha to selection and go to filters>light and shodow>drop shadow> and then set the coordinates from 8 and 8 to 0 and 0. It might make the canvas larger so you can just crop it.
(after at bottom of tutorial)
Open up any image you want, then use your rectangle select tool and select a rectangle
on any part of the image you want. Make a new layer. Then use the bucket fill tool (and make sure it is set to fill whole selection! Not fill similiar colors!) and fill the selection
with either black or white.
If behind the bar the image is black it is best to use white and if it is a lighter background use a black. Set the opacity of that layer to somewhee between 30 and 50 depending on what
looks best.
Then go to select>border> and set it to 1.
Then use the rectangle select tool and set it to subtract
from the current selection. Zoom close to one side of the selected border and remove the selection from
the border that is going down and repeat the same thing on the other side.
Now make a new layer use the bucket fill tool
and fill the border with black. If you want you can skip the step about removing the selection on both sides and when you finish the image just crop off both sides so you can's see the 1 pixel black border. Now you should have a image that looks like this and you can then put text on that
bar or whatever looks good.
Also for the added drop shaodw in the final image you can right click the layer with the white bar and then clcik alpha to selection and go to filters>light and shodow>drop shadow> and then set the coordinates from 8 and 8 to 0 and 0. It might make the canvas larger so you can just crop it.
Tutorial Comments
Showing latest 4 of 4 comments

woahhhhh nice theme. Where can I get?
By emberfly on Jul 11, 2009 10:19 pm

hehe. he is super hot.
and nice tut :)
By fiercest on Apr 24, 2009 8:56 pm

really good tutorial!
By theerinkal on Apr 14, 2009 3:22 am

nice.
;]
By xii3 on Apr 9, 2009 7:48 pm