Tutorial
Click on thumbnailed images to enlarge
In this tutorial, you will learn to do this:

in Paint Shop Pro 7. Very simple.
Alright, so we're starting with this picture of Alexis Bledel, just because I like the show Gilmore Girls.

Duplicate the picture under Window>>Duplicate. Now you have two. Excellent.
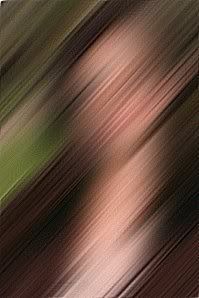
Take the second picture and do motion blur three or four times in a slanted direction, 40 pixels of strength. And this is what you have.

Now, do "Sharpen More" under effects>>sharpen three or four times. Then it looks like this:

Right. Now Select all [ctrl+A] and cut and paste it AS A NEW LAYER on the first picture, the one that isnt changed. so it looks like the same picture you had a second ago, only in two layers.
Then, change the layer properties blend mode under Layers>>Properties to Overlay. THen you come out with this:
You can also change it to screen:
Play around with the different blend modes because the right blend mode for each tutorial changes.
By the way, I got this tutorial from graphicized.org but i put it in my own words and own spin. :smile:
in Paint Shop Pro 7. Very simple.
Alright, so we're starting with this picture of Alexis Bledel, just because I like the show Gilmore Girls.
Duplicate the picture under Window>>Duplicate. Now you have two. Excellent.
Take the second picture and do motion blur three or four times in a slanted direction, 40 pixels of strength. And this is what you have.
Now, do "Sharpen More" under effects>>sharpen three or four times. Then it looks like this:
Right. Now Select all [ctrl+A] and cut and paste it AS A NEW LAYER on the first picture, the one that isnt changed. so it looks like the same picture you had a second ago, only in two layers.
Then, change the layer properties blend mode under Layers>>Properties to Overlay. THen you come out with this:
You can also change it to screen:
Play around with the different blend modes because the right blend mode for each tutorial changes.
By the way, I got this tutorial from graphicized.org but i put it in my own words and own spin. :smile:
Tutorial Comments
No comments yet. Be the first one to comment!