Tutorial
Click on thumbnailed images to enlarge
Step 1:
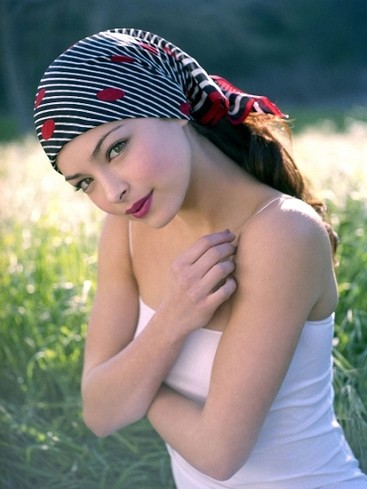
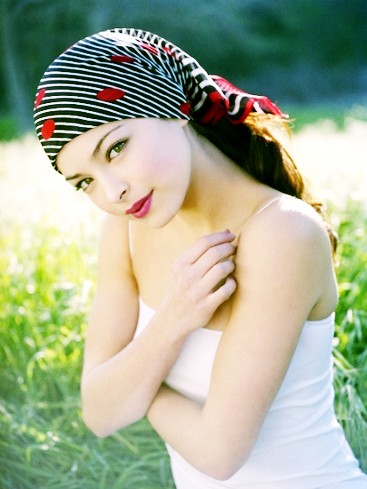
Open your picture up in photoshop. I will be using this photo of Kristin Kreuk. You can already tell that the quality of this picture is perfection as it was taken with a professional camera. If you are not quite acquainted with photoshop, I suggest you use the same picture so it will be easier for you to follow along. If you have a not-so wonderful quality picture, I will teach you how to enhance the quality.
Step 2:
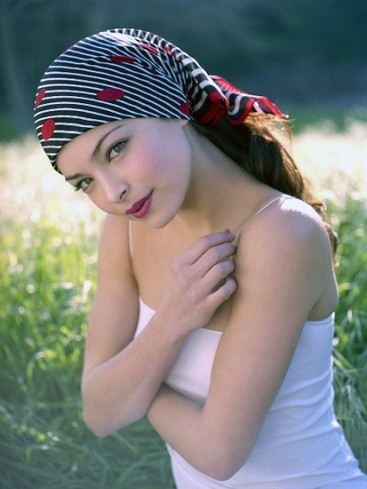
Next, I want to see if photoshop's auto color will add a favorable shade of color. You can test this by clicking on your toolbar Image > Adjustments > Auto Color or simply press Shift + Ctrl + B. As you can see, the image has turned a little darker which is unfavorable as it was lighter before. Press Ctrl + Z to undo auto color.
The reason for this is because often, auto color will enhance the richness of your picture and sometimes it will make it darker. You should always try to see what will happen but undo auto color if your results are not favorable.
Step 3:
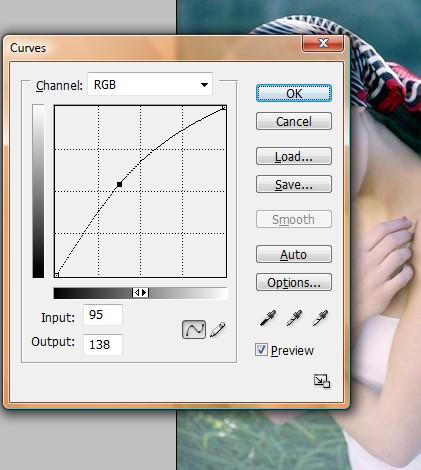
We need to make this picture lighter and there are several ways of doing this but I will show you the way I do it. Simply press Ctrl + M to change the curves or go to Image > Adjustments > Curve. As of right now, the Curve box is a linear line, what you need to do to make this image lighter is to drag the middle of the linear line to the left. Why the middle? On the left there is a scale of dark to light. Since this image is not exactly dark as night, we just want to make it lighter moderately by choosing to drag the middle of the linear line. If this picture were a lot darker, we would drag the linear line to curve at a lower point. Inversely, to make this image darker, we would drag it the other way.
You can also obviously see the difference in the picture as it is lighter.
Step 4:
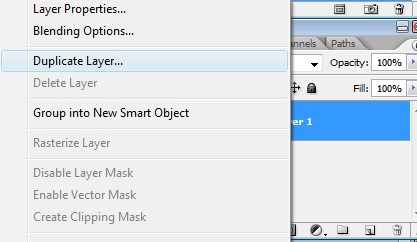
Next go to your Layers box and right click your first layer and then duplicate it. If you have no idea what I am talking about, go to Windows > Layers or F7. A layers box should appear. Your first layer should be titled either Layer 1 if you copy and pasted your picture into photoshop or Background Image if you opened it from a file. Doesn't matter what it's titled, just make a duplicate of it.
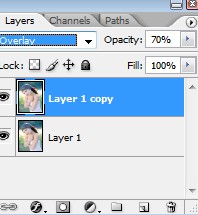
Step 5:
Click on your duplicated layer and change the setting from "normal" to "overlay". Then change the opacity to anywhere around 60% to 70%. It's your call! Experiment with the opacity to see what you prefer more. I have set my opacity to 70% but normally I set it to about 60%.
Step 6:
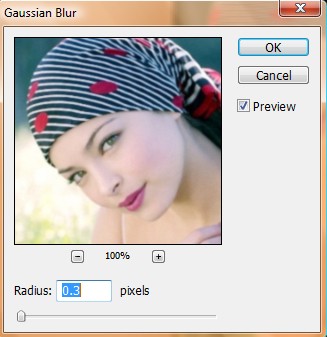
Click back to your first layer and if you have any types of blemishes or things you'd like to get rid of, do so by using the blur tool. It is extremely vital that you are clicking on the first layer and not the 2nd layer. If you are using the model picture, simply go to Filter > Blur > Gaussian Blur.
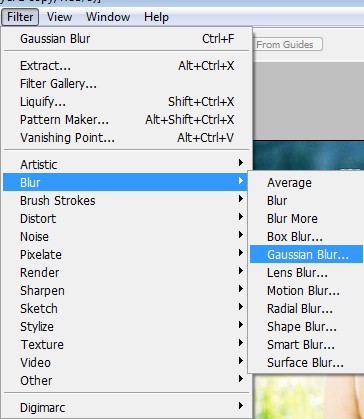
Then change the setting from a range of .2 to 3. I have chosen to use .3 because it creates a soft glow but does not complete discard the sharpness of the picture that I like. If you'd like to make your picture more with more blur and glow, go for it! Experiment with the setting. The higher the number, the greater the blur.
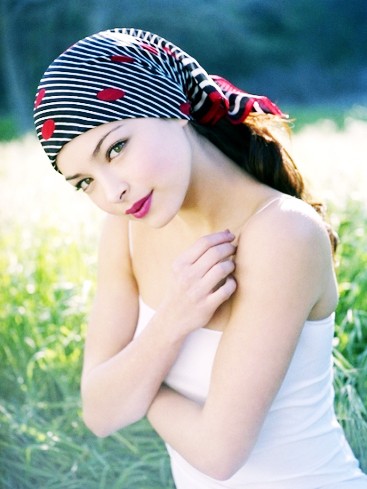
So far I have this:
Step 7:
You could finish at step 6 if you want to but I will go on to show you a couple of tricks that I have been taught. I think the picture is a little bland and needs a little more life, more happiness, more..yellow! So click on your paint bucket tool and input a nice soft yellow color. I will be using #ffffcc. Then go to your layers box and add a new layer, do not duplicate the previous layer! Right next to the trashcan in your layers box is a little folded paper, click that to create a new layer. Click that layer which should be titled Layer 2 if you copied your picture or Layer 1 if you opened your picture from a file. Again, it does not matter what the title is, as long as you are following along with me, it is all good. Now use your paint bucket and fill in the image with 100% #ffffcc. Go to your layers box and change the setting from "normal" to "color burn".
This is what I have so far:
Of course we are not done but you can see that the image is obviously different. Click the opacity and change it to a much more desired percentage of anywhere from 35% to 65%. I will be using 60%.
Step 8:
The final step! Adding a border. Add a new layer and press Ctrl + A. Now go to Edit > Stroke. Change the color to white and the width to 5-10px. Then press okay. Go to Edit > Stroke one last time and change the color to black or a dark gray but this time, change the width to 1px. Press okay, deselect (Ctrl + D) and you're all done!
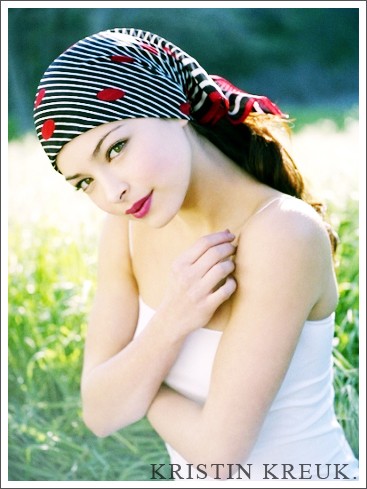
My final product:
If you feel that this image is still too light, try adding another layer after the yellow layer and filling it with a light orange color. I used #ffd863, then change the setting to Color Burn and the opacity to 40%.
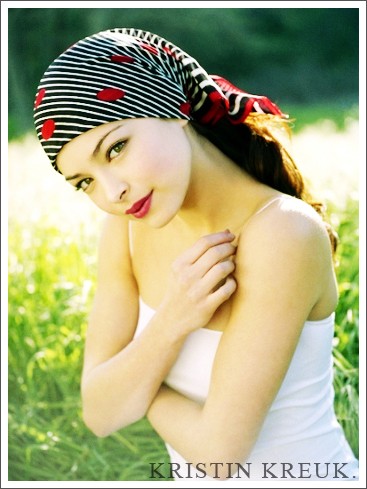
My final final product:
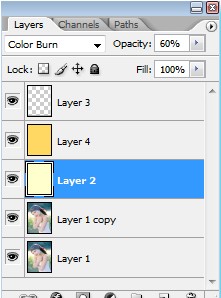
Curious to see my layers box?
I hope your results turned out to your liking! Feel free to leave any comments or questions.
Open your picture up in photoshop. I will be using this photo of Kristin Kreuk. You can already tell that the quality of this picture is perfection as it was taken with a professional camera. If you are not quite acquainted with photoshop, I suggest you use the same picture so it will be easier for you to follow along. If you have a not-so wonderful quality picture, I will teach you how to enhance the quality.
Step 2:
Next, I want to see if photoshop's auto color will add a favorable shade of color. You can test this by clicking on your toolbar Image > Adjustments > Auto Color or simply press Shift + Ctrl + B. As you can see, the image has turned a little darker which is unfavorable as it was lighter before. Press Ctrl + Z to undo auto color.
The reason for this is because often, auto color will enhance the richness of your picture and sometimes it will make it darker. You should always try to see what will happen but undo auto color if your results are not favorable.
Step 3:
We need to make this picture lighter and there are several ways of doing this but I will show you the way I do it. Simply press Ctrl + M to change the curves or go to Image > Adjustments > Curve. As of right now, the Curve box is a linear line, what you need to do to make this image lighter is to drag the middle of the linear line to the left. Why the middle? On the left there is a scale of dark to light. Since this image is not exactly dark as night, we just want to make it lighter moderately by choosing to drag the middle of the linear line. If this picture were a lot darker, we would drag the linear line to curve at a lower point. Inversely, to make this image darker, we would drag it the other way.
You can also obviously see the difference in the picture as it is lighter.
Step 4:
Next go to your Layers box and right click your first layer and then duplicate it. If you have no idea what I am talking about, go to Windows > Layers or F7. A layers box should appear. Your first layer should be titled either Layer 1 if you copy and pasted your picture into photoshop or Background Image if you opened it from a file. Doesn't matter what it's titled, just make a duplicate of it.
Step 5:
Click on your duplicated layer and change the setting from "normal" to "overlay". Then change the opacity to anywhere around 60% to 70%. It's your call! Experiment with the opacity to see what you prefer more. I have set my opacity to 70% but normally I set it to about 60%.
Step 6:
Click back to your first layer and if you have any types of blemishes or things you'd like to get rid of, do so by using the blur tool. It is extremely vital that you are clicking on the first layer and not the 2nd layer. If you are using the model picture, simply go to Filter > Blur > Gaussian Blur.
Then change the setting from a range of .2 to 3. I have chosen to use .3 because it creates a soft glow but does not complete discard the sharpness of the picture that I like. If you'd like to make your picture more with more blur and glow, go for it! Experiment with the setting. The higher the number, the greater the blur.
So far I have this:
Step 7:
You could finish at step 6 if you want to but I will go on to show you a couple of tricks that I have been taught. I think the picture is a little bland and needs a little more life, more happiness, more..yellow! So click on your paint bucket tool and input a nice soft yellow color. I will be using #ffffcc. Then go to your layers box and add a new layer, do not duplicate the previous layer! Right next to the trashcan in your layers box is a little folded paper, click that to create a new layer. Click that layer which should be titled Layer 2 if you copied your picture or Layer 1 if you opened your picture from a file. Again, it does not matter what the title is, as long as you are following along with me, it is all good. Now use your paint bucket and fill in the image with 100% #ffffcc. Go to your layers box and change the setting from "normal" to "color burn".
This is what I have so far:
Of course we are not done but you can see that the image is obviously different. Click the opacity and change it to a much more desired percentage of anywhere from 35% to 65%. I will be using 60%.
Step 8:
The final step! Adding a border. Add a new layer and press Ctrl + A. Now go to Edit > Stroke. Change the color to white and the width to 5-10px. Then press okay. Go to Edit > Stroke one last time and change the color to black or a dark gray but this time, change the width to 1px. Press okay, deselect (Ctrl + D) and you're all done!
My final product:
If you feel that this image is still too light, try adding another layer after the yellow layer and filling it with a light orange color. I used #ffd863, then change the setting to Color Burn and the opacity to 40%.
My final final product:
Curious to see my layers box?
I hope your results turned out to your liking! Feel free to leave any comments or questions.
Tutorial Comments
Showing latest 10 of 11 comments

OoOO pretty
By MiissYER on Mar 11, 2010 3:53 pm

great!
By Cupcake-S on Jul 9, 2008 1:20 pm

Cute.
By IzzyGrace on Jun 7, 2008 4:26 am

This gives off a really nice ambient light effect! Thank you
for sharing it.
By arekellee on May 31, 2008 6:05 pm

thanks so much
By kimboxxkimi on May 28, 2008 2:08 am

This is really great. Thanks so muuuuuch. ;]
By LittleMissShibooyah on May 13, 2008 7:48 am

really nice :)
By purplelilac8o8 on May 13, 2008 1:23 am

niceeeeeeeee =]
By N4th4li3L on May 11, 2008 9:00 pm

WONDERful! Thank you so very much!
By iSbl on May 10, 2008 1:11 am

this is niiice!
By lkajsfklajskds on May 9, 2008 12:34 am
Tutorial Details
| Author |
TiffanyFactorial
|
| Submitted on | May 2, 2008 |
| Page views | 22,313 |
| Favorites | 139 |
| Comments | 11 |
| Reviewer |
Synesthesia
|
| Approved on | May 2, 2008 |