Tutorial
Click on thumbnailed images to enlarge
**NOTE**
I did this tutorial in Photoshop CS3 Extended which is why some of you may have problems. However, that does't mean this tutorial won't work in other versions of Photoshop. Just try it out.
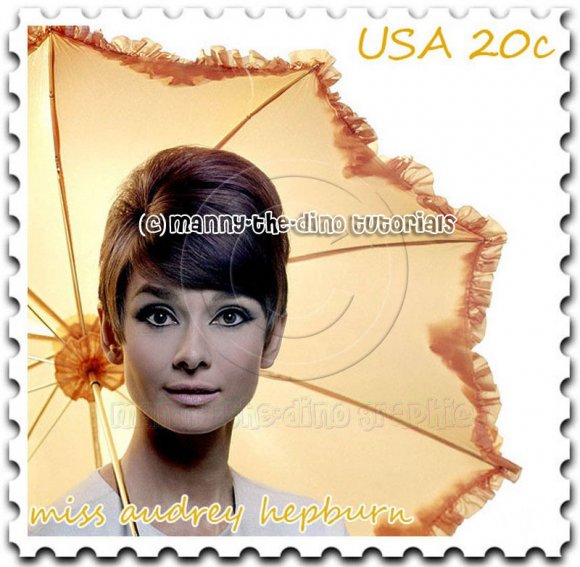
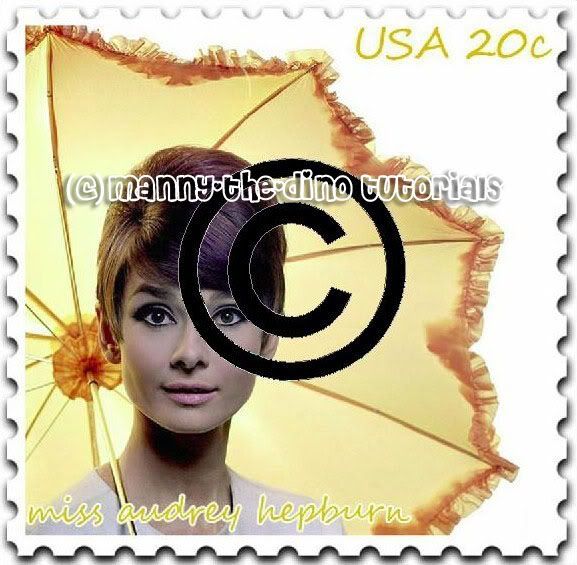
Want to learn how to copyright & watermark your photos/graphics? Now you can with my tutorial. I'll be using a graphic I made for my postage stamp tutorial. Here's the before:

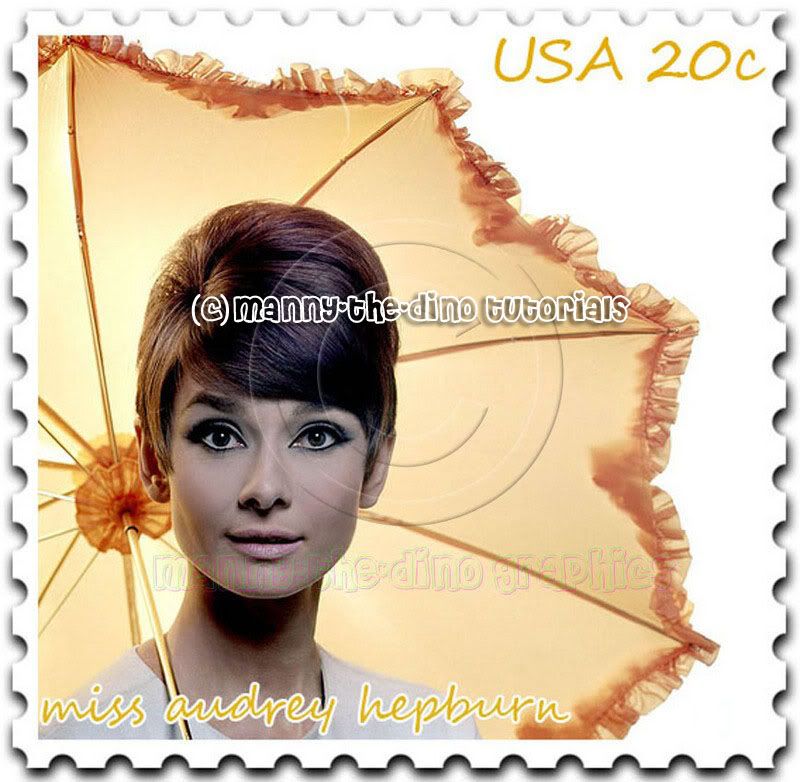
Here's the after:
Let's start!
001.First, open up your picture.
002.Select your Custom Tool Shape (U).

003.Click on the little arrow next to your shape, up at the top, & find the "Copyright" symbol.

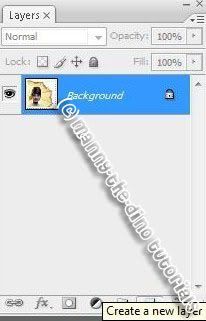
004.Create a new layer by clicking on your "Create a new layer" button.
005.Now put the copyright symbol on your picture. It doesn't matter the size or where. Anywhere will do.
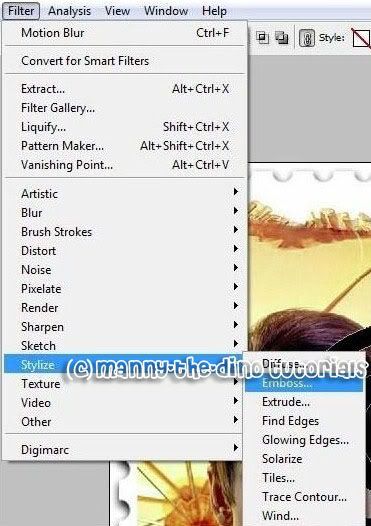
006.Now go Filter>Stylize>Emboss.
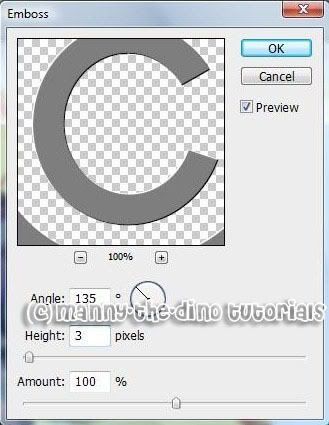
007.When the pop-up appears, apply the following settings:
Angle: 135
Height: 3
Amount: 100
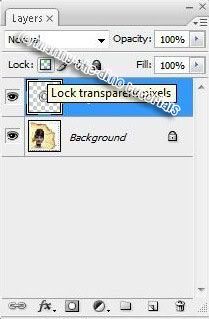
008.Click on the "Lock transparent pixels" button in your layers' palette.
009.Now go Filter>Blur>Gaussian Blur.

010.Enter 2 as your radius.
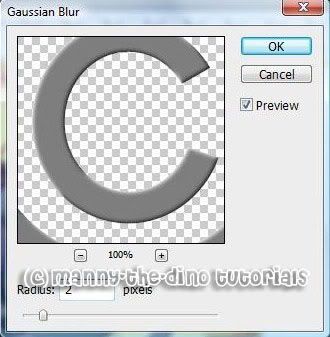
011.Change your blend mode from Normal to Hard Light.

012.Now get your typing tool.

013.And type the name of your website, productions, graphics name, name, etc.

014.Right click on your text layer & select "Rasterize Type".

015.Now go Filter>Stylize>Emboss.
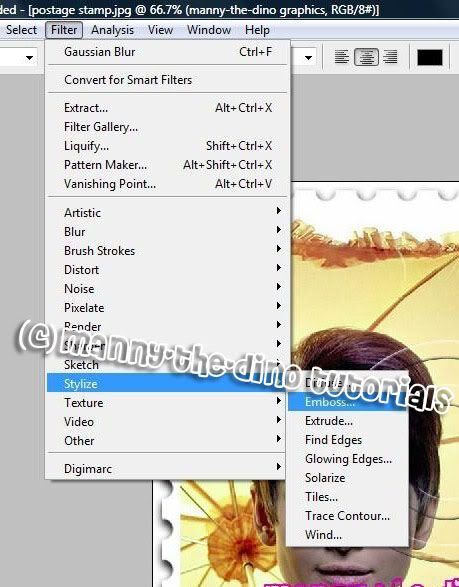
016.Change the blend mode to Hard Light & opacity to 40 for your text.
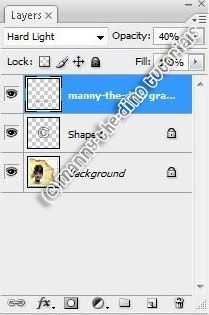
017.Change the opacity to 40 for your shape layer.

018.Now go File>File Info.
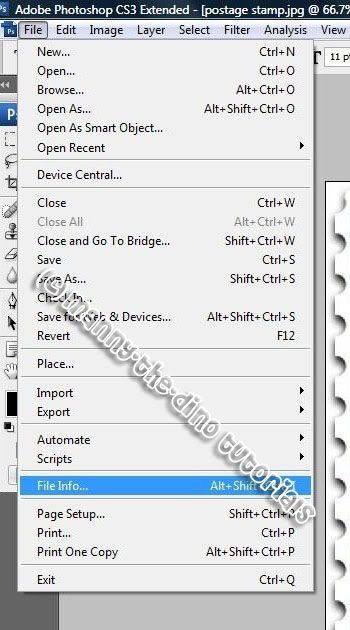
019.When the pop-up appears, apply the following settings:
Copyright Status: Copyright
Copyright Notice: (your productions name) copyright 2007
Copyright Info URL: (your website)
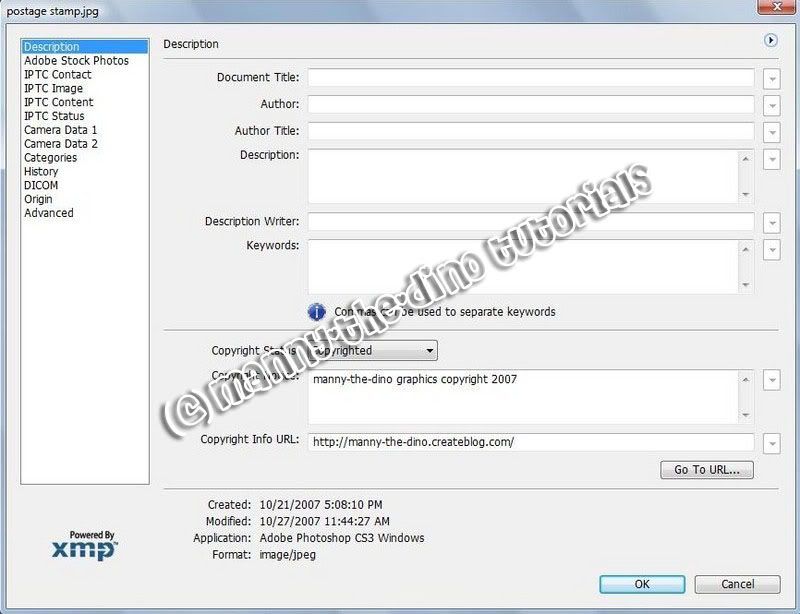
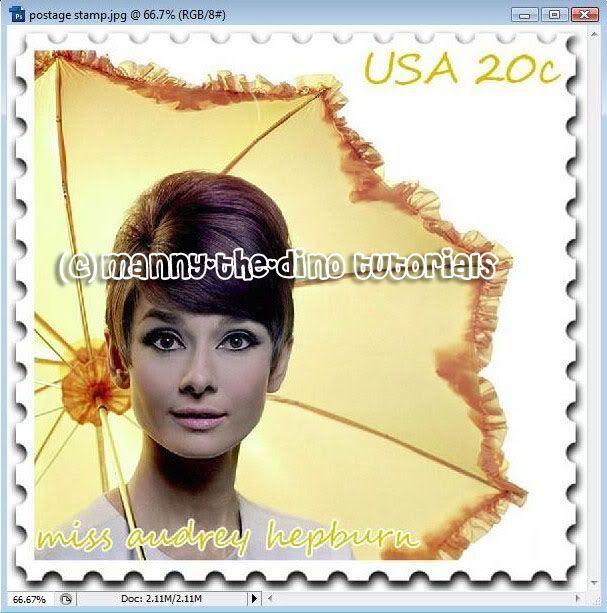
020.After pressing Ok, you'll notice that at the top of your screen where it says the name of your file, there will be a copyright symbol. And also at the bottom of your screen on the left corner.

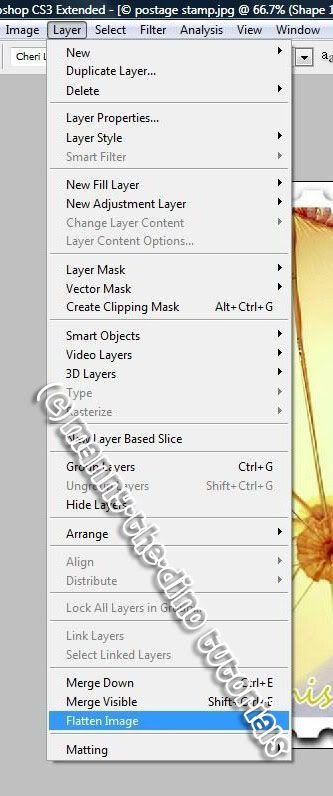
021.Now go Layer>Flatten Image.
022.And you have your final product. Now no one can steal your images. Hope this tut helped you!

If you got lost or have any questions, comment the tutorial & I'll get back to you as soon as I can. :D
I did this tutorial in Photoshop CS3 Extended which is why some of you may have problems. However, that does't mean this tutorial won't work in other versions of Photoshop. Just try it out.
Want to learn how to copyright & watermark your photos/graphics? Now you can with my tutorial. I'll be using a graphic I made for my postage stamp tutorial. Here's the before:

Here's the after:

Let's start!
001.First, open up your picture.

002.Select your Custom Tool Shape (U).

003.Click on the little arrow next to your shape, up at the top, & find the "Copyright" symbol.

004.Create a new layer by clicking on your "Create a new layer" button.

005.Now put the copyright symbol on your picture. It doesn't matter the size or where. Anywhere will do.

006.Now go Filter>Stylize>Emboss.

007.When the pop-up appears, apply the following settings:
Angle: 135
Height: 3
Amount: 100

008.Click on the "Lock transparent pixels" button in your layers' palette.

009.Now go Filter>Blur>Gaussian Blur.

010.Enter 2 as your radius.

011.Change your blend mode from Normal to Hard Light.

012.Now get your typing tool.

013.And type the name of your website, productions, graphics name, name, etc.

014.Right click on your text layer & select "Rasterize Type".

015.Now go Filter>Stylize>Emboss.

016.Change the blend mode to Hard Light & opacity to 40 for your text.

017.Change the opacity to 40 for your shape layer.

018.Now go File>File Info.

019.When the pop-up appears, apply the following settings:
Copyright Status: Copyright
Copyright Notice: (your productions name) copyright 2007
Copyright Info URL: (your website)

020.After pressing Ok, you'll notice that at the top of your screen where it says the name of your file, there will be a copyright symbol. And also at the bottom of your screen on the left corner.

021.Now go Layer>Flatten Image.

022.And you have your final product. Now no one can steal your images. Hope this tut helped you!

If you got lost or have any questions, comment the tutorial & I'll get back to you as soon as I can. :D
Tutorial Comments
Showing latest 10 of 19 comments

THANKS. FINALLY I!
By SLYBOi on Jan 21, 2009 9:24 am
For some reason I cant fill mines with color.. Any help with that?
By jayy-cass on Dec 31, 2008 2:19 am
woops no its not sorry for keep posting!
By 4gotten4ever on Dec 22, 2008 5:40 pm
Yea part 11 is it..
By 4gotten4ever on Dec 22, 2008 5:39 pm
Didnt work..my big C is Bold black?
By 4gotten4ever on Dec 22, 2008 5:39 pm
I care too...anyway thanks for this tutorial =]
By lauren5848 on Sep 4, 2008 8:48 pm
this is what they do with the new dollar bills, only they make it so you cant SEE IT....ooh CrEePy!!!
By Jghelfi on Aug 18, 2008 10:06 pm
im stuck on part 11 can you please help me?
By SmexiiKitty on Jul 25, 2008 11:13 am
I CARE. O.o
You must be a pic. stealer!!! >,<
Baha, anywayyysss....
thank you!!! :D
By NoWorriesDesigns on Jul 7, 2008 9:12 am
sweet!!! awesome! thanks
By purpleKat on Jun 23, 2008 6:16 pm
Tutorial Details
| Author |
manny-the-dino
|
| Submitted on | Nov 14, 2007 |
| Page views | 22,357 |
| Favorites | 157 |
| Comments | 19 |
| Reviewer |
tripvertigo
|
| Approved on | Nov 15, 2007 |
