Tutorial
Click on thumbnailed images to enlarge
First, Open a photoshop document, sized 600px x 400px with a white background
Next, Make sure your background and foreground colours are set to black and white by pressing "D" then go to: Filter > Render > Clouds
Some clouds will appear on your document, then go to: Filter > Pixelate > Mezzotint and set it to "Long Strokes"
Some lines will appear, and finally you go to: Filter > Blur > Motion Blur and set it to:
Angle: 90
Distance: 999
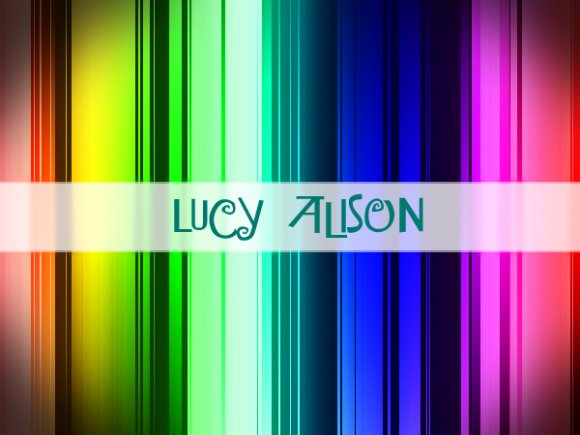
And vertical bars will appear, next, if you want them to be rainbow coloured, create a new layer and select the gradient tool and select the rainbow gradient and set it to "Linear Gradient" and drag it from left to right on your document - if you hold down "shift" it will go in a straight line
Then set your layer to "Overlay" and you will see rainbow coloured bars
After this you can go to: Layer > New Adjustment Layer > Curves and adjust the settings to your liking
You can also create a small selection in the middle of your document and go to Select > Feather and set it to 30px, and go to Image > Adjustments > Curves and change that to make it brighter and to how you like it
This next part is optional, get your Eliptical Marquee tool and create a huge ring over the bars so only a small area at the corners is not inside, then go to: Select > Modify > Feather and set it to 30px
Go to: Select > Inverse and go to Edit > Fill and chose the colour as "Black"
Then, get your Rectangular Marquee Tool and create a rectangle across the middle of your document (see tutorial pic), then keeping the selection on, go onto the first layer with your bars on, then Copy and Paste it onto a new layer, underneath the rainbow gradient layer and go to: Filter > Blur > Gaussian Blur and set the radius to 3.2px
Then keeping the selection go and create a new layer ontop of all the other layers and fill the selection with white and set the layer Opacity to 50%, and duplicate the layer and zoom in go to Edit > Free Transform and drag it in smaller at the top and the bottom by a couple of pixels
Add some text and you're done!You can use this for icons, Backgrounds, Tutorials and More, please credit me for my tutorial!
Tutorial Comments
Showing latest 3 of 3 comments

adorbzz.:3
By scenegirl988 on Jun 21, 2011 3:09 pm
i love this one..thanks
By deepfriend on Nov 15, 2010 12:09 pm
cute(: thanks
By georgejetKins on Jul 10, 2010 5:32 pm
Tutorial Details
| Author |
lolzies
|
| Submitted on | Jul 8, 2010 |
| Page views | 6,175 |
| Favorites | 17 |
| Comments | 3 |
| Reviewer |
manny-the-dino
|
| Approved on | Jul 10, 2010 |


