Tutorial
Click on thumbnailed images to enlarge
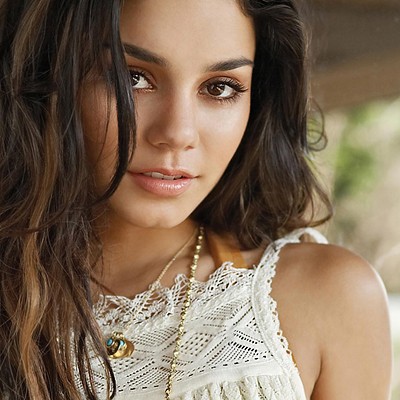
STEP 001 : OPEN UP BASE
For this tutorial, I will be using a photo of Vanessa Hudgens =)

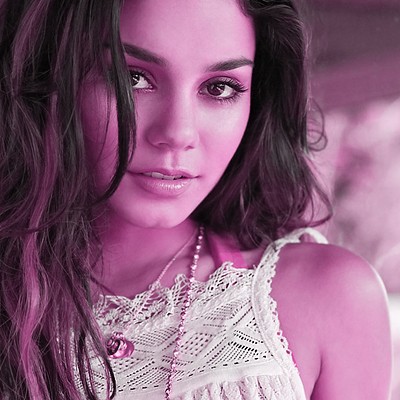
STEP 002 : LAYER > NEW FILL LAYER > COLOR
Use e436a4 and set the layer to hue 100%.

STEP 003 : LAYER > NEW FILL LAYER > COLOR
Use 020229 and set that layer to difference 100%.

I know it looks strange right now, but it will look fabulous, I promise!!
STEP 004 : LAYER > NEW ADJUSTMENT LAYER > LEVELS
Use these specifications:
50, 1.88, 255
STEP 005 : LAYER > NEW ADJUSTMENT LAYER > COLOR BALANCE
Use these specifications:
MIDTONES -12, -16, -93
SHADOWS -100, -100, -100
HIGHLIGHTS -100, -100, -100
STEP 006 : LAYER > NEW ADJUSTMENT LAYER > HUE/SATURATION
Use these specifications:
REDS 17, -4, 4
YELLOWS 0, 33, 62
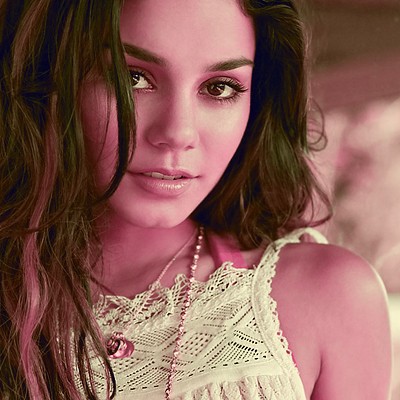
After these new adjustment layers, your image should look something like this so far:

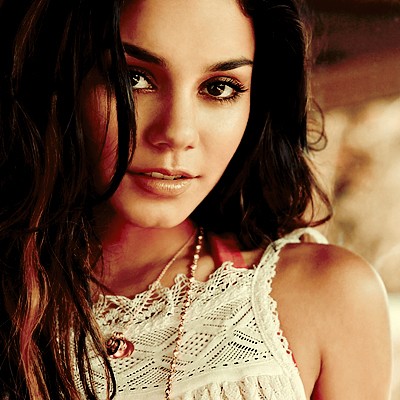
STEP 007 : LAYER > NEW FILL LAYER > COLOR
Use 020229 and set the layer to overlay 75%.

THE END!!
Here's the effect on a few other images:


For this tutorial, I will be using a photo of Vanessa Hudgens =)

STEP 002 : LAYER > NEW FILL LAYER > COLOR
Use e436a4 and set the layer to hue 100%.

STEP 003 : LAYER > NEW FILL LAYER > COLOR
Use 020229 and set that layer to difference 100%.

I know it looks strange right now, but it will look fabulous, I promise!!
STEP 004 : LAYER > NEW ADJUSTMENT LAYER > LEVELS
Use these specifications:
50, 1.88, 255
STEP 005 : LAYER > NEW ADJUSTMENT LAYER > COLOR BALANCE
Use these specifications:
MIDTONES -12, -16, -93
SHADOWS -100, -100, -100
HIGHLIGHTS -100, -100, -100
STEP 006 : LAYER > NEW ADJUSTMENT LAYER > HUE/SATURATION
Use these specifications:
REDS 17, -4, 4
YELLOWS 0, 33, 62
After these new adjustment layers, your image should look something like this so far:

STEP 007 : LAYER > NEW FILL LAYER > COLOR
Use 020229 and set the layer to overlay 75%.

THE END!!
Here's the effect on a few other images:


Tutorial Comments
Showing latest 2 of 2 comments

love it!
By pinkkgoddess20 on May 6, 2010 1:09 pm
Looks a little bit too much for my taste, but I'll use this later for sure. (;
By creole on Apr 9, 2010 9:41 pm
Tutorial Details
| Author |
paisleyinthesky
|
| Submitted on | Apr 3, 2010 |
| Page views | 11,896 |
| Favorites | 37 |
| Comments | 2 |
| Reviewer |
manny-the-dino
|
| Approved on | Apr 3, 2010 |

