
Tutorial
Click on thumbnailed images to enlarge
NOTE! This tutorial uses selective coloring and exclusion layers, so not translatable! :( Sorry guys
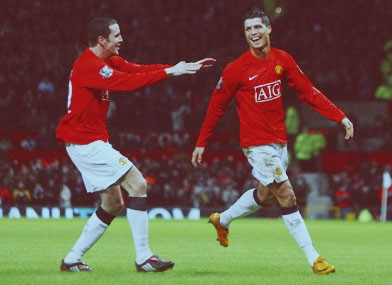
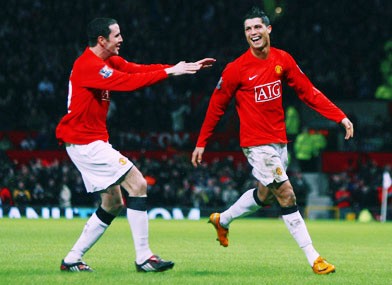
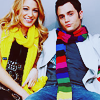
Okay so today we'll be doing this:
from this:
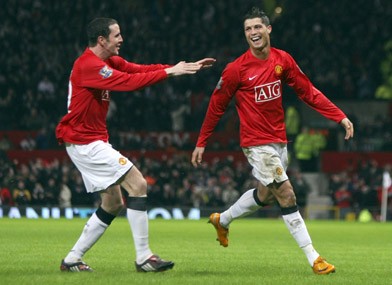
So let's start. :) Open up your photo, crop, resize, blur, sharpen, whatever. :D Then layer > new adjustment layer > selective coloring layer with these settings:
reds: c: -79
m: +4
y :+18
b :+7
whites: c: +59
m: +78
y: -43
b: -53

Next layer > new adjustment layer > selective coloring and apply these settings:
greens: c: +68
y: -33
m: +4
b: -52
blues: c: +86
neutrals: c: +4
m: -9
y: -16
b: +21
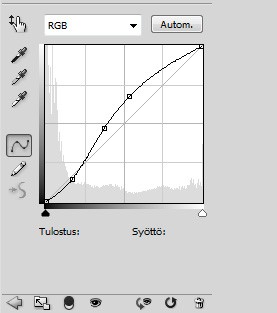
Next layer > new adjustment layer > curves. Put the settings like this:
1st point: output 36
input 42
2nd point: output 120
input 42
3rd point: output 172
input 136
it should look like this:

Next layer > new fill layer > solid color with #ce2dd4 , set it to multiply 8%.
Then another fill layer with #410e0e , set it to exclusion 50%.
And voilá you're done! if the outcome is too dark, duplicate the base and set the duplicate to screen. :)
other exsamples in icon-size:


you can take the icons if you want. :D
Okay so today we'll be doing this:
from this:
So let's start. :) Open up your photo, crop, resize, blur, sharpen, whatever. :D Then layer > new adjustment layer > selective coloring layer with these settings:
reds: c: -79
m: +4
y :+18
b :+7
whites: c: +59
m: +78
y: -43
b: -53
Next layer > new adjustment layer > selective coloring and apply these settings:
greens: c: +68
y: -33
m: +4
b: -52
blues: c: +86
neutrals: c: +4
m: -9
y: -16
b: +21
Next layer > new adjustment layer > curves. Put the settings like this:
1st point: output 36
input 42
2nd point: output 120
input 42
3rd point: output 172
input 136
it should look like this:
Next layer > new fill layer > solid color with #ce2dd4 , set it to multiply 8%.
Then another fill layer with #410e0e , set it to exclusion 50%.
And voilá you're done! if the outcome is too dark, duplicate the base and set the duplicate to screen. :)
other exsamples in icon-size:
you can take the icons if you want. :D
Tutorial Comments
Showing latest 8 of 8 comments

love this. +fav's
By naythan82 on Sep 24, 2009 8:24 pm

i like the second example you used for the icons,
did you tweak the lighting a bit?
By creole on Aug 22, 2009 12:52 pm

love manchester
By turnupthevolume on Aug 15, 2009 3:44 pm

The second point won't let me put the input as 42, it says the lowest input I can have is 46. =/
By MemoriesWithin on Aug 13, 2009 4:13 pm

cristiano rolando? is that him? ahhhh he's so sexxxyy.
By broken-doll on Aug 5, 2009 11:01 pm

must comment because Cris is in this. looks cool ^^
By futura on Jul 31, 2009 2:04 am

Nice vintage look, the icons look cool.
By aliiicimo on Jul 30, 2009 3:08 pm

:D
whoa, i love it.
sorta vintage-ish and green stylee
By xii3 on Jul 30, 2009 12:16 pm
Tutorial Details
| Author |
fiercest
|
| Submitted on | Jul 30, 2009 |
| Page views | 9,188 |
| Favorites | 29 |
| Comments | 8 |
| Reviewer |
A1Bassline
|
| Approved on | Jul 30, 2009 |