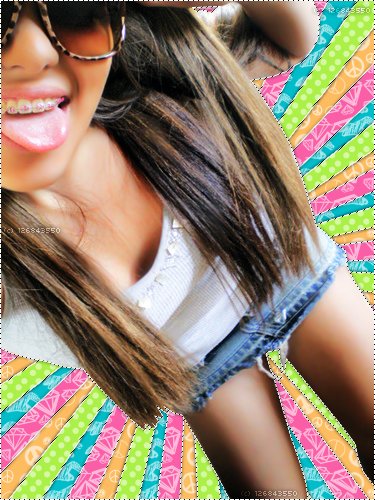
Tutorial
Click on thumbnailed images to enlarge
this was made in photoshop cs2
but most photoshops are the basically same
you'll need a basic understanding of photoshop to do this
step 1 - open up the picture you want to use in photoshop
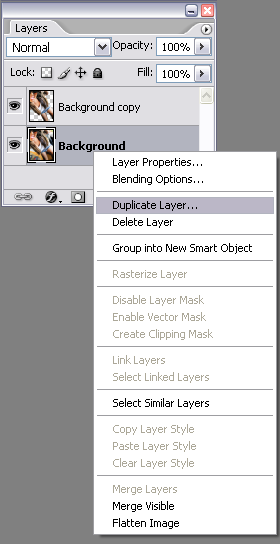
step 2 - duplicate your image. (right click on the layer and select "duplicate layer")
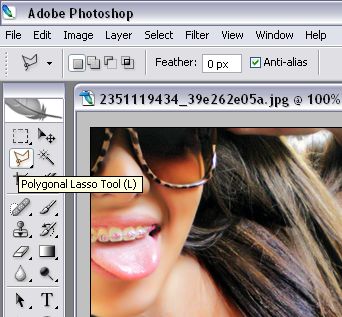
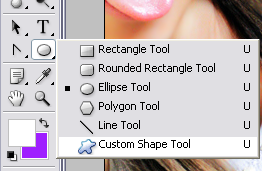
step 3 - select your "polygon lasso tool"(right click on the "lasso tool" to find it).
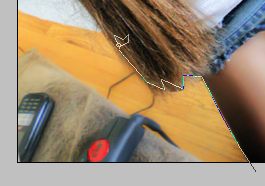
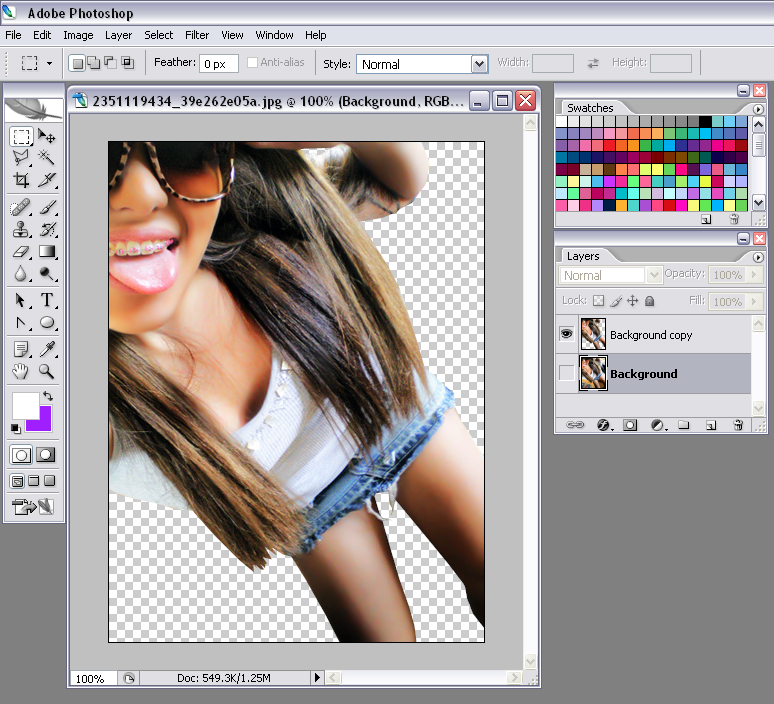
step 4 - precisely cut out the main person in the photo by clicking around the edges of the body, (zoom in for more precision).
step 5 - close the area by clicking on the place you started, this will automatically make a selection.

step 6 - once your area is selected press the "delete" button on your keyboard. this will make that area disappear.
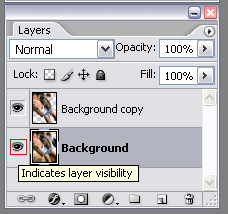
Now deselect by clicking anywhere on the picture, just once.
(if is looks like nothing happened, hide the very bottom layer by clicking on the eye icon next to the picture in the layers box)
your picture should look like if your on the right track
next we're going to add the sunburst vector background
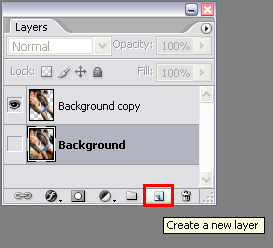
step 7 - create a new layer, and drag it below the cut out layer of your person
to quickly do this you can click on the "create a new layer" icon in the layers box
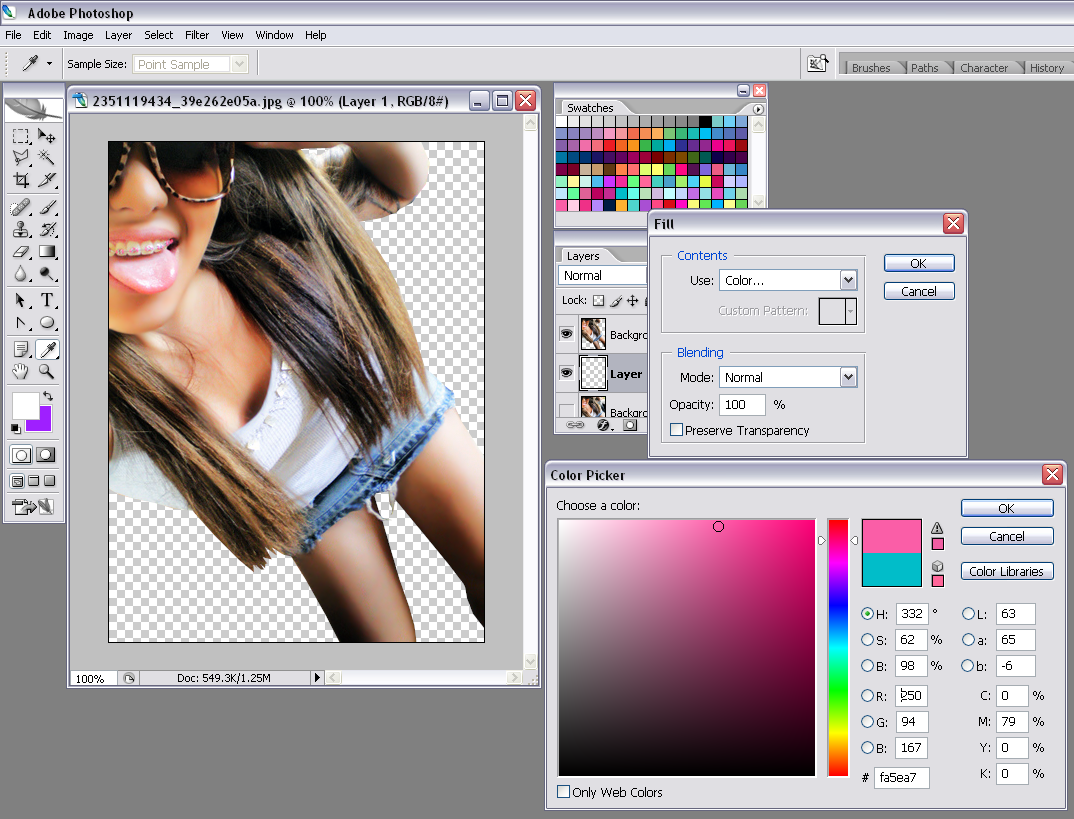
step 8 - fill that layer with one of your chosen colors. go up to "edit" then select "fill."
another box should pop up, you'll want to choose "color" from the drop down menu, then select your color.
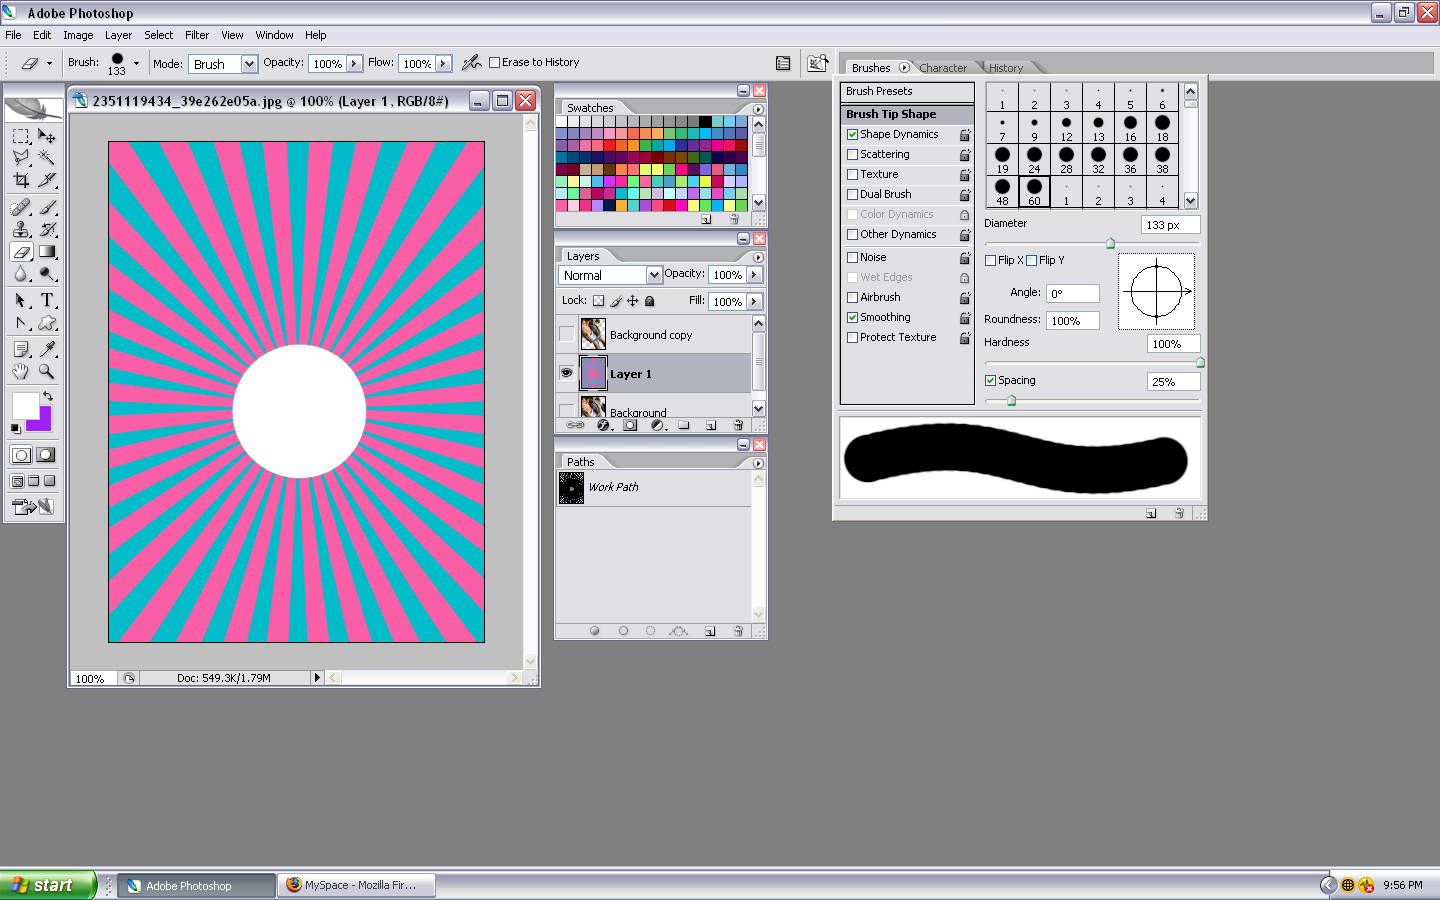
step 9 - now on most photoshops there is already a sunvector custom shape so you won't need a brush,
but if you dont have the custom shape, you can use this sunvector brush instead, it will turn out about the same.
so now what your going to do is add the sunvector using the custom shape tool. click on your custom shape tool.
then go up to your toolbar and find the sunvector shape
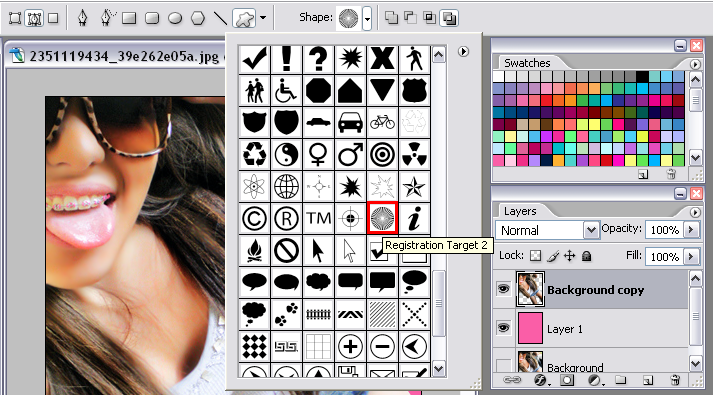
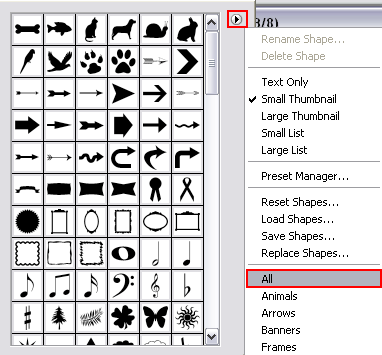
if you don't see it, you may have to load it
make sure your settings look like the ones shown as well

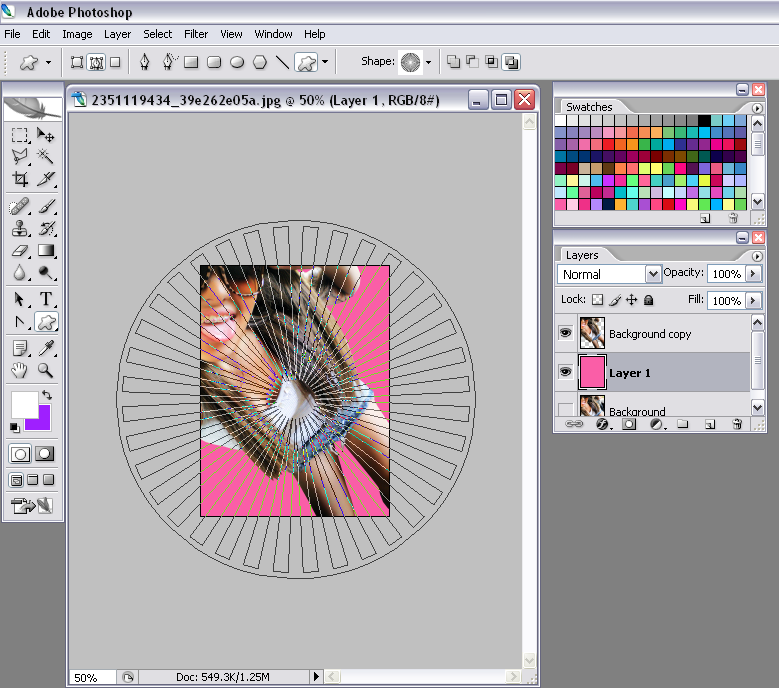
step 10 - now what your going to want to do is hold the shift key down then click and drag the shape across the picture, (zoom out for a better area to work with, its easier.)
make sure the middle area of the sunvector is behind the person in the picture exactly, or your going to see a big hole later.
step 11 - your going to need your "paths" box for this next step
go up to "window" in your toolbar and select "paths" and then a box should pop up.
click the little arrow and choose "make selection." and click ok.

step 12 - now fill that selected area with the color of your choosing
go up to edit > fill > then select your color (i showed you how to do this earlier)
step 13 - make your picture normal size again.
select the magnifying glass tool right click on the picture and select "actual pixels"
you can deselect now as well by going up to "select" in the toolbar at the top and clicking on "deselect"
step 14 - hide the top layer (the cut out of the person your working on)
click on the eye icon next the the picture of that layer. (i showed you how to do this earlier)
now only your sunvectors should be showing.
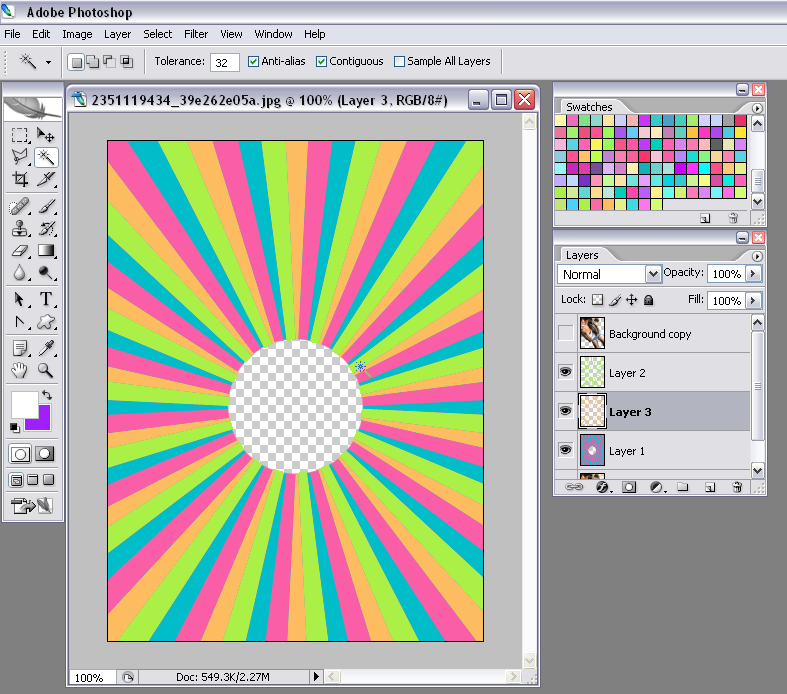
step 15 - take your eraser tool and choose the "hard circle brush" make sure you eraser opacity it at 100& and erase the middle out of the sunvector.
step 16 - choose the "magic wand tool."
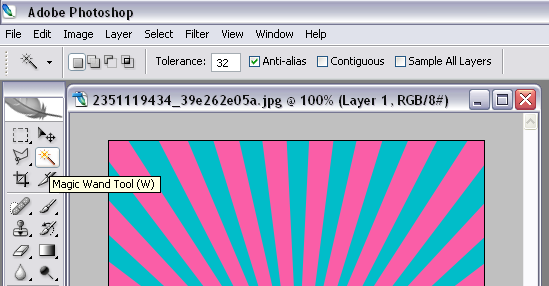
make sure your settings look like this:

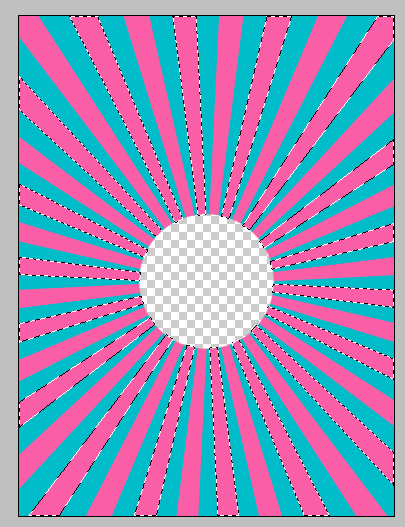
step 17 - hold down the shift key on the keyboard and select every other bar of one of the vector colors.
step 18 - make a new layer (i showed you how to do this earlier) and fill with a different color of your choosing.
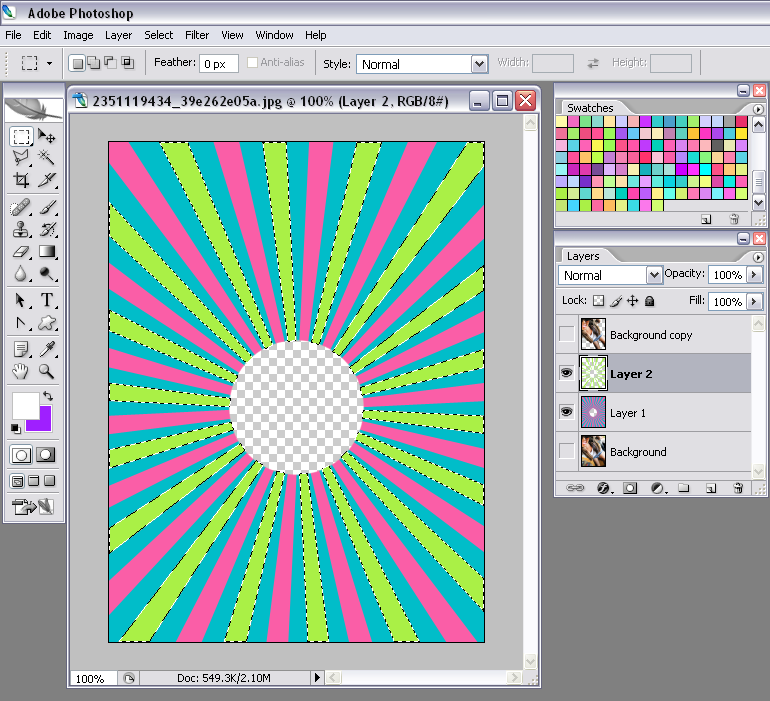
step 19 - go back to the bottom layer and select every other bar of the other color sunvector
then make another new layer and fill it with another color.
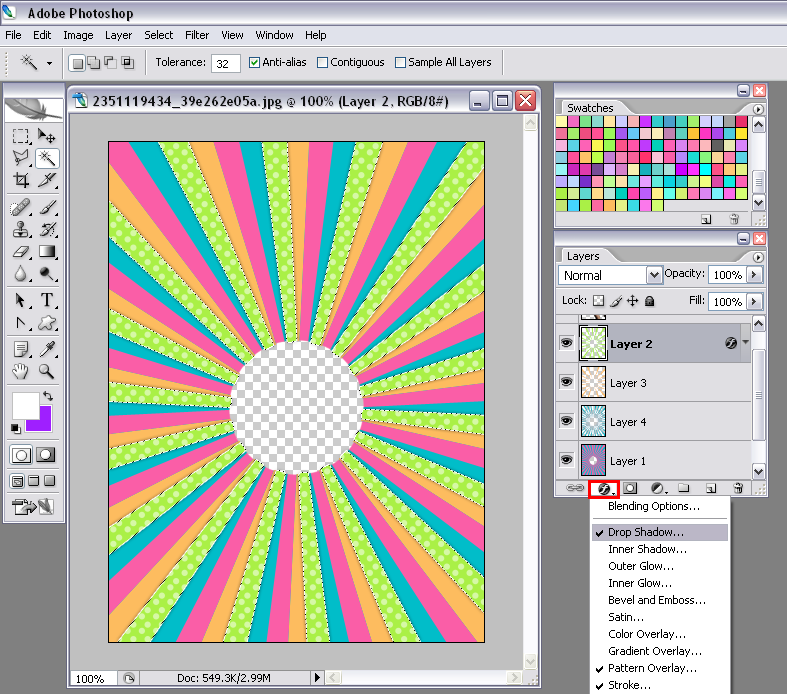
now you'll want to unclick the "contiguous" box at the top, in your settings section
then go back to your bottom layer and click on one of the main colors (the pink or blue in the example) and then hold down the CTRL key on the keyboard and then press J.
this creates a new copied layer of the sunvector you selected.
step 20 - now you can add a drop shadow, stroke, and pattern overlay to each vector layer!
step 21 - also unhide the top layer (the person you cut out) and add a stroke and drop shadow to them as well
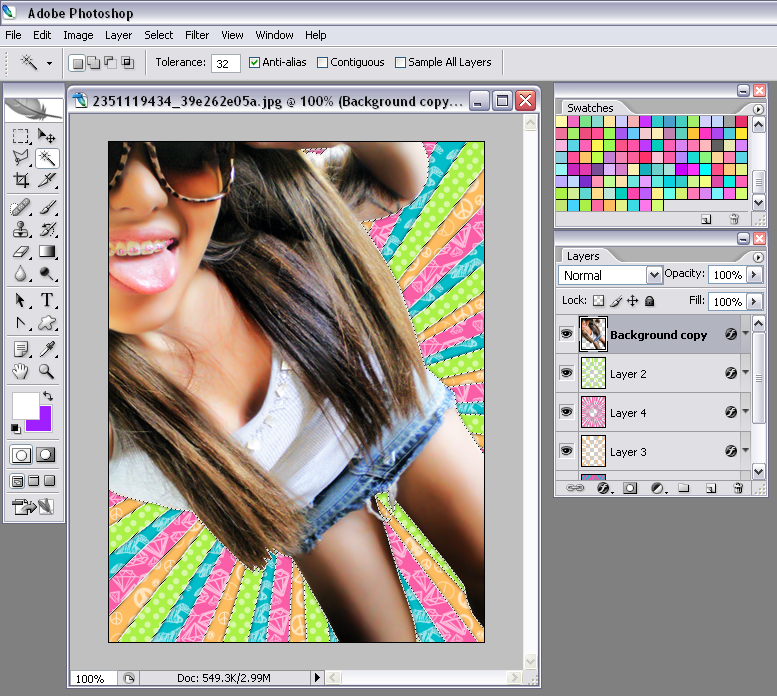
step 22 - then just add text, save, and your done!
hope this helped!(ORIGINAL MADE BY http://www.myspace.com/towerlayouts)
but most photoshops are the basically same
you'll need a basic understanding of photoshop to do this
step 1 - open up the picture you want to use in photoshop
step 2 - duplicate your image. (right click on the layer and select "duplicate layer")
step 3 - select your "polygon lasso tool"(right click on the "lasso tool" to find it).
step 4 - precisely cut out the main person in the photo by clicking around the edges of the body, (zoom in for more precision).
step 5 - close the area by clicking on the place you started, this will automatically make a selection.
step 6 - once your area is selected press the "delete" button on your keyboard. this will make that area disappear.
Now deselect by clicking anywhere on the picture, just once.
(if is looks like nothing happened, hide the very bottom layer by clicking on the eye icon next to the picture in the layers box)
your picture should look like if your on the right track
next we're going to add the sunburst vector background
step 7 - create a new layer, and drag it below the cut out layer of your person
to quickly do this you can click on the "create a new layer" icon in the layers box
step 8 - fill that layer with one of your chosen colors. go up to "edit" then select "fill."
another box should pop up, you'll want to choose "color" from the drop down menu, then select your color.
step 9 - now on most photoshops there is already a sunvector custom shape so you won't need a brush,
but if you dont have the custom shape, you can use this sunvector brush instead, it will turn out about the same.
so now what your going to do is add the sunvector using the custom shape tool. click on your custom shape tool.
then go up to your toolbar and find the sunvector shape
if you don't see it, you may have to load it
make sure your settings look like the ones shown as well
step 10 - now what your going to want to do is hold the shift key down then click and drag the shape across the picture, (zoom out for a better area to work with, its easier.)
make sure the middle area of the sunvector is behind the person in the picture exactly, or your going to see a big hole later.
step 11 - your going to need your "paths" box for this next step
go up to "window" in your toolbar and select "paths" and then a box should pop up.
click the little arrow and choose "make selection." and click ok.
step 12 - now fill that selected area with the color of your choosing
go up to edit > fill > then select your color (i showed you how to do this earlier)
step 13 - make your picture normal size again.
select the magnifying glass tool right click on the picture and select "actual pixels"
you can deselect now as well by going up to "select" in the toolbar at the top and clicking on "deselect"
step 14 - hide the top layer (the cut out of the person your working on)
click on the eye icon next the the picture of that layer. (i showed you how to do this earlier)
now only your sunvectors should be showing.
step 15 - take your eraser tool and choose the "hard circle brush" make sure you eraser opacity it at 100& and erase the middle out of the sunvector.
step 16 - choose the "magic wand tool."
make sure your settings look like this:
step 17 - hold down the shift key on the keyboard and select every other bar of one of the vector colors.
step 18 - make a new layer (i showed you how to do this earlier) and fill with a different color of your choosing.
step 19 - go back to the bottom layer and select every other bar of the other color sunvector
then make another new layer and fill it with another color.
now you'll want to unclick the "contiguous" box at the top, in your settings section
then go back to your bottom layer and click on one of the main colors (the pink or blue in the example) and then hold down the CTRL key on the keyboard and then press J.
this creates a new copied layer of the sunvector you selected.
step 20 - now you can add a drop shadow, stroke, and pattern overlay to each vector layer!
step 21 - also unhide the top layer (the person you cut out) and add a stroke and drop shadow to them as well
step 22 - then just add text, save, and your done!
hope this helped!(ORIGINAL MADE BY http://www.myspace.com/towerlayouts)
Tutorial Comments
Showing latest 10 of 16 comments

how u edid the pic -__-
By nena143nena on Feb 15, 2012 11:22 pm
This is great! What are your swatches?
By heatherlaken on Jul 27, 2010 11:20 am

how do i get the poka dots
By panda-randa on Apr 27, 2010 11:23 pm

Where can i get your brushes used for the details?
By MiissYER on Mar 16, 2010 5:35 pm
How do i make a selection??!
By MiissYER on Mar 11, 2010 7:00 pm
dang. i've been wondering so long on how people do it.
i tried, it turned out okay but not nearly as good ! thankss.
By rawrshakela on Dec 6, 2009 8:26 pm

This Is Cool.
I Tried But I Forgot a step.
By reemyst on Oct 6, 2009 10:45 pm

this is neat. Definitely makes it easier than how i was doing it before.
By Tomates on Aug 6, 2009 10:26 pm

this is awesome!
very well explained.
By xii3 on Jul 20, 2009 1:38 pm

is there a easier way
By TiahniAM on Jul 15, 2009 6:28 am
Tutorial Details
| Author |
xColour
|
| Submitted on | Jul 10, 2009 |
| Page views | 31,199 |
| Favorites | 113 |
| Comments | 16 |
| Reviewer |
manny-the-dino
|
| Approved on | Jul 10, 2009 |