
Tutorial
Click on thumbnailed images to enlarge
Note : Basic knowledge required!
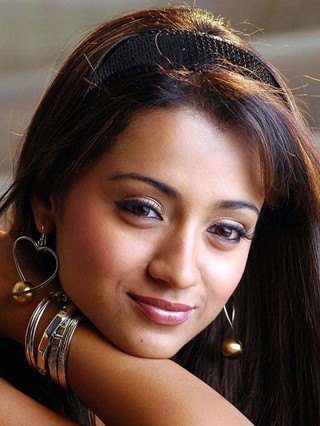
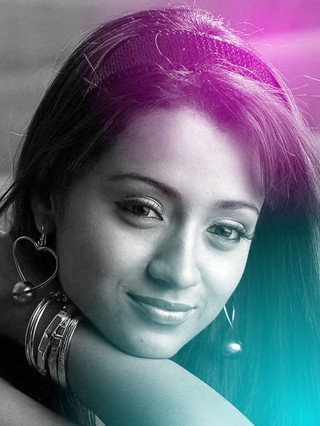
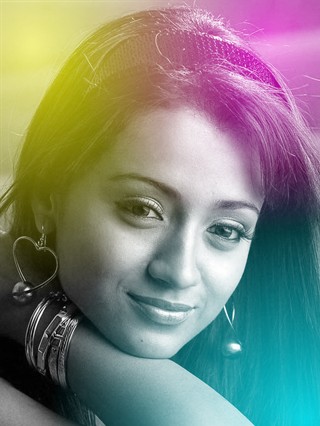
Before :
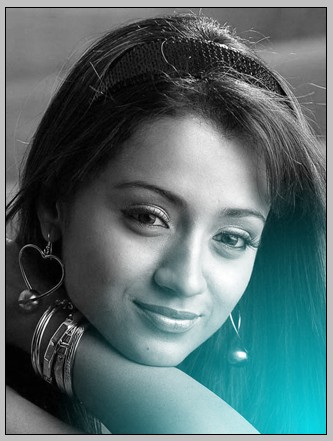
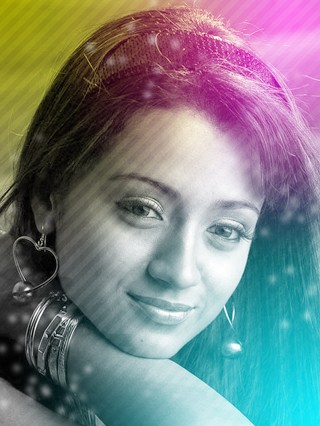
After :

Okay, let's start!
1. Open up your image in Photoshop. I'm using this picture of the beautiful Indian actress Trisha -
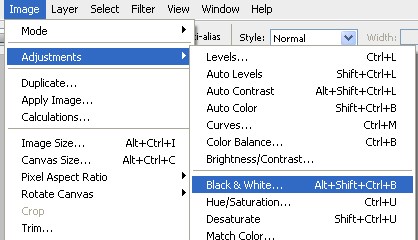
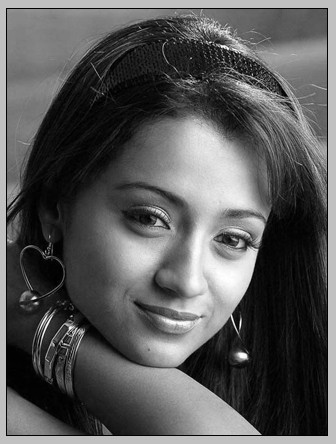
2. Go to Image > Adjustments > Black & White > OK . This will turn your image into a black & white picture –
3. Now we'll add some lights! Make a new layer. Select your gradient tool and select this color – #05edfc. In your gradient tool bar, choose Radial Gradient and from the drop down menu, select Foreground to Transparent gradient –


And drag from the bottom –
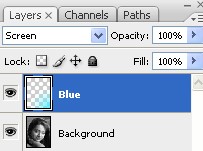
Set the layer's Blend Mode to Screen. And name this layer 'Blue'.
4. Make a new layer again. Select this color – #fc05dc. And add a light with this color again on the top -
Set the layer's Blend Mode to Screen. Name this layer 'Pink'.
5. Make a new again and finally, do the same effect using this color – #fcf905. Name the layer 'Yellow'.
Set the Blend Mode to Color Burn.
6. Now we'll add a pattern to our image. Go here and download the First Set of Patterns there. Load the patterns in your Photoshop.
Next, make a new layer and fill it with Black ( Edit > Fill > Black ). Make sure this layer is below the lights and above the actual image layer. Right click on this layer and choose Pattern Overlay and apply these settings –
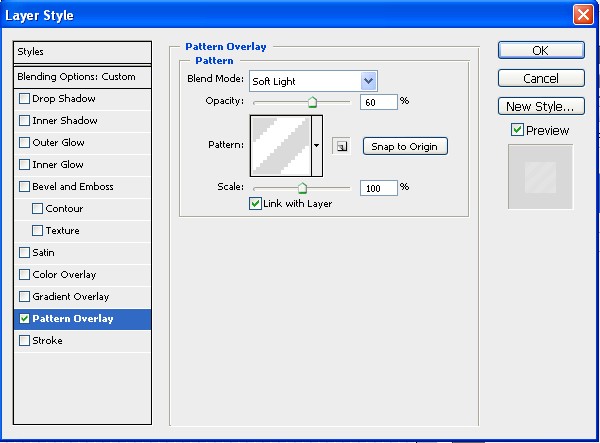
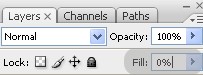
And set the Fill to 0%.
6. Now we'll add some sparkles. Select White as your foreground color. Choose the Brush Tool and choose any soft rounded brush. Go to Window > Brushes and apply these settings –

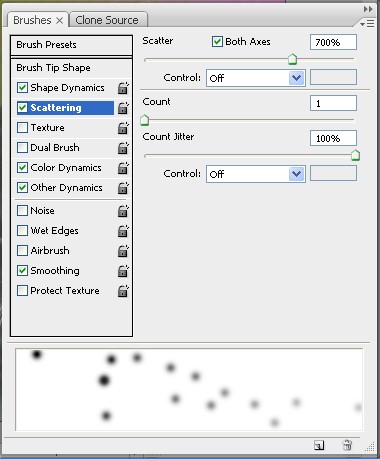
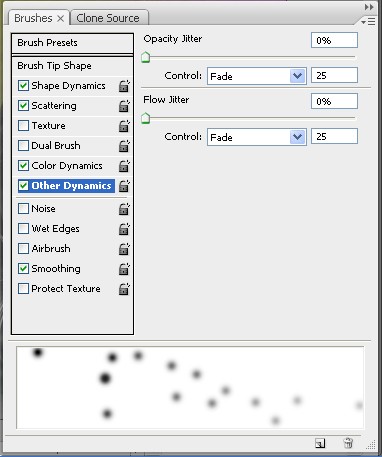
And apply this brush on your image –
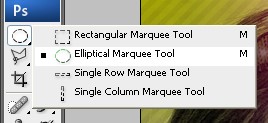
7. Now we'll make something new here. Make a new layer. Choose your Elliptical Marquee tool –
And draw a circle on the image. Make your foreground color to White and select your Gradient Tool and choose Linear Gradient –

Click and drag inside your selection. Lower the Opacity to 32%.
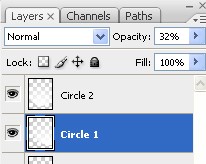
Make a new layer and make another circle, somewhere close to the first circle and repeat step 7. Lower the Opacity to 28%.
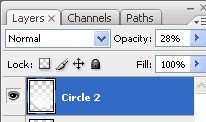
8. Now repeat step 7 but make smaller circles and fill it with the gradient. Lower the Opacity to 32%. And make sure you do this in a new layer.
Optional -
You can make a new layer and add more sparkles so it will look a little more bright. :D
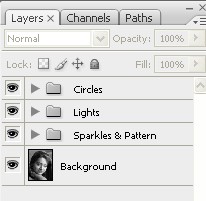
And this is how I arranged my layers –
9. Now you're done! Go to Layer > Flatten. And save your cute image!
Hope you enjoyed this tut! :P
Any questions ? PM me :D
^o^
Before :
After :
Okay, let's start!
1. Open up your image in Photoshop. I'm using this picture of the beautiful Indian actress Trisha -
2. Go to Image > Adjustments > Black & White > OK . This will turn your image into a black & white picture –
3. Now we'll add some lights! Make a new layer. Select your gradient tool and select this color – #05edfc. In your gradient tool bar, choose Radial Gradient and from the drop down menu, select Foreground to Transparent gradient –
And drag from the bottom –
Set the layer's Blend Mode to Screen. And name this layer 'Blue'.
4. Make a new layer again. Select this color – #fc05dc. And add a light with this color again on the top -
Set the layer's Blend Mode to Screen. Name this layer 'Pink'.
5. Make a new again and finally, do the same effect using this color – #fcf905. Name the layer 'Yellow'.
Set the Blend Mode to Color Burn.
6. Now we'll add a pattern to our image. Go here and download the First Set of Patterns there. Load the patterns in your Photoshop.
Next, make a new layer and fill it with Black ( Edit > Fill > Black ). Make sure this layer is below the lights and above the actual image layer. Right click on this layer and choose Pattern Overlay and apply these settings –
And set the Fill to 0%.
6. Now we'll add some sparkles. Select White as your foreground color. Choose the Brush Tool and choose any soft rounded brush. Go to Window > Brushes and apply these settings –
And apply this brush on your image –
7. Now we'll make something new here. Make a new layer. Choose your Elliptical Marquee tool –
And draw a circle on the image. Make your foreground color to White and select your Gradient Tool and choose Linear Gradient –
Click and drag inside your selection. Lower the Opacity to 32%.
Make a new layer and make another circle, somewhere close to the first circle and repeat step 7. Lower the Opacity to 28%.
8. Now repeat step 7 but make smaller circles and fill it with the gradient. Lower the Opacity to 32%. And make sure you do this in a new layer.
Optional -
You can make a new layer and add more sparkles so it will look a little more bright. :D
And this is how I arranged my layers –
9. Now you're done! Go to Layer > Flatten. And save your cute image!
Hope you enjoyed this tut! :P
Any questions ? PM me :D
^o^
Tutorial Comments
Showing latest 10 of 30 comments

Luv it!!:U .... Awsome!
By marapnk on Oct 28, 2010 7:34 pm

omg i love this one so much
By panda-randa on Apr 28, 2010 12:05 am

Wow, thank you so much!
By aaaaaa000000 on Feb 20, 2010 11:00 pm

There's a similar pattern (actually it looks pretty much the same) here:
http://smileyhelper.com /patterns.php
By emmasawr on Jul 3, 2009 6:28 pm

i dont think the link works.
check it out?
By shirvzz on Jun 25, 2009 12:55 pm
Easy, Simple And Cute...
By Passionatex28 on Jun 23, 2009 4:12 am
I was unable to find the patterns. Please help!
By bstone804 on Jun 3, 2009 4:16 am
Awesome! ^__^
x
By KylieKARNIVORE on May 31, 2009 3:56 am

when i use the qray scale it dont let me use color anymore .
By amazinqthali on May 25, 2009 7:58 am

wre do you dowload the photoshop??thing
By wild619 on May 18, 2009 9:34 pm
Tutorial Details
| Author |
sunshine07
|
| Submitted on | Nov 2, 2008 |
| Page views | 42,016 |
| Favorites | 264 |
| Comments | 30 |
| Reviewer |
schizo
|
| Approved on | Nov 2, 2008 |