Tutorial
Click on thumbnailed images to enlarge
Step one
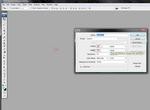
Ok, start off with a new image.
i usually go
400x400 [pixels]
Step two
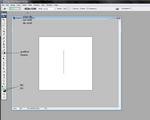
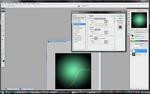
click on the gradient button and make the ;
background black ( #000000)
and foreground white (#FFFFFF)
by clicking a straight small line you can create a circular glow i nthe middle of the image.
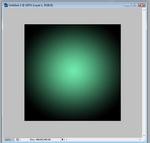
now go
Layer-duplcate layer.
then make the layer on COLOUR DODGE
this creates a more vivid effect.
Step three
Once you have created something like this;
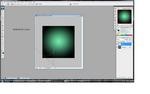
its time to start adding the cool swirly bits.
click on the pen tool
and form a swirl like pattern
but make sure you have it with the right
settings
for example
its not freeform , (+) and is on making paths.
add a new layer
and then start by making ur curve by moving the mouse and clicking on the boxes at the end of the line to make its shape.
Step Four
you need to click on the brush tool.
make sure the brush tool is set at around a 3 pix
thickness.
now click bak on the pen button *REMEMBER*
and right click on the curve and select STROKE PATH.
MAKE SURE YOU TICK THE BOX BELOW POP ,it gives it a more curned end.and looks better ;)
THEN RIGHT CLICK AGAIN AND CLICK DELETE PATH.
If you dont like positioning you can go ctrl + T and move it around.
Step Five
Now you should have something like this
but to give it a sleeker effect
right click on the layer 1 and select blending
options
once that has done tick the outer glow button
i usually --
opacity-13
noise-0
spread-7
size-21
then click OK!
Step Six
Then walah! you should have it!
if you like you can do diffrent orb colours and diffrent colours and thickness' of the curve.
you can also
add little dots with a outer glow on to give a nicer effect.
new layer,PEN TOOL make a really tiny line
and then right click on layer and select outer glow.
Yaaay
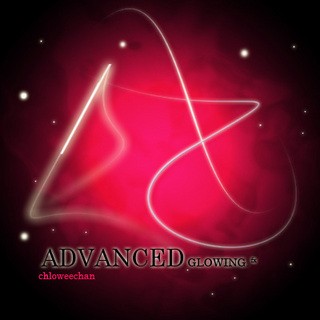
hopefully you final should look something like this.
i did this one earlier lol it was my first
advance glowing practice
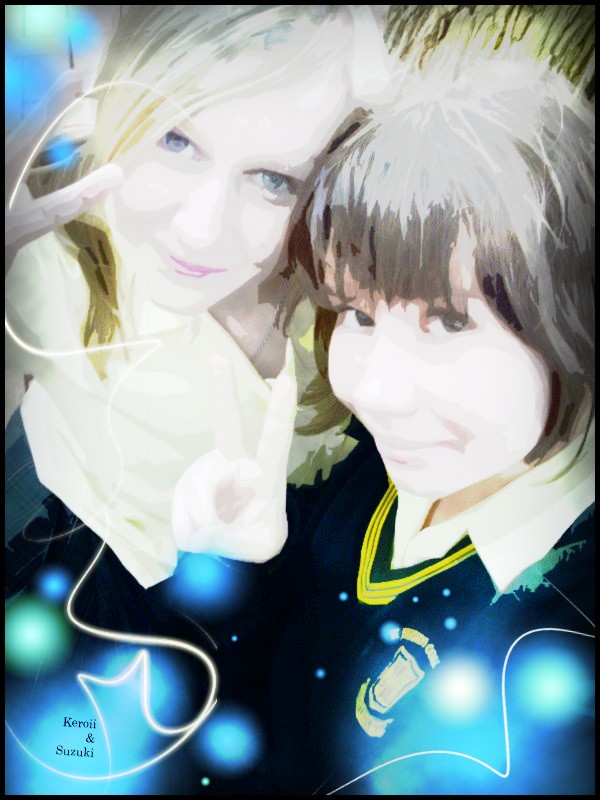
here is a pic of me and my friend with AG on it
it shows you dont just have to limit your self to a blank canvas.
i hope i helped.
if u wont anymore just
mail.
:)
Ok, start off with a new image.
i usually go
400x400 [pixels]

Step two
click on the gradient button and make the ;
background black ( #000000)
and foreground white (#FFFFFF)
by clicking a straight small line you can create a circular glow i nthe middle of the image.

now go
Layer-duplcate layer.
then make the layer on COLOUR DODGE
this creates a more vivid effect.
Step three
Once you have created something like this;

its time to start adding the cool swirly bits.
click on the pen tool
and form a swirl like pattern
but make sure you have it with the right
settings
for example
its not freeform , (+) and is on making paths.
add a new layer
and then start by making ur curve by moving the mouse and clicking on the boxes at the end of the line to make its shape.

Step Four
you need to click on the brush tool.
make sure the brush tool is set at around a 3 pix
thickness.
now click bak on the pen button *REMEMBER*
and right click on the curve and select STROKE PATH.
MAKE SURE YOU TICK THE BOX BELOW POP ,it gives it a more curned end.and looks better ;)
THEN RIGHT CLICK AGAIN AND CLICK DELETE PATH.
If you dont like positioning you can go ctrl + T and move it around.
Step Five
Now you should have something like this

but to give it a sleeker effect
right click on the layer 1 and select blending
options
once that has done tick the outer glow button
i usually --
opacity-13
noise-0
spread-7
size-21
then click OK!
Step Six
Then walah! you should have it!
if you like you can do diffrent orb colours and diffrent colours and thickness' of the curve.
you can also
add little dots with a outer glow on to give a nicer effect.
new layer,PEN TOOL make a really tiny line
and then right click on layer and select outer glow.
Yaaay
hopefully you final should look something like this.
i did this one earlier lol it was my first
advance glowing practice

here is a pic of me and my friend with AG on it
it shows you dont just have to limit your self to a blank canvas.

i hope i helped.
if u wont anymore just
mail.
:)
Tutorial Comments
Showing latest 9 of 9 comments

I forgot how to do that edgy decor on the pen tool. How do you do it?
By MiissYER on Mar 5, 2010 4:22 pm

I LOVE THE AfFECT buT DNt GeT IT rIghT... i WIlL tRY AGAIN!!
THANKS FOR TAKIN THE TO POST
By crdots2786 on Feb 10, 2009 5:50 am

CS3 or CS2?
By TheMuffinMan on Aug 11, 2008 10:23 am

AWESOME
By L0V3M4K3UP on Aug 7, 2008 8:30 pm
omg this is sooooooo awesome!
Thanks so much!
By iloveTaylorLautner on Jun 19, 2008 7:33 pm

life saver ;)
By fatmonsterx on May 28, 2008 10:31 pm

OMG OMG SDKJFNHAKSLDHSLBFHS!! ok first off i wanna SUPER THANK YOU FOR THIS TUTORIAL!! YOU ROCK!!
THIS WOULD BE UTTERLY FRIGGIN PERFECT FOR THE LIGHT THAT COMES OUT OF A WAND (HARRY POTTER) YES im an extreme HP fanatic!! lol
thank you thank you thank you!!!!!!
By missk on May 12, 2008 8:16 pm
this is so gorgeous.
i understood the blank canvas one.
but im having a little trouble doing this to a picture.
By raspuhberry on May 5, 2008 1:48 am

this is beautiful. (:
By BsLayouts on Apr 19, 2008 1:37 pm
Tutorial Details
| Author |
Chlowee-Chan
|
| Submitted on | Apr 15, 2008 |
| Page views | 25,662 |
| Favorites | 97 |
| Comments | 9 |
| Reviewer |
miyashu
|
| Approved on | Apr 16, 2008 |