Tutorial
Click on thumbnailed images to enlarge
I did this tutorial in Photoshop CS3 Extended which is why some of you may have problems. However, that doesn't mean this tutorial won't work in other versions of Photoshop. Just try it out.
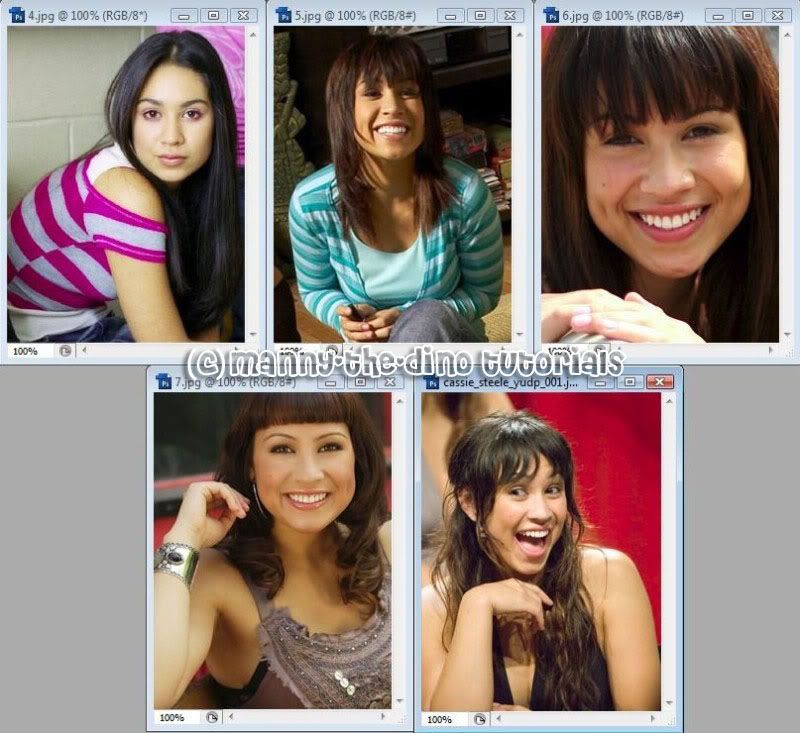
Want to learn how to do something different using animation & ps? Here's the place to be, love. I will be showing you guys how to make my "Manny Santos" icon. I will obviously be using Manny for this tutorial. Remember that this does not only apply for making icons. This can also be used for any sized pictures. So here are the befores:


Here is the after:
To animating!
001.First off, open the pictures you want to use.
002.Select your Crop Tool (C).

003.Holding down shift, crop your picture.

004.Do the same for your other pictures.

005.Now go Image>Image Size.
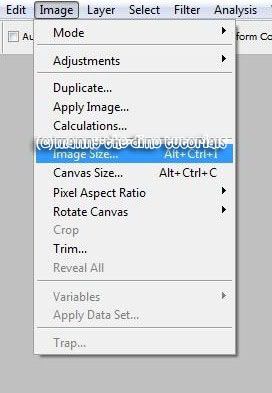
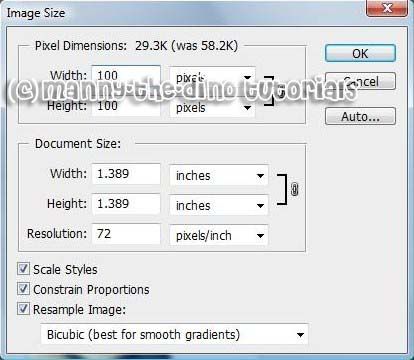
006.Make your picture 100x100.
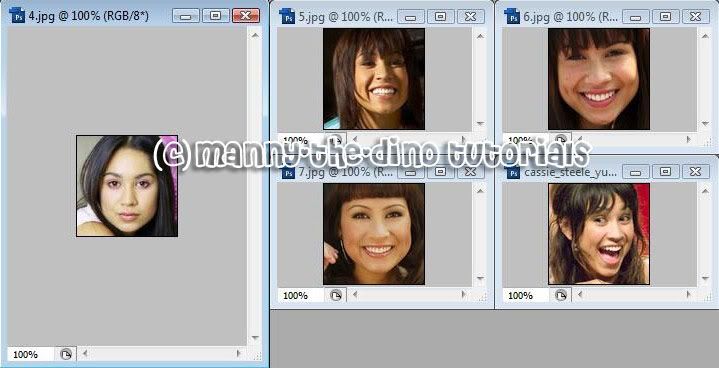
007.Do the same for your other pictures.
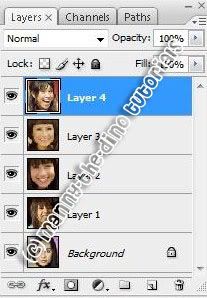
008.Okay before you do this step establish the order of your pictures. Once you have that, copy (ctrl+c) & paste (ctrl+v) all your pictures onto your starting picture. You can close the other pictures. Your layers should now look like this:
009.Now make all your layers invisible except for your first layer.

010.Select your Horizontal Type Tool (T).

011.Type in what you want to appear. I used "Manny". Also position the text where you want it to be.

012.This step depends on how many pictures you are using. If you are using 5 pictures like me, have your text layer selected & do a ctrl+j 4 times. Now arrange your layers so that starting from the bottom there is picture, text, picture, text & so on.
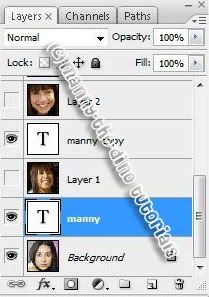
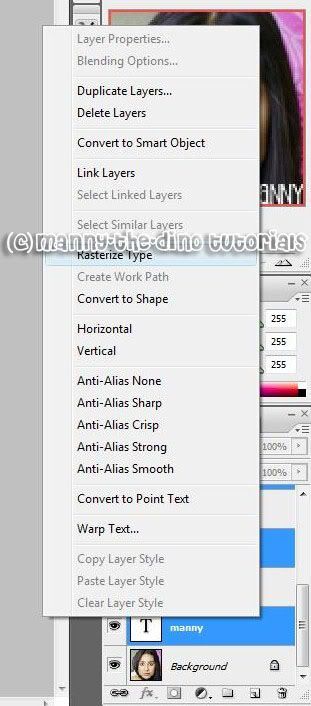
013.Raterize all your text layers.
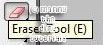
014.Get your Eraser Tool (E).
015.Go up to the top & change it from Brush to Block. This makes it easier to erase the letters.

016.With your first text layer selected, erase all the letters except the first one.

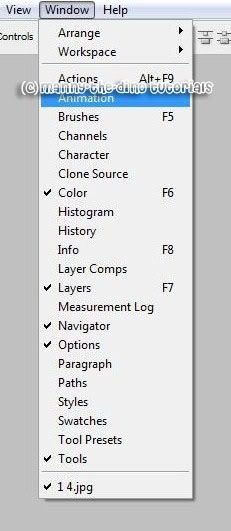
017.Do the same for all the other text layers. Like on the second text layer, erase all the letters except the first & second ones & so on & so on. Once you have done that, go Window>Animation.
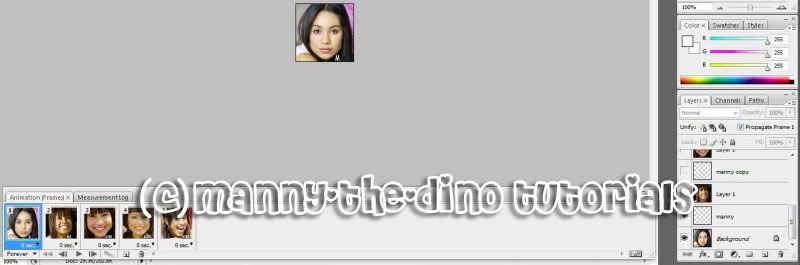
018.Duplicate your frames. This part varies depending on how many pictures you are using. Since I am using 5 pictures, I am going to need 5 frames obviously.

019.These following 4 steps will be essential. For your first frame make all the layers in your layers' palette insivible except for your "Background" layer & first text layer.
020.Make all your layer's invisble except for your 2nd picture & 2nd text layers.
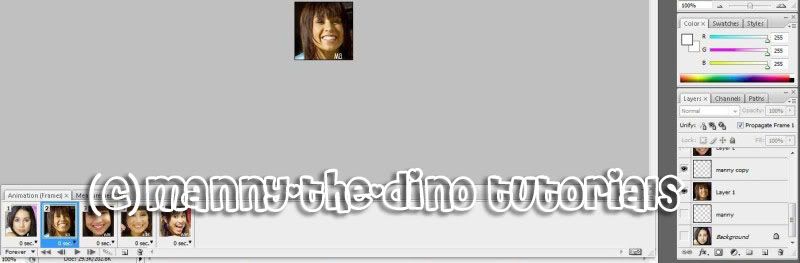
021.Make all your layer's invisble except for your 3rd picture & 3rd text layers.

022.Make all your layer's invisble except for your 4th picture & 4th text layers.
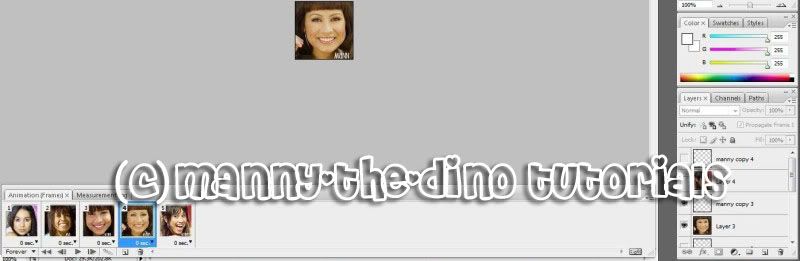
023.Make all your layer's invisble except for your 5th picture & 5th text layers.

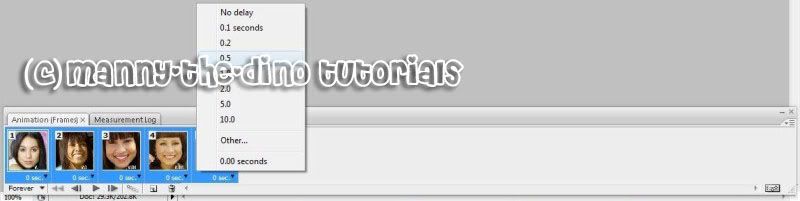
024.Now go over to your animation toolbar. Select your frames & set the delay to 0.5 seconds. It isn't too fast or too slow. It's just perfect timing. "D
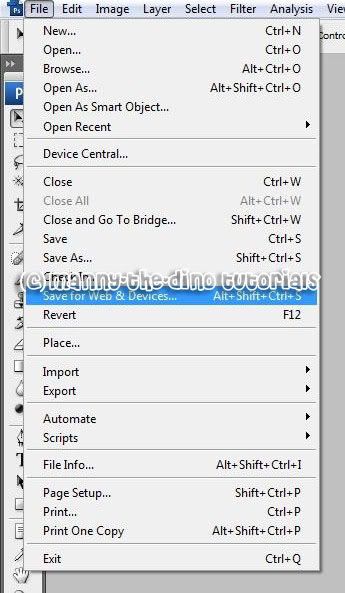
025.Now go File>Save for Web & Devices.
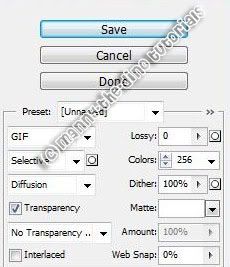
026.And save your picture.
027.You now have your new animation graphic!! ")
If you got lost or have any questions, comment the tutotial & I'll get back to you as soon as I can. :D
Tutorial Comments
Showing latest 10 of 30 comments

this is SO great!

Okai, so there's a part that says 'raterize layers' or something?
I don't have that, so what's the equivalent button (I'm using Adobe Photoshop Elements)?
Thanks much!
Lovin' the Santos icon, btw!!

Girl below me, Use Animation Shop 3 or higher, (:
it's almost the same as the animation for photoshop.

hey i dont have "animation" in my window...any sugestions?

wow i am really
surpriise
it was easier than i think[;
hehe
its a great tutorial
i lobe it
thanksz(:

thanks so much.
your my hero with this tutorial
:)

Good!

iF i WANTED
TO MAKE AH BANNER
AND HAVE SOME TEXT
BLINK DiFFERENT
WORDS..HOW
CAN i MAKE THAT
iNTO ANiMATiON
BUT AS LETTERS ON A PiCTURE
iNSTEAD OF PiCTURES

oi i did it!!! text and all.. luv yaa
i pretty much did it, however i couldnt get the text part to work, other than that awesome tut
Tutorial Details
| Author |
manny-the-dino
|
| Submitted on | Feb 3, 2008 |
| Page views | 37,297 |
| Favorites | 172 |
| Comments | 30 |
| Reviewer |
mlothepimp
|
| Approved on | Feb 3, 2008 |