Tutorial
Click on thumbnailed images to enlarge
-ANIMATED BLINKIES -
In this tutorial you need to download my blinky selection HERE.
Let's get started!
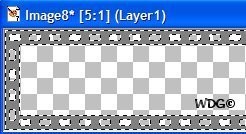
Open a new image 150x20 - Transparent - 16.7 million colors. Click on the "Zoom" tool . Click the image 4x to make it bigger. Now. go to "Selections" - 'Load from Disk" - Select "blinky1.sel". Flood fill with the color of your choice. I used Gray (#808080). DO NOT Deselect.
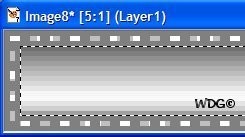
Go to "Selections" - "Load from Disk" - Select "blinky2.sel". That's for the inside part. Flood fill with the color of your choice. I used Gradient (Metallic). DO NOT Deselect.
Go to "Selections" - "Load from Disk" - Select "blinky.3sel". You will see the little boxes bee selected. Flood fill with the color of your choice. I used Black (#000000). DO NOT Deselect.
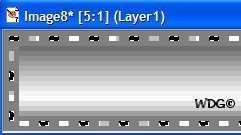
Go to "Selections" - "Load from Disk" - Select "blinky4.sel". Flood fill with the color of your choice. I used White (#ffffff). "Select None".
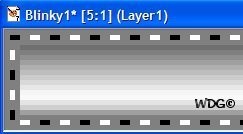
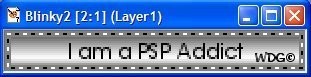
Now it's time to add a text. Click on the "Text" tool . You can use any text you want, any color you want as long it fits in the box. I used Black - Text "AvantGarde BK BT" - Size 8. Put the text on the center. Then "Select None". Save your first work as Blinky1.psp

We're almost there OK..lolz
Make a copy of your first work. Hit "Shift D" or click "Copy" then "Paste as new image". Use your "Zoom" tool. Click the copy image 4x to make it bigger.
OR
You can use the first work you have saved. Go back to "Selections" again - "Load from Disk" - Select "blinky3.sel". We are going to change the color like to the opposite side. Before I used Black, now I will use White. Flood fill it with White. DO NOT Deselect.
Go to "Selections" - "Load from Disk" - Select "blinky4.sel". The same procedure as above. But now I will use Black instead of White. Flood fill it with Black. "Select None" Save your work as Blinky2.psp
Now it's time for the Animation:
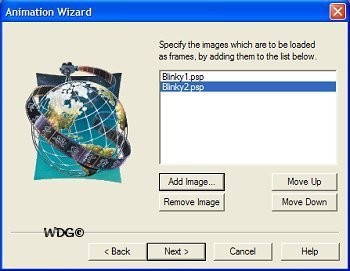
Open the "Animation Wizard"...Same size as the first frame (checked) - Next...Transparent (checked) - Next...Centered in the frame - with the canvas color (checked) - Next...Yes, repeat the animation indefinitely - 15 (checked) - Next...Load the Blinky1.psp and the Blinky2.psp
Click "Next" - "Finished". Click the "View Animation"

Then you're done. Save your work as .gif
This is the result:

Hope you understand my tutorial...Let me know if you have any questions.
In this tutorial you need to download my blinky selection HERE.
Let's get started!
Open a new image 150x20 - Transparent - 16.7 million colors. Click on the "Zoom" tool
. Click the image 4x to make it bigger. Now. go to "Selections" - 'Load from Disk" - Select "blinky1.sel". Flood fill with the color of your choice. I used Gray (#808080). DO NOT Deselect.Go to "Selections" - "Load from Disk" - Select "blinky2.sel". That's for the inside part. Flood fill with the color of your choice. I used Gradient (Metallic). DO NOT Deselect.
Go to "Selections" - "Load from Disk" - Select "blinky.3sel". You will see the little boxes bee selected. Flood fill with the color of your choice. I used Black (#000000). DO NOT Deselect.
Go to "Selections" - "Load from Disk" - Select "blinky4.sel". Flood fill with the color of your choice. I used White (#ffffff). "Select None".
Now it's time to add a text. Click on the "Text" tool
. You can use any text you want, any color you want as long it fits in the box. I used Black - Text "AvantGarde BK BT" - Size 8. Put the text on the center. Then "Select None". Save your first work as Blinky1.pspWe're almost there OK..lolz
Make a copy of your first work. Hit "Shift D" or click "Copy" then "Paste as new image". Use your "Zoom" tool
. Click the copy image 4x to make it bigger.OR
You can use the first work you have saved. Go back to "Selections" again - "Load from Disk" - Select "blinky3.sel". We are going to change the color like to the opposite side. Before I used Black, now I will use White. Flood fill it with White. DO NOT Deselect.
Go to "Selections" - "Load from Disk" - Select "blinky4.sel". The same procedure as above. But now I will use Black instead of White. Flood fill it with Black. "Select None"
Save your work as Blinky2.pspNow it's time for the Animation:
Open the "Animation Wizard"...Same size as the first frame (checked) - Next...Transparent (checked) - Next...Centered in the frame - with the canvas color (checked) - Next...Yes, repeat the animation indefinitely - 15 (checked) - Next...Load the Blinky1.psp and the Blinky2.psp
Click "Next" - "Finished". Click the "View Animation"
Then you're done.
Save your work as .gifThis is the result:
Hope you understand my tutorial...Let me know if you have any questions.
Tutorial Comments
Showing latest 3 of 3 comments

Shortie: Yes, you have to download it.
Try google.
By DIRTYM0E on Nov 24, 2008 5:51 am

this is kOol.!
but where dO i qet
animation thinq?
dO i have tO download it?
By shOrtiebiatchx23 on Jul 22, 2008 1:02 pm

Your blinky selection does not work anymore. Could you please put it up again? I'd really like to learn how to do this :)
By brittXblc on Jun 21, 2008 4:24 am
Tutorial Details
| Author |
Wavegirl
|
| Submitted on | Nov 14, 2007 |
| Page views | 13,931 |
| Favorites | 8 |
| Comments | 3 |
| Reviewer |
tripvertigo
|
| Approved on | Nov 14, 2007 |