OMG FIRST TUTORIAL!, ICONING |
Rating


|
Resource Center Links
This Month's Contests | Hosts Looking for Hostees | Hostees looking for Hosts | BigBookofResources
Submission Guidelines
  |
 Apr 5 2009, 02:26 PM Apr 5 2009, 02:26 PM
Post
#1
|
|
|
Senior Member  Group: Staff Alumni Posts: 4,665 Joined: Aug 2008 Member No: 676,364 |
Okay guys. I'm going to submit this now to createblog. I would love to have any comments or criticism to help me improve my next tutorial.
I hope this gets accepted. LOL  READ FIRST : This tutorial was made by me. Redistributing is not allowed. Not all pictures will have this effect. You are highly advised to mess with the settings to your liking, so you may get the effect you want. ------------------------------------------- 01. Open up your base! ( Sharpen if you want. )  02. Make a new SELECTIVE COLORING layer, and apply these settings. (Adjust them to your liking if you have to . )    03. You should have something like this.  04. Make a new FILL layer and use the Paint Bucket Tool. Fill the new layer with #04637f and set the layer to OVERLAY. Set the layeropacity to 88%. (Here's the color if you're too lazy to fill the layer. You can just copy image/paste if you wanted to.)  You should have the first effect!  OPTIONAL: If you want the second effect of making the icon brighter, just duplicate your final icon and set the duplicated layer to SCREEN. Set the layer opacity to 24%. You should have the second effect!  --------- Thank you for reading my first tutorial! Here's a PSD if you're too lazy or you're confused. Be sure to replace my icon with your icon! |
|
|
|


|
Apr 5 2009, 05:06 PM
Post
#2
|
|
|
Senior Member Group: Staff Alumni Posts: 4,665 Joined: Aug 2008 Member No: 676,364 |
holy marshmallow, i think no one's going to read this long rambling. LOL
|
|
|
|
|
Apr 5 2009, 05:21 PM
Post
#3
|
|
|
Senior Member Group: Staff Alumni Posts: 4,665 Joined: Aug 2008 Member No: 676,364 |
Wtf, are you serious?!
Lol, i'm such a n00b |
|
|
|
|
Apr 5 2009, 05:22 PM
Post
#4
|
|
 Sex, Blood, & RocknRoll Group: People Staff Posts: 5,305 Joined: Nov 2007 Member No: 596,480 |
I think it is a good tutorial, but Thomas is right. I think it would get excepted though, I have seen worse.
|
|
|
|


|
Apr 5 2009, 07:10 PM
Post
#5
|
|
 Mel Blanc was allergic to carrots. Group: Official Designer Posts: 6,371 Joined: Aug 2008 Member No: 676,291 |
QUOTE(IWontRapeYou @ Apr 5 2009, 06:22 PM)  I think it is a good tutorial, but Thomas is right. I think it would get excepted though, I have seen worse. Was that a compliment or an insult, Abbey?  Anyways, yeah, the tutorial is pretty nice and easy but you can still do that in other ways that are quicker. But still, nice job. I think it'll get accepted.  |
|
|
|


|
Apr 5 2009, 07:14 PM
Post
#6
|
|
 Coming from Illinois Group: Member Posts: 319 Joined: Mar 2009 Member No: 718,627 |
Just about everything as a tutorial get's accepted, look at mine for example. I left something out, and had a typo. But it was still accepted.
 not complaining though, I didn't save that as a psd. not complaining though, I didn't save that as a psd. But Beenly, your tutorial is a bit complicated, I mean, why is it necessary to say things like: "set the layer opacity to 88%, set the layer opacity to 24%, I've never really understood these colorization tutorials anyway though. |
|
|
|

|
Apr 5 2009, 07:27 PM
Post
#7
|
|
|
Mel Blanc was allergic to carrots. Group: Official Designer Posts: 6,371 Joined: Aug 2008 Member No: 676,291 |
QUOTE(Medi @ Apr 5 2009, 08:14 PM) Just about everything as a tutorial get's accepted, look at mine for example. I left something out, and had a typo. But it was still accepted. not complaining though, I didn't save that as a psd. But Beenly, your tutorial is a bit complicated, I mean, why is it necessary to say things like: "set the layer opacity to 88%, set the layer opacity to 24%, I've never really understood these colorization tutorials anyway though. I kinda get what you mean. But this tutorial isn't even that complicated, it's just messing with different settings and modes in Photoshop. 
|
|
|
|
|
Apr 5 2009, 07:33 PM
Post
#8
|
|
|
Coming from Illinois Group: Member Posts: 319 Joined: Mar 2009 Member No: 718,627 |
Not complicated that it's hard to follow the directions. But leaping buildings and jumping through rings of fire just to get to Point B from Point A: difficult.
|
|
|
|
|
Apr 5 2009, 08:53 PM
Post
#9
|
|
|
Senior Member Group: Staff Alumni Posts: 4,665 Joined: Aug 2008 Member No: 676,364 |
Um, Murat.. I just edited the opacities because I like a certain type of lighting in my icons.
This tutorial was a bit simple and plain, but you can tell a dramatic difference. Like my tutorial said, you are highly advised to change the settings to your needs. Instead of icon tutorials, maybe I should try Guides to selective coloring or text or something like that? |
|
|
|
|
Apr 5 2009, 10:41 PM
Post
#10
|
|
 Senior Member Group: Staff Alumni Posts: 2,435 Joined: Feb 2007 Member No: 506,205 |
I didn't read through the steps because I don't use Photoshop so I don't care. I just looked at the before an after.
There are so many tutorials out there for making images look cooler, warmer, vintage, saturated, etc. They all have a million different steps, but in the end they're all the same. |
|
|
|

|
Apr 5 2009, 10:43 PM
Post
#11
|
|
 Senior Member Group: Official Designer Posts: 5,880 Joined: Nov 2007 Member No: 593,382 |
This just doesnt seem like a tutorial to me. Its more like the things you learn when you are just playing around with a program. I mean technically its a tutorial but its so basic. ehh.
|
|
|
|

|
Apr 5 2009, 10:45 PM
Post
#12
|
|
 show me a garden thats bursting to life Group: Staff Alumni Posts: 12,303 Joined: Mar 2005 Member No: 115,987 |
QUOTE(jcp @ Apr 5 2009, 10:43 PM) This just doesnt seem like a tutorial to me. Its more like the things you learn when you are just playing around with a program. I mean technically its a tutorial but its so basic. ehh. I'm going to have to agree. With the tutorials I write, I try to explain thoroughly the coloring and all of the different options. This is just way too simple. |
|
|
|

|
Apr 5 2009, 11:19 PM
Post
#13
|
|
 (: Group: Official Designer Posts: 461 Joined: Jul 2005 Member No: 184,978 |
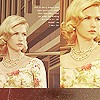
The effect is nice but I agree with everyone else; there's so many tutorials for this kind of effect. That girl is hawt tho

|
|
|
|

|
Apr 6 2009, 06:07 PM
Post
#14
|
|
 Senior Member Group: Administrator Posts: 8,629 Joined: Jan 2007 Member No: 498,468 |
I agree with Thomas but then again tutorials are meant to teach you what you can do with programs. In the end you'll get the same result if you just use Auto Color & the Cooling filter but your tutorial showed how to do it in a different way. Although it may be more complicated, it makes the user more comfortable with the program & shows them what it can offer. But anyways, I would have accepted it. Nice outcome. :)
|
|
|
|

|
1 User(s) are reading this topic (1 Guests and 0 Anonymous Users)
0 Members: