Tutorial
Click on thumbnailed images to enlarge
Ok, this effect will be using both Photofiltre and Photoshop, enjoy (= PS: I don't know the correct terms for every tool so please excuse me :P
Step 1: Open up your image in Photofiltre.
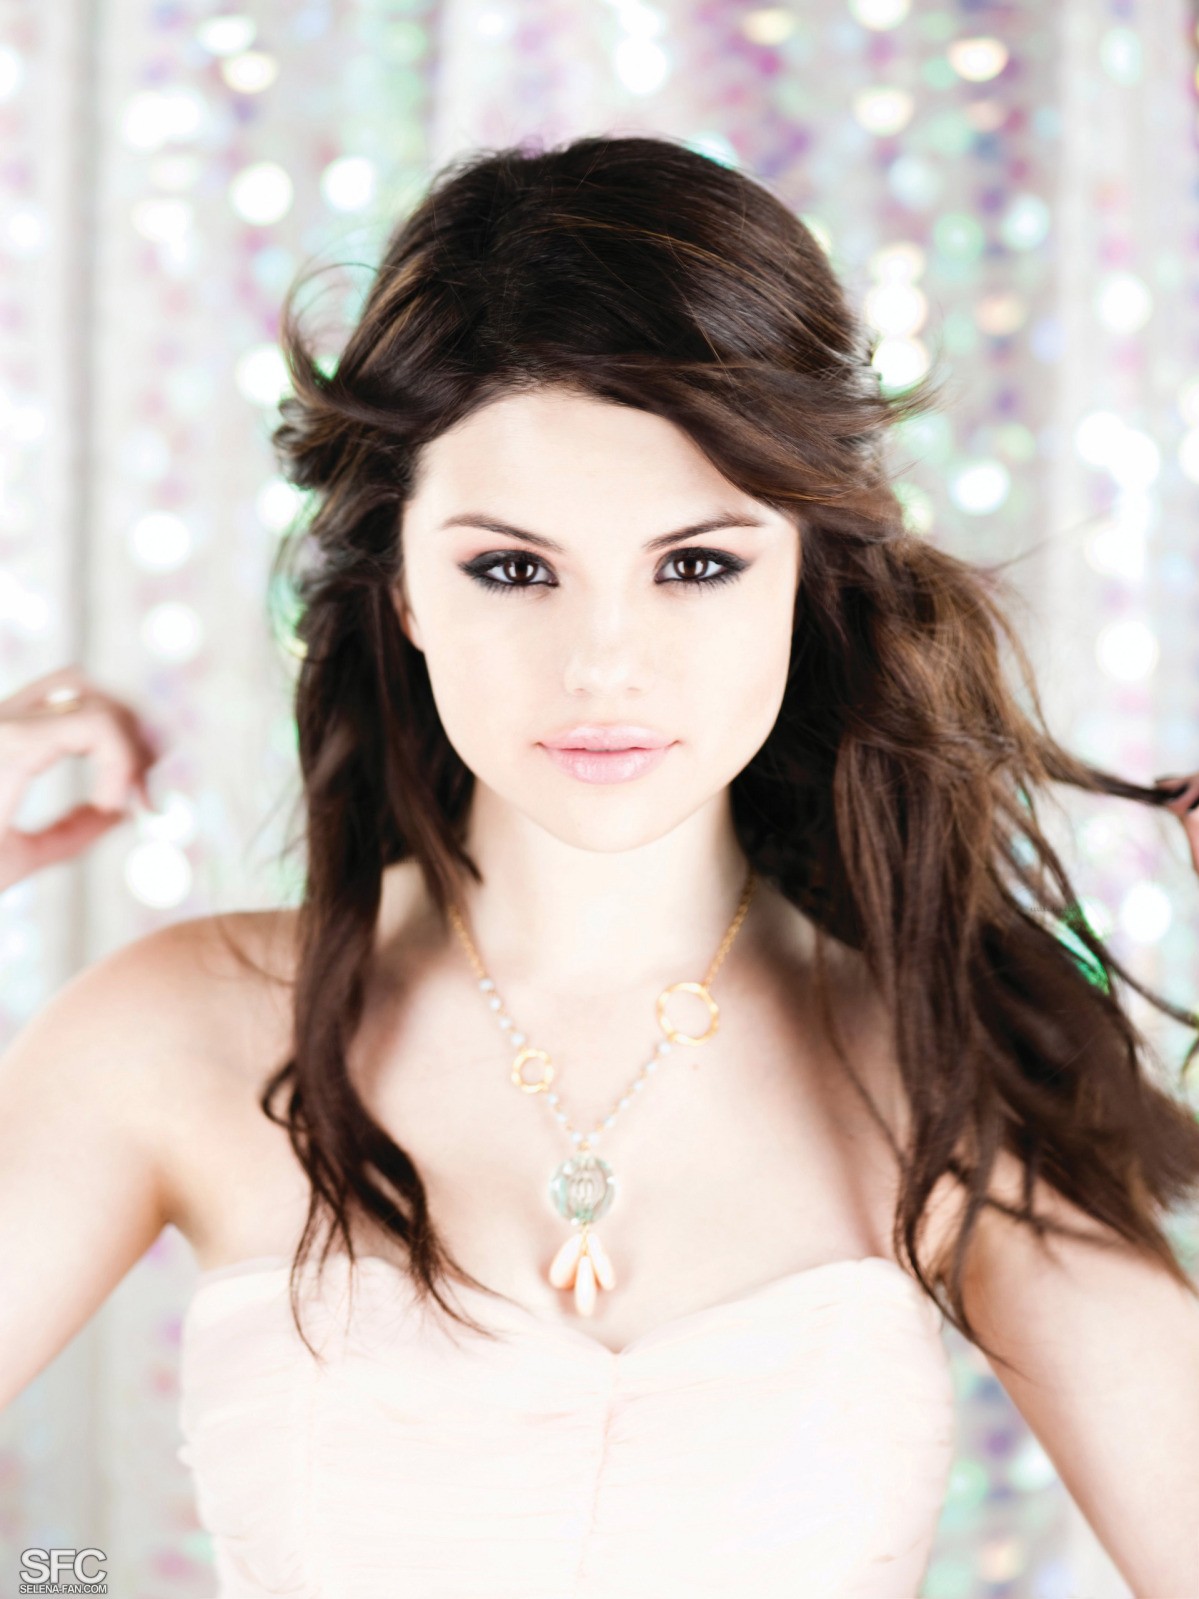
I will be using this image of the beautiful Selena Gomez
Step 2: Once your image is open, click once on the black and white icon.

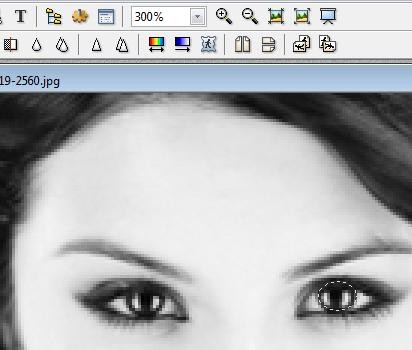
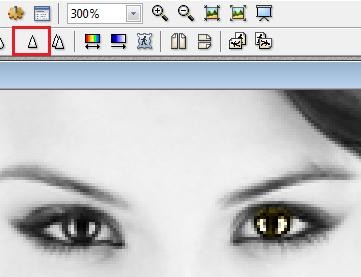
Step 3: Zoom in on the image to make it easier for you to change the color of your subject's eyes.

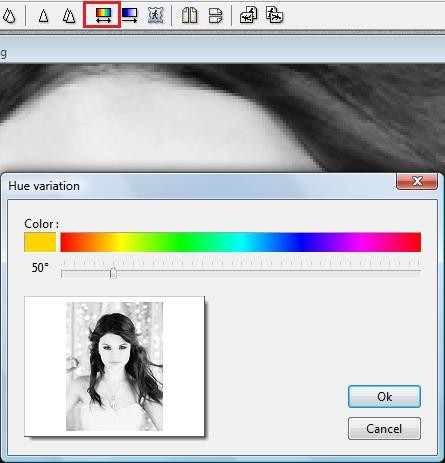
Step 4: Make sure you have these settings before you do anything else. Have the black square around the arrow first, then click on the circle.

Step 5: Outline the part of the eye you would like to change colors.
Step 6: Select the gradient tool. You can either use the same settings as I used or choose your own color.
Step 7: Click the sharpen tool twice.
Step 8: Repeat steps 5-7 on the other eye.
Step 9: Zoom back out to 100%
Step 10: Click File > Save As (You can also close Photofiltre afterwards if you'd like)
Step 11: Open Photoshop (I tried this effect in both CS3 and Adobe Photoshop 7.0 and it worked perfectly in both, and exactly the same result)
Step 12: Open the image you made in Photofiltre.
Step 13: Once open, duplicate the image by pressing CTRL+J on your keyboard.
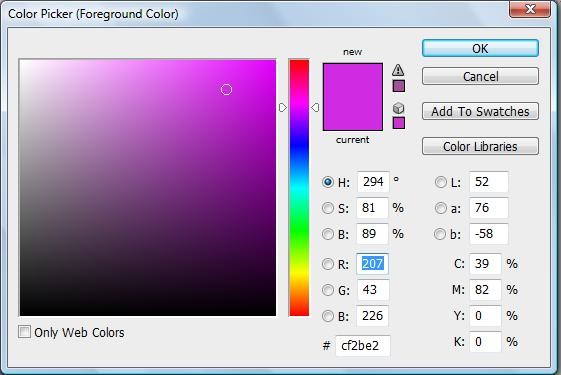
Step 14: Change the Foreground color. You can use my settings or choose your own.
Step 15: Choose the Gradient tool then select Radial Gradient.

I flipped the second bar so it would be easier for you.
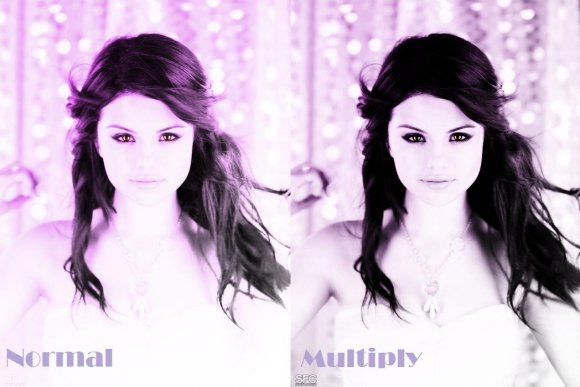
Step 16: Set the mode to either Normal or Multiply (I'll show you both results at the end)
Step 17: Go to your picture and drag the gradient tool across your image.

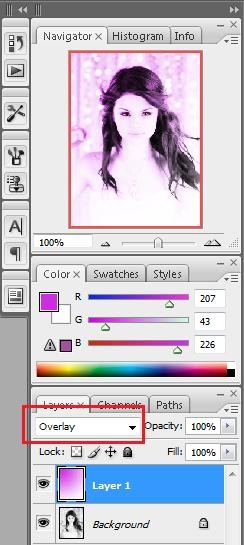
Step 18: Go to your layers and select Overlay
Step 19: You're done! This is what both of my images came out as (: Hope you enjoyed!
[img]http://i34.tinypic.com/23vkvmp.jpg[img]
Step 1: Open up your image in Photofiltre.
I will be using this image of the beautiful Selena Gomez
Step 2: Once your image is open, click once on the black and white icon.
Step 3: Zoom in on the image to make it easier for you to change the color of your subject's eyes.
Step 4: Make sure you have these settings before you do anything else. Have the black square around the arrow first, then click on the circle.
Step 5: Outline the part of the eye you would like to change colors.
Step 6: Select the gradient tool. You can either use the same settings as I used or choose your own color.
Step 7: Click the sharpen tool twice.
Step 8: Repeat steps 5-7 on the other eye.
Step 9: Zoom back out to 100%
Step 10: Click File > Save As (You can also close Photofiltre afterwards if you'd like)
Step 11: Open Photoshop (I tried this effect in both CS3 and Adobe Photoshop 7.0 and it worked perfectly in both, and exactly the same result)
Step 12: Open the image you made in Photofiltre.
Step 13: Once open, duplicate the image by pressing CTRL+J on your keyboard.
Step 14: Change the Foreground color. You can use my settings or choose your own.
Step 15: Choose the Gradient tool then select Radial Gradient.
I flipped the second bar so it would be easier for you.
Step 16: Set the mode to either Normal or Multiply (I'll show you both results at the end)
Step 17: Go to your picture and drag the gradient tool across your image.
Step 18: Go to your layers and select Overlay
Step 19: You're done! This is what both of my images came out as (: Hope you enjoyed!
[img]http://i34.tinypic.com/23vkvmp.jpg[img]
Tutorial Comments
No comments yet. Be the first one to comment!
Tutorial Details
| Author |
AyeChristeeeel
|
| Submitted on | Aug 14, 2010 |
| Page views | 9,730 |
| Favorites | 4 |
| Comments | 0 |
| Reviewer |
jiyong
|
| Approved on | Aug 17, 2010 |