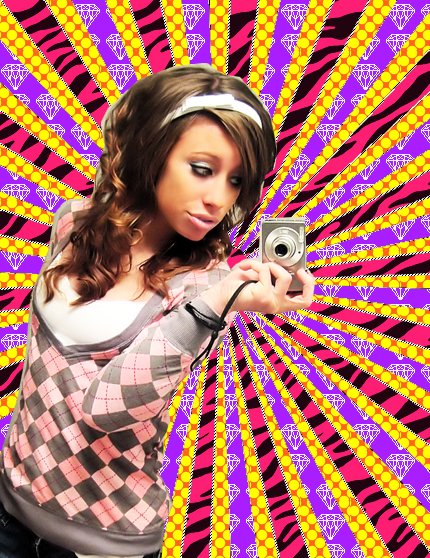
Tutorial
Click on thumbnailed images to enlarge
What i used:

Patterns:
1.)
2.)
3.)
Outline pattern:

Color Pallet:

Vector:

1.)Open up your color pallet and vector.
2.)Use the eye drop tool and click on the color you want from your color pallet.
3.)get your pain bucket tool and choose the first color that you want and fill in all the black lines.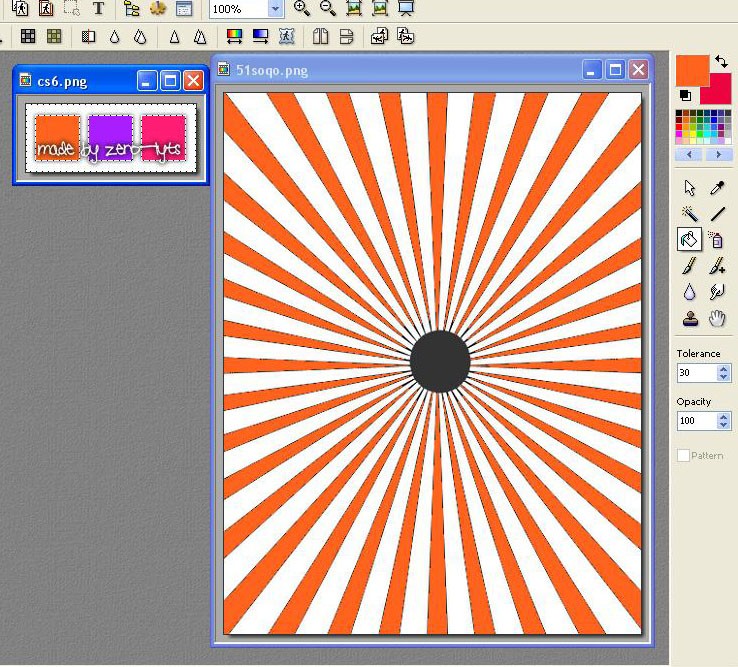
4.)choose your next color and full in every other white line. Then use your last color and fill in the rest of it.
5.)If your useing the same ones i am yours should look like this: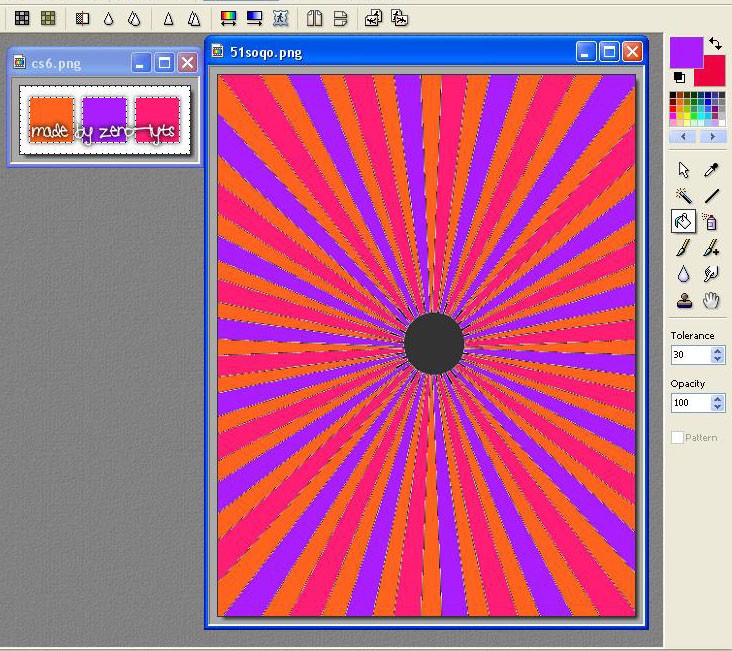
6.)Get you magic wand tool and on the side bar make sure the tolerance is at 30 and color is checked.
7.) click the first color and click on photomasque at the top get your first pattern and choose the color make sure blur doutone and stretch make are UNchecked and tile mask is checked and opacity is at 100 then click ok
8.) right click and copy that like this: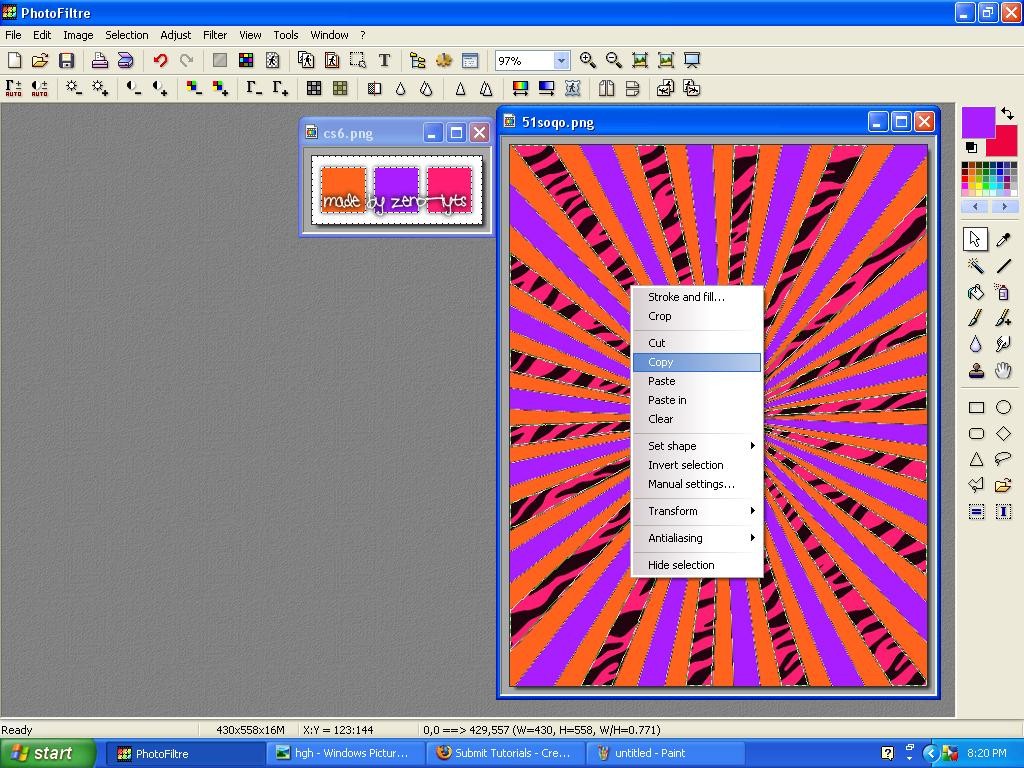
then go up to where is says selection and click expand put the width at 2 and click ok
9.)Now right click like on step 8 but click on stroke and fill where it says fill pattern use your outline pattern should look like this: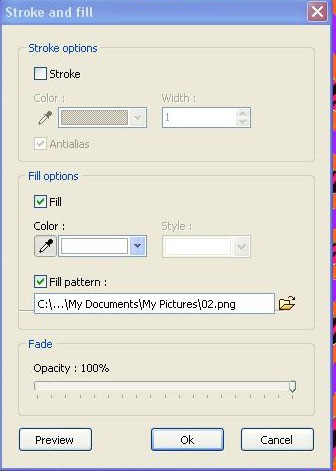
10.) right click on the gray part and click paste in. repeat all the steps for the rest and use different patterns if you want.
11.)open up your sm Use the polygon tool and and select around the sm and then edit cut, copy and paste it on your premade vector
12.) repeat all the steps for the rest and that it

Patterns:
1.)

2.)

3.)

Outline pattern:

Color Pallet:

Vector:

1.)Open up your color pallet and vector.
2.)Use the eye drop tool and click on the color you want from your color pallet.
3.)get your pain bucket tool and choose the first color that you want and fill in all the black lines.

4.)choose your next color and full in every other white line. Then use your last color and fill in the rest of it.
5.)If your useing the same ones i am yours should look like this:

6.)Get you magic wand tool and on the side bar make sure the tolerance is at 30 and color is checked.
7.) click the first color and click on photomasque
 at the top get your first pattern and choose the color make sure blur doutone and stretch make are UNchecked and tile mask is checked and opacity is at 100 then click ok
8.) right click and copy that like this:

then go up to where is says selection and click expand put the width at 2 and click ok
9.)Now right click like on step 8 but click on stroke and fill where it says fill pattern use your outline pattern should look like this:

10.) right click on the gray part and click paste in. repeat all the steps for the rest and use different patterns if you want.
11.)open up your sm Use the polygon tool and and select around the sm and then edit cut, copy and paste it on your premade vector
12.) repeat all the steps for the rest and that it
Tutorial Comments
Showing latest 8 of 8 comments

nice i like (:
By Aero2k10 on Jun 3, 2010 12:04 pm
Thanks for this! :)
By iZoe on Nov 4, 2009 10:39 pm
Did you know the quality always comes out better if you save it as a .png file rather than a .jpeg ?
By jazzyg96 on Oct 10, 2009 5:00 pm
How/where do i get a vector?
By Musicfeen101 on Sep 26, 2009 1:04 pm
i cant find the polygon tool~
By pippet-doll on Aug 23, 2009 3:24 pm
These signs aren't really my thing, but it's awesome you were able to create one in PhotoFiltre, so kudos. C=
Actually, The GIMP and PhotoPlus are as close as you will get to a "free" Photoshop, so calm the hell down. :|
|
|
v
By so-sarcastic on Aug 9, 2009 7:25 pm
well PHOTOFILTRE is as close as you will get to PHOTOSHOP if you want sumthin that is FREE...people get photofilter for a reason...!!
By lilpink1231 on Aug 7, 2009 11:59 pm
Pretty nice, but it never comes out as nice as photoshop.
:D
By xii3 on Aug 3, 2009 2:25 pm
Tutorial Details
| Author |
xColour
|
| Submitted on | Aug 1, 2009 |
| Page views | 19,851 |
| Favorites | 22 |
| Comments | 8 |
| Reviewer |
manny-the-dino
|
| Approved on | Aug 2, 2009 |
